|
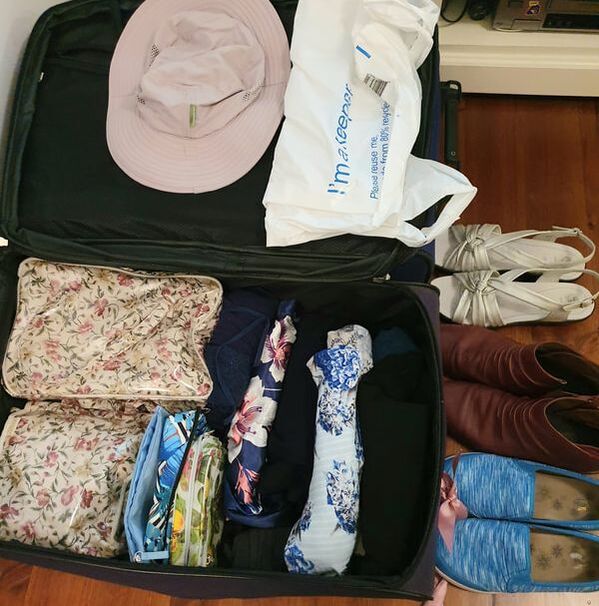
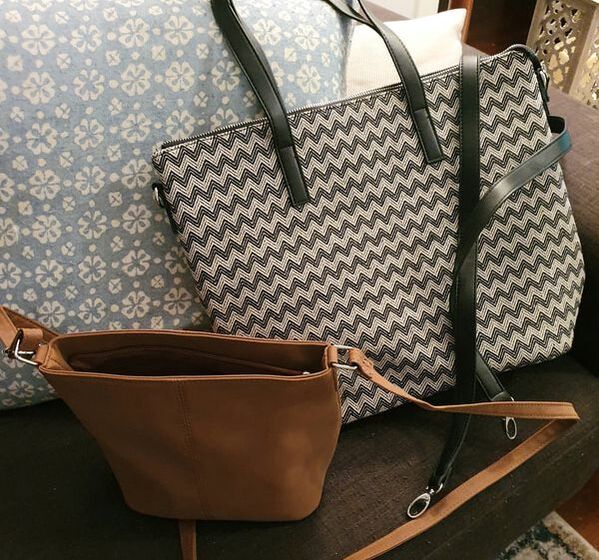
Packing was once a dilemma for me but not anymore. I have it down to a fine art. I don’t like lugging heavy suitcases and so I always pack light. In past holidays I've taken a lot of clothes so that I'd have options but ended up wearing the same few items over and over again. I've learned from experience that a couple of items of each type of clothing is all I need. Even though I’m travelling to Italy and Cyprus in October, the weather won’t be freezing but I can expect a cool day here and there so I'll need to be prepared for a range of temperatures. Due to weight restrictions, I won’t pack anything thick or bulky. Layers of clothing will provide insulation on cool days. Singlet, T-shirt, cotton button shirt, cardigan, scarf. If the sun comes out I can ditch the scarf and cardigan and put on my sun hat. If I’m really hot, a quick trip to the loo and the singlet and T-shirt will be in my bag when I emerge. I like to take a dress as well for going out to dinner and for warmer days. Shoes are heavy, so I opt for the lightest ones I can find. But they must have adequate arch support and rubber soles that will absorb impact, so I can walk for longer. I recently updated my sandals at the Homey Ped outlet. It was my lucky day, they had a rare size 11 for my large feet in a sweet style that will go with both pants and dresses. Hair care is minimal when I’m on holiday. Hair ties are my best friend. I will take my favorite shampoo, conditioner and hair brush. I’ll wash my long, curly hair at night and let it dry while I sleep. In the morning I’ll brush it and mold it into a messy chignon with the hair tie. Done. I have to admit, I really don’t like wearing heavy makeup and it doesn’t do much for my mature skin anyway. A BB cream which is a tinted moisturizer with sunscreen is my preferred go to. A muted pink lipstick is a must for looking put together, other cosmetics will include a palate of eye shadow in neutral colors, blush and mascara. I’ll take makeup remover wipes and a night cream. That will be it. This week I purchased a tote sized cross body bag from Kmart that is large enough for a nightie and emergency toiletries. I also purchased a smaller cross body bag for day trips. At $15 and $20 AUD they were a bargain. For entertainment, I’ll be bringing some technology to save weight. I have a new phone with lots of memory so I won’t be taking my Sony camera. That’s one less thing. A selfie stick will be going, for better shots of Sam and I with scenery behind us.
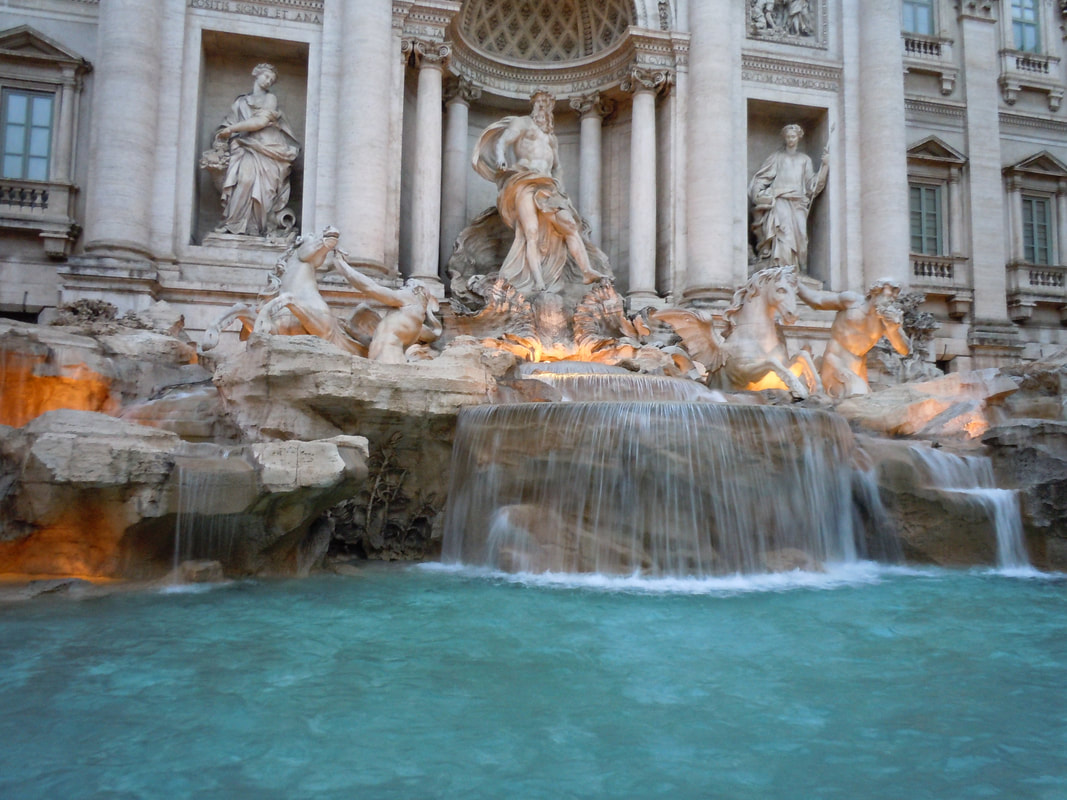
On my first overseas trip, my case was heavy with books. Thank goodness I don't have to lug physical books anymore. My kindle will live in my tote bag. It’s loaded with books from my To-Be-Read-Pile and I can’t wait to open it and dive in on the long flights. A notepad and pen will be useful for making notes of anything inspiring. A travel diary is essential so I can record all the things we did each day. Regarding medicines, I have an authority letter from the doctor for my many medications that keep me alive. A large bag will be needed to carry the month’s supply but that okay. No medicine, no Dora, no holiday. All I need to do now is go through my checklist and make sure I have everything packed that I want to take. The Checklist Clothing 2 pair socks 4 underpants 2 long pants made of stretch material 2 singlets 1 T-shirt 2 cotton shirts 1 dress 1 cardigans 1 scarf 2 nighties 1 kimono style dressing gown 1 pair slippers 1 pair sandals 1 pair runners bathers Bathroom Makeup bag with foundation, blush, eye shadow palette, mascara, lipstick, small pot night cream. Makeup remover wipes Toothbrush and toothpaste Shampoo and Conditioner Hair Brush Hair ties Accessories 1 umbrella Sun hat Scarf Faux gold earrings and necklace Large, cross-body tote bag Small cross-body bag for day trips Selfie stick Carry On Essentials Passport and Wallet Phone Kindle Notepad and pen Medicine If I’ve forgotten anything please let me know in the comments below. Is there anything you always travel with that makes your holiday less fuss and more fun? Dora Bramden writes heart-melting, passionate romance. The Scottish Billionaire’s Secret Lover The Italian Billionaire’s Secret Baby Follow Dora on Instagram Facebook and Pinterest In 2011, I threw two coins into the Trevi fountain, one so I'd come back to Rome and another so I'd find love. Guess what, it worked. This year I'm going to Italy with my new husband. Although Sam has Italian heritage he's never been to Italy. So this trip is two fold. It's our honeymoon but also for him to connect with his Italian culture. I've never met a person who traveled to Italy and said they didn't love it. The country is so beautiful, north, midlands and south, each area has a distinct charm. So I'm thrilled to be travelling to nearly all the places I've been before and adding some new destinations as well. But the flight from Australia to Europe is far too long for us, so we are breaking it up. We're booked with Emirates to have overnight stopovers in both Singapore and Dubai before landing in Rome. Hopefully, this will mean we have no more than two eight hour flights and one six hour flight to get us to Rome. Our travel agent arranged it so that we will have a couple of days in Rome to acclimatize and get to know parts where the tour bus doesn't' go. Two day's after we arrive we'll joining a thirteen day Best of Italy, Trafalgar Tour, that will take us south through Cassino, to, Sorrento and Capri and Pompeii. We head north through Assisi, Verona and Venice and turn west to Milan, Lake Como, Lake Maggiore and then begin our journey back south through Pisa, Florence and San Gimignano and finish back in Rome. Even after covering so much of the county we have yet to visit the island where Sam's parents were born. We're booked on Air Italia, from Rome to Catania in Sicily and will stay the night in Catania before making our way to Milazzo by train and taxi the following day. From the port, we'll take a ferry to Lipari, one of the volcanic Aeolian islands. Now a popular holiday resort with restaurants and plenty to do, our focus will also be discovering the places that Sam's family lived and worked. We are staying at Casa Papiro, in Canneto for four nights. After that we'll do the travel in reverse back to Rome. Cyprus is our next destination. Sam's best man has a house on Cyprus, and have invited us to spend a week there. We'll take a Ryan air flight from Rome's Ciampino airport to Paphos. Our host will pick us up and be our tour guide while we are there. I'm excited to experience the Cyprian culture the way you can when staying with a local. Also I've heard so much about the beauty of this Greek island and I'm sure it will be amazing. We fly home to Melbourne, Australia with Emirates and reverse our stopovers in Dubai and Singapore. We've included enough time for sightseeing at our stopovers on the way home. I'm hoping to see a bit of Singapore because I've never been there before. In particular the botanic gardens are at the top of my list. While writing this blog post I'm made aware of how happy I'll be to get back home and how ecstatic I'll be, that I got to experience such a wonderful honeymoon/holiday. Have you been to any of these places? Comment and let me know if you have any tips to share. What did you like most? What was your trip highlight? Did you ever throw a coin in the Trevi Fountain?
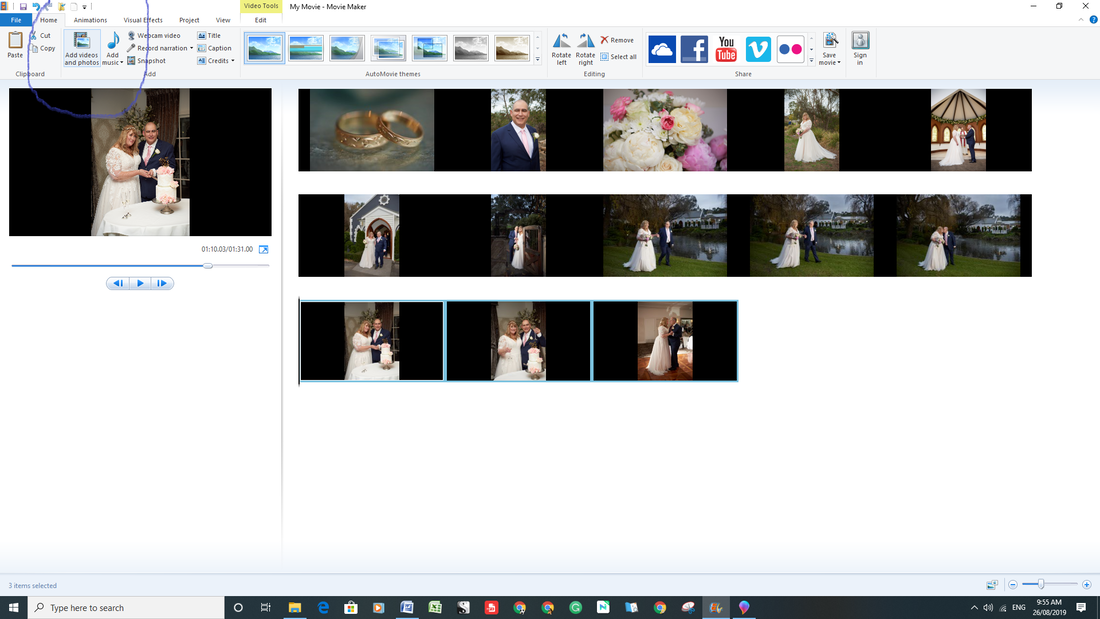
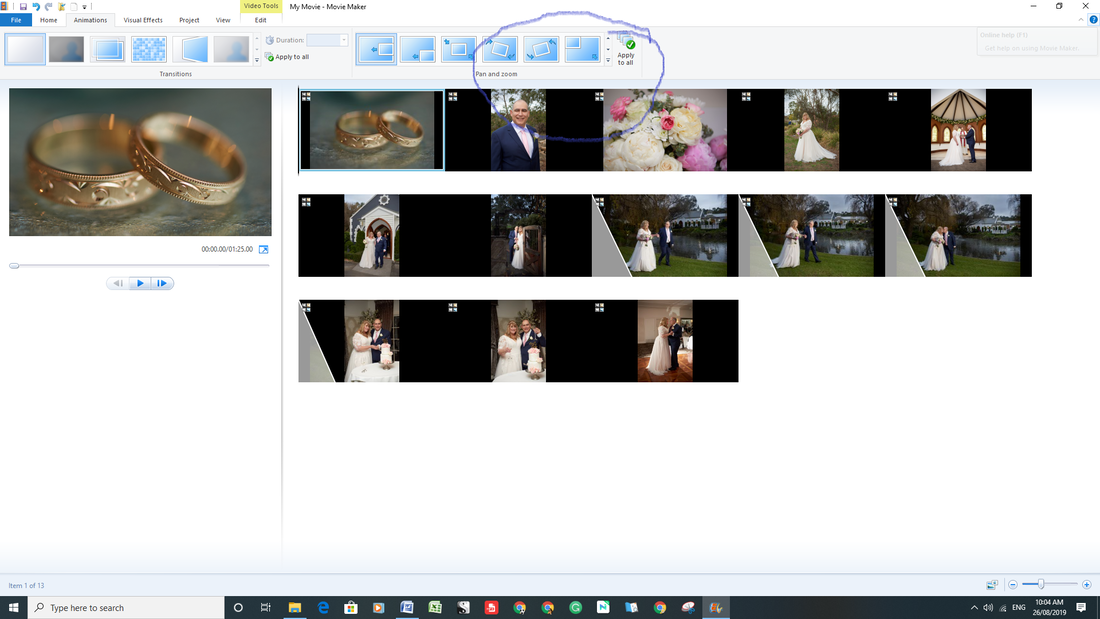
Dora Bramden writes heart-melting, passionate romance. The Scottish Billionaire’s Secret Lover The Italian Billionaire’s Secret Baby Follow Dora on Instagram Facebook and Pinterest As much as we would have loved having a video of our wedding, we didn't have the budget. But we loved the idea of watching our photos in way that tells a story. I'd been playing around with Movie Maker before and decided to give it a try. I am thrilled with the results. In this blog, I uploaded a shortened YouTube version to show you what is possible. Using the tabs in Movie Maker, I loaded our photos into a project and played around adding animation, transition effects and soundtrack. The result was a video slide show that lets us relive the wonderful experience of our wedding day. Keep reading to see how I did it. yIt was easy to add photos to Microsoft Movie Maker and later music. I've circled the function taps on the home screen that walk you through the process. Just do it in order and they'll load perfectly. If you want to change the order, it's easy to click and drag a photo to a new position. Once you have loaded all your photo's and chosen how many seconds you want each image to play for, you can add a sound track from your computer music files. In the Video Tools tab you can find functions for adding transitions and animating the photos. It's easy using the functions on the top of the screen. Individual photos can be clicked and the function plays when you hover the mouse over it to give a preview of the effect. If you click on the drop-down box you'll find another big list of extra animation options including zooming in or out. I decided to choose different animations to suit individual photos but chose the same transition function for the whole video which unifies it. Below is a short two and a half minute video I made to show you what can be done. I've used copyright free music so I can post it on my blog, but the music for our personal use video/slideshow is uploaded from my computer library. Another option is to combine photo's with short video clips that friends and family share with you of your wedding day. I've recently discovered that my sister-in-law has our service recorded on her phone. Once I get a copy of it I will insert it that into our video using the easy upload video tab in Movie Maker. So there will be then be a mix of photo's and video making up the story of our wedding day. I will alter the soundtrack volume down for that section so you can hear our voices. So far I'm delighted with how this turned out and have given copies to our wedding party.
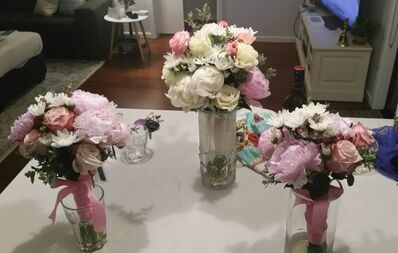
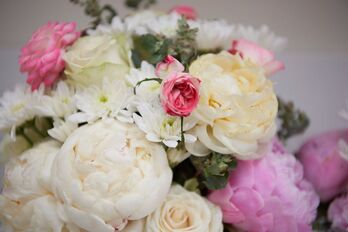
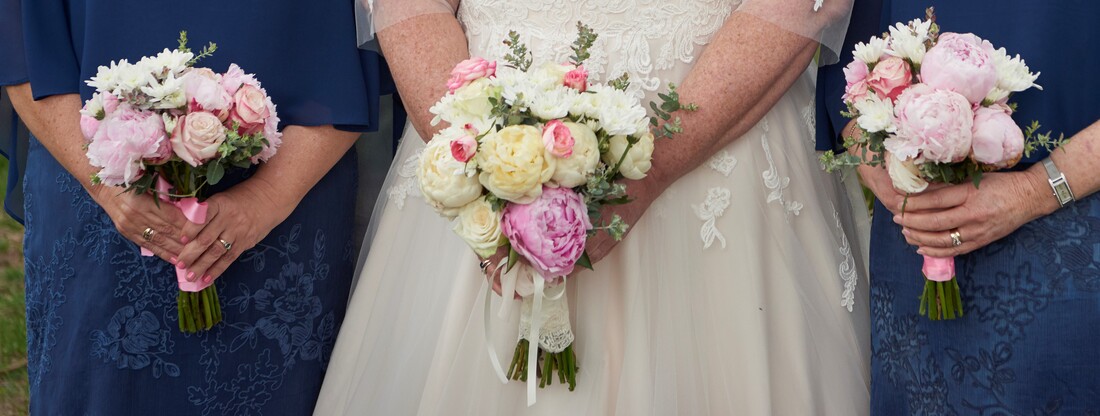
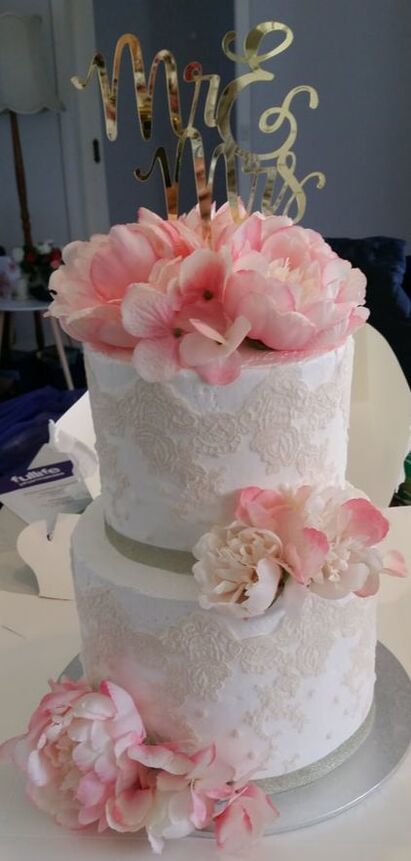
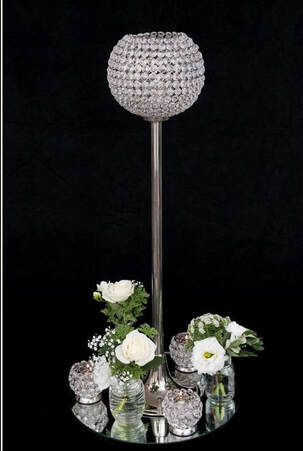
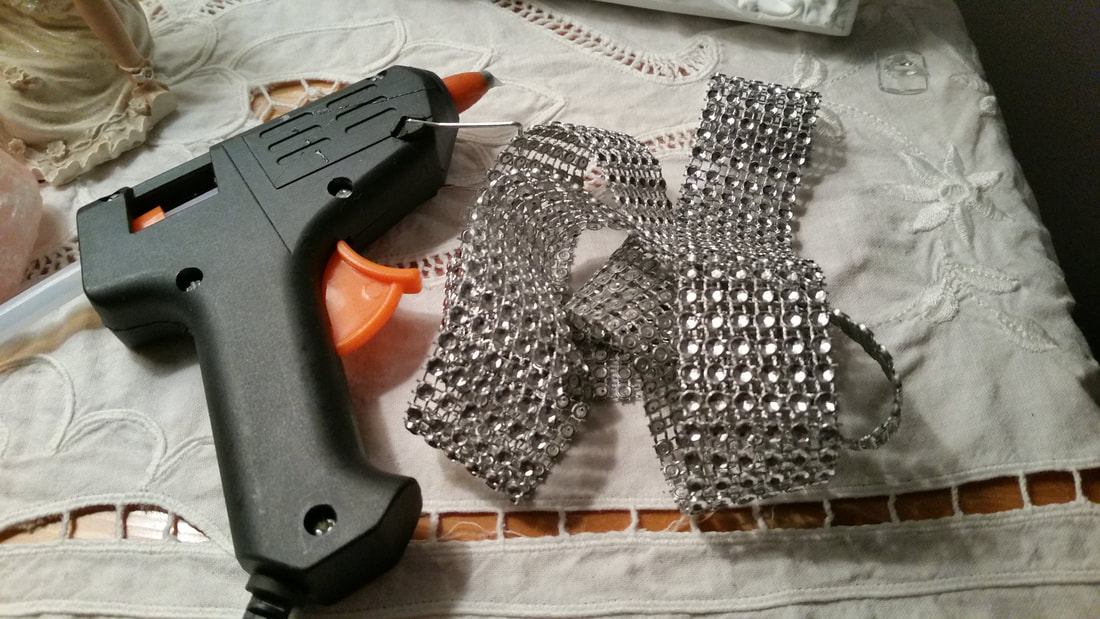
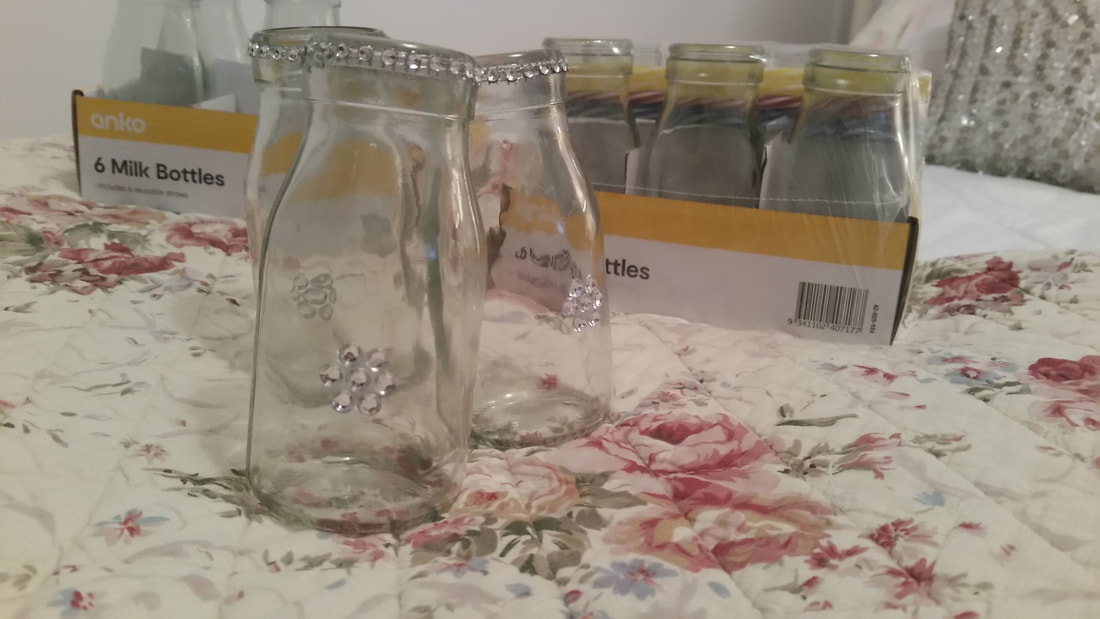
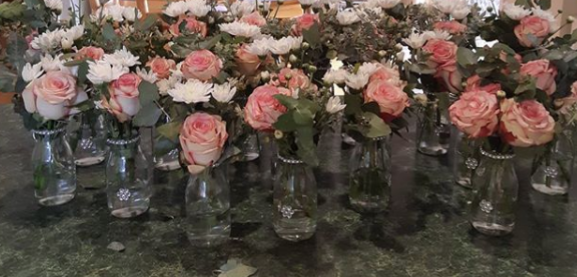
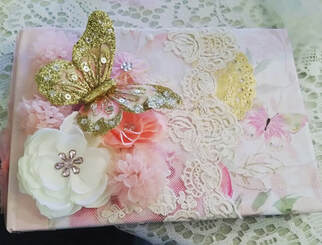
It's a great option for anyone who was married and doesn't have a video of the day. If you were married back in the day's before digital photography, scan your photos at your local photo shop or Officeworks and then you'll have the digital files to create a video like mine. Dora Bramden writes heart-melting, passionate romance. The Scottish Billionaire’s Secret Lover The Italian Billionaire’s Secret Baby Follow Dora on Instagram Facebook and Pinterest When deciding which DIYs to take on, I needed to be strategic and also consider the time I'd have the day before and on the day to get it all done. I wanted to have personal involvement with creating our special day . Making some of the things myself was how I achieved it. Read on to find out what I DIYd and how I did it. 1. Making a bouquet. I knew I could make the bouquets myself, if I went with simple posies tied with satin ribbon. I found inspiration on Pinterest and watched YouTube videos on how to make them so that when it came time to act, I had a plan in place. What you'll need Florist wire on a roll or pre cut lengths of wire. Rolls of 1 inch wide ribbon in the colors you desire I used one roll per bouquet Lace of choice Florist's pins for attaching lace. Per Bouquet,Three bunches of flowers of choice. For all three, 1 bunch of greenery The flowers I used in the bouquets were: The bridal bouquet 1 branch of eucalyptus, separated into about 5 stems 5 white peonies and 1 pink, 10 white roses 1 multi flowered stem of white chrysanthemums Each bridesmaids bouquet contained I branch of eucalyptus separated into about 5 stems 5 pink peonies 10 blush pink rose stems 1 multi flowered stem of white chrysanthemums Method used for all bouquets I began with a center flower and kept adding in a circle around it. Holding the bouquet in my left hand and adding flowers with my right, letting the flowers sit at an angle as the bouquet grew. I Alternated the flowers and eucalyptus stems as I went. To make the classic dome shape, I placed the flowers lower near the edge. The stems will make a fan underneath below where you are gripping them. That's okay. Tie them off tightly with florist wire. Wrap the stems tightly with ribbon starting at the top and leaving a length free. Wind down the stems (this brings them back together) stopping a couple of inches before you get to the bottom and then wind back up to the top. Using the length left free at the beginning, tie it off and make a bow . Using sharp kitchen scissors or secateurs, snip the stems even at the bottom and place in a vase with an inch of water covering the stems but not wetting the ribbon and or lace. On my bride's bouquet I pinned on lace that matched the lace on my wedding cake and guest book. I made the bouquets the day before and stored them overnight in a cool room (the laundry in my house) with enough water to wet the stems but not come high enough to reach the ribbon. About an hour before I left for the ceremony I emptied the water from the vase and patted the end of the stems with paper towel. We didn't have any drips and the flowers lasted very well. They were put in water after the reception and kept well in vases for the next week. 2. Decorating the cake. Although making the cake would have been too big a challenge, I saved money (and got the cake I wanted) by decorating it myself. Cake decorating has been an interest on mine since I was a teenager so I felt confident enough to take this on. Again I got an idea of what I'd like from the DIYers best friend, Pinterest. The gold acrylic Mr and Mrs sign was purchased cheaply from Ebay. This one was only ten dollars plus postage. I hot glued a bamboo chopstick to the stake for extra height and then wrapped the join with ribbon to make sure it stayed put. I found the silk faux peonies I wanted at Kaisercraft. I trimmed the green petals away and the darkest pink outer petals then I popped them off their stems and hot glued them to stiff plastic drinking straws that I'd cut in half. This allowed me to push the straws into the cake and keep the flowers secure. I added the hydrangea florets from my stash to fill in the spaces between the peonies using toothpicks to anchor them into the cake. Some time ago, I bought a length of beautiful cream lace from a vintage fair to use as inspiration for my wedding. I wasn't sure how I'd use it, but I ended up having enough to use on the flowers, the guest book and to wrap around the two tiers of the butter cream cake. I had toothpicks on hand to secure it at the back with some florets but didn't need them. The lace stuck to the buttercream easily. I added a gold non toxic washi tape to the base of each tier so that it would tie in with the gold sign on top. 3. Blinging up vases. When we were at the reception tasting night there were samples of decorations for the tables. We were enchanted with a setting that included three small vases set around a central tall crystal candle holder. The table center pieces we chose were included in our package but the flowers would have been extra. But I had an idea for blinging milk bottles from Kmart to hold our flowers. I cut a single line of bling from the tape and hot glued it to the neck of each bottle. Then I applied 6 single crystal stickers in a flower shape to the front of each bottle. My girlfriend did the floral arrangements in the vases I created with Kmart milk bottles, bling ribbon and stickers and hot glue. The bottles cost $5Aus for a pack of six. Unfortunately, we didn't get a photo of the tables set up but my girlfriend sent me this picture of the vases with flowers arranged ready to be taken to the wedding reception. We chose the flowers together, they included blush pink edged roses, white chrysanthemums and eucalyptus. It cost a lot less than if we'd paid the price quoted for a florist to do them. I was very fortunate to have a friend who volunteered to set them up and she purchased the flowers for Sam and I as a gift. Having such beautiful fresh flowers on the table really added elegance to room. To help out, I've hyperlinked the items I used in my DIY's, where I could find them. But they are Australian sites. For other countries, you should be able to source similar items from your local online retailers. (I also created a guest book which I posted in an earlier blog. Link to that is here if you'd like to see how I made that.) I used the same lace on this book that I also used on the cake and the bridal bouquet which helped link the ivory lace, navy and pink theme. Comment and let me know if you're planning DIYs for your wedding or if already married, what you made for your wedding. I'm happy to answer any questions you might have as to how I made any of these DIYs. Thanks for stopping by to read the blog.
|
Romance author and lifestyle bloggerMy whole life is inspired by romance. I write romance novels of course but also love creating DIY's and decorating in a romantic style. I'm rejuvenating an old garden, including rescuing a couple of old rose bushes and planting new ones. Archives
March 2021
Categories
All
|

 RSS Feed
