
Doing the things that give me energy is essential to my creative process but there's an added bonus, that is huge.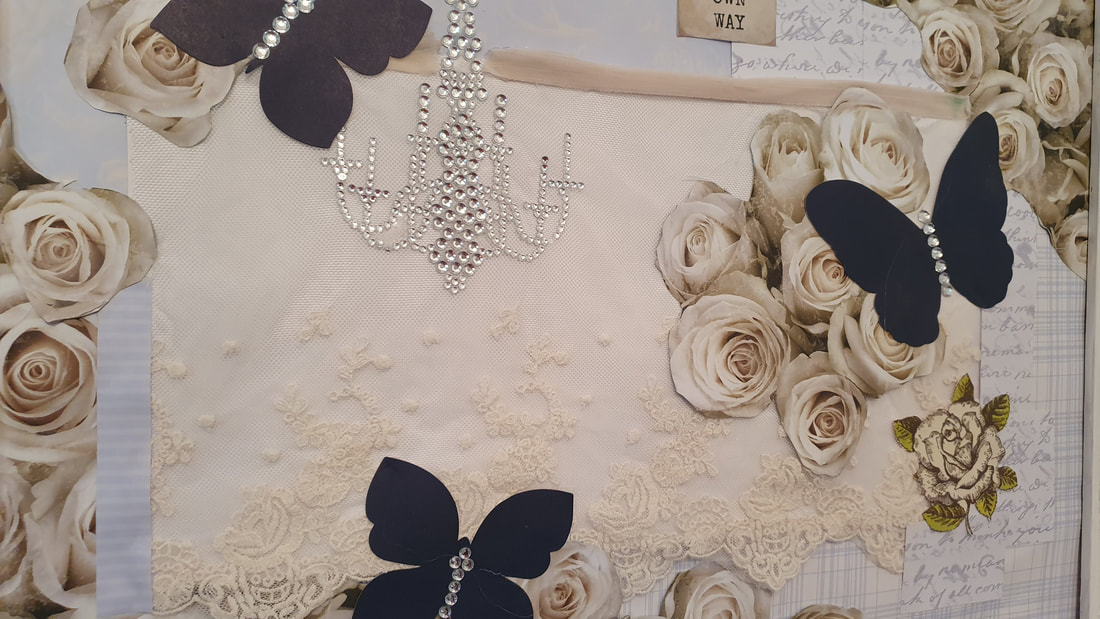 After a lifetime of doing what my head said was right, I'm still learning to listen to the subtle messages from my heart. I've been feeling blocked in my writing and have been meditating on what thought patterns are behind it. While at the same time, I wanted to feel productive, so I turned to doing something that has worked for me in the past. Working with my hands fires up my creativity. I started making this collage from scrap-booking paper and supplies. I made a good start but the final picture didn't come together in one afternoon. I had to let it sit with me and add extra bits and pieces over time. It was the 'Go Your Way' sign that gelled what my subconscious was trying to tell me. In my meditations, a recurring theme kept cropping up around worthiness. If anyone had asked me if I felt worthy I'd have said yes, but with a quiet mind during meditation, some big doubts came forward from my subconscious. The solution would take time to emerge, I needed to process the difficult feelings, working on my collage helped me sit with them. 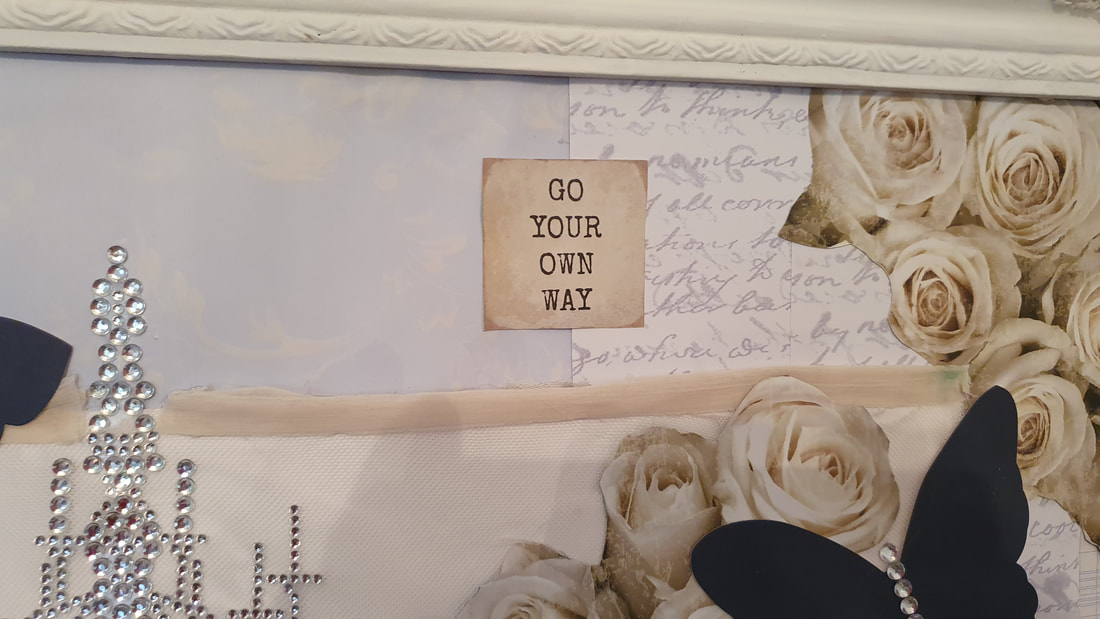 I had an idea that I wanted this collage to reflect my true self, as a way of valuing who I am. I began with adding elements that speak about my favorite things. Predominantly, I wanted something tangible to help me take ownership of what I like about being me. Something I could look at that would remind me of my passions at times of distraction or self doubt. Roses are my favorite flower. These white roses came in a huge sheet which I fussy cut into odd sections. I love the shabby chic style, pale blue background paper with more subtle roses. The scrapbook script paper refers to my love of writing. This sparkly chandelier has been in my stash for ages and I finally had a reason to use it. There are no less than three chandeliers in our house, even the bathrooms have mini chandeliers, if I count them all that makes five. 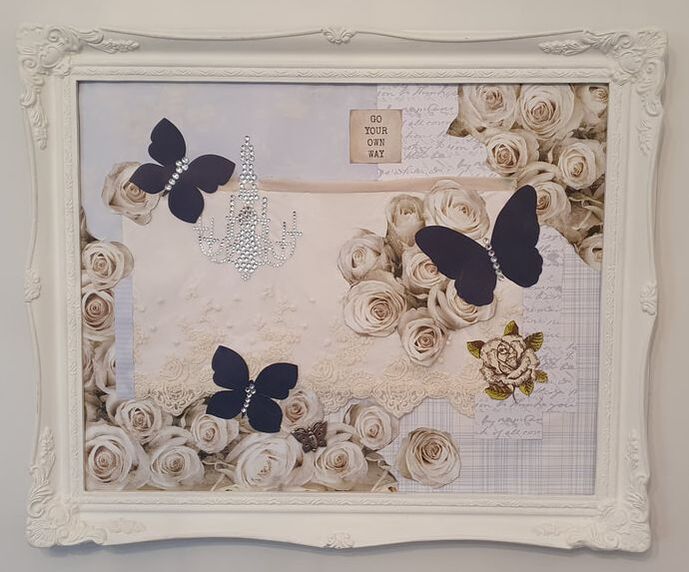 Butterflys and Roses, mix media collage by Dora Bramden. The lace I used was also the inspiration for Sam's and my wedding, being traditional and elegant. I've always been enraptured with lace. I love the way the formality of the lace is contrasted with the scrappy paper and how that says so much about my eclectic tastes. I decorate with the odd luxury item and home made sitting side by side. The once gold frame was a cheap thrift store find that I painted white with chalk paint.
I arranged all the mix and match elements and hot glued them down. Next came the dark blue/grey paper butterflys. I always loved them for the promise that one day I'd grow wings. I really feel I'm there, my life is sorted. I've found a loving life partner and established a home for us. Regarding my writing, I have and self published two books and two short stories. These Butterflys now remind me to look for the light. That's what butterflys do, they look for rays of light to dance in. The little sign, 'Go Your Own Way' summed up both what I needed to acknowledge, and what this work had been leading me to. Going my own way is the how I resolve being worthy. It doesn't matter if I'm good enough, or if I deserve success. I only need to live authentically to be getting it right,and that seems to make the question of being worthy or not irrelevant. Of course I'm worthy of being myself. It's embracing all that is me that makes me feel whole. I'm very happy to say that I have started working on a new story. The characters are currently making themselves known to me. It exciting to be at the beginning of a new journey but I also have a finished book that needs significant rewrites. The heroine has been the victim of sexual harassment in the workplace, but I've been holding back from really exploring how deeply this affected her. I think I was afraid of upsetting myself or the reader. But I think every voice that adds to women being deserving of respect and a romantic hero that shows it is a good thing. There's only one thing to do, and that is to go my own way with this. I need to stop holding back or pulling my punches. This story deserves to be told to the best of my ability and I'm going to do my best for it. If you've ever felt not good enough or hopeless about achieving something, I totally understand how you feel. Its terrible in the way it cripples creativity. Mt advice is to make a start on something and do it just for yourself. Turn off your inner critic that says it's no good and focus on the fun you're having while you're doing it. Nothing ever has to be perfect, even nature is imperfect. Thanks for stopping by my blog. You can find my published books at my Amazon page and you can follow me on Instagram, and my Facebook Page. Dora Bramden Heart-melting, passionate romance.  Recently I was taking part in a discussion in a FB group about why a single person would bother to celebrate Valentine’s Day. It was sparked from a comment from a person who said as they were single they wouldn’t be bothering to craft things or decorate this year. I had to admit that I too had been wondering if I would take much notice of it this year. I’ve just put the house back to order after all the Christmas decorating, did I have the energy? Did I want a lot of hearts everywhere? But when I thought about what I wanted to say to this lady, that she deserved hearts and flowers and to give them to herself, I had my answer. It’s sad when someone feels Valentine’s day is just a reminder of their loneliness so I wanted to turn that around. I posted a comment that suggested they make it all about self love. Doing it for themselves. Hearts and flowers for her to enjoy basically. I also needed to remember this applies to me as well. I’m not single now but I was for a long time before Sam came into my life. To generate love in your life it helps enormously to start with yourself. Filling your well with self appreciation and beautiful things can be done on a very small budget. I suggested she frame photo’s of her enjoying life, doing things she loves and making some new floral displays. I also suggested she make or buy a Valentine’s day card for herself and write words of all the things she loves about herself in it. Most crafters have a stash of supplies they can dive into to put some charming vignettes together with a romantic theme. But if you can’t afford flowers a cheap card from the dollar shop can be put in a frame you already have. Displaying some pretty china from your cupboard on the kitchen sink draining rack is so charming. Using cheap gift wrap paper, cut out hearts to either put on the table or glue to a string for a cheap banner. A pink candle in a jar from Kmart is only 75 cents. Tea light candles look pretty in old jam jars that are tied around with ribbon or lace. I’ve re-purposed a Christmas wreath to make a romantic floral one for my kitchen. 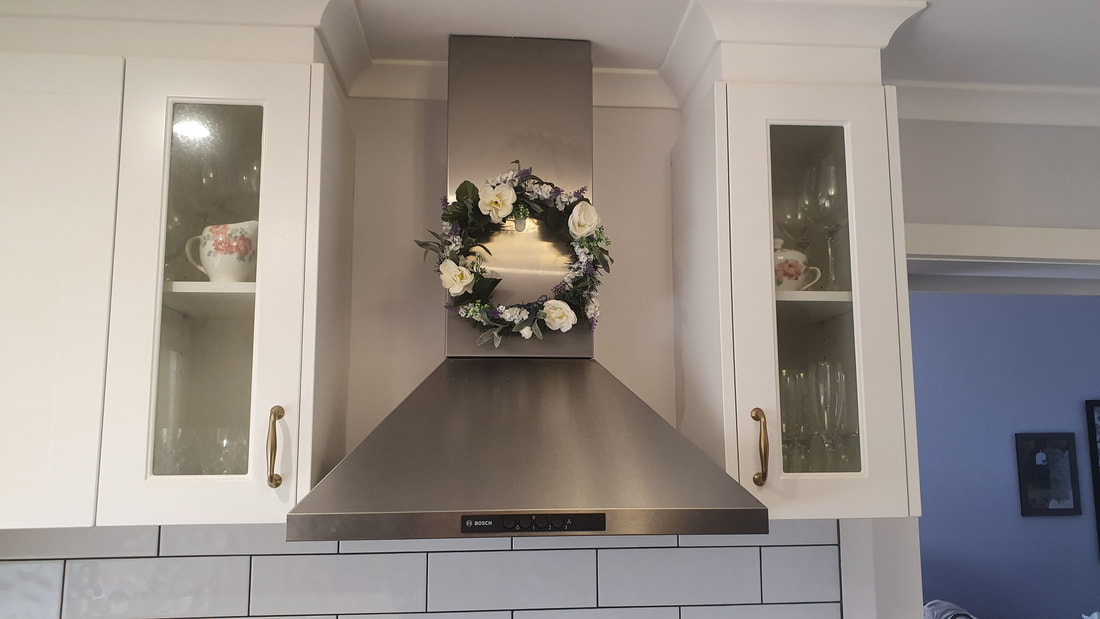 For Christmas, I’d hung a wreath on the range hood flue using a command hook. I liked it there so much that I decided to keep it there but make it over. I pulled off all the red berries and wound some jute twine around the branches pulling them in tight to the wire base. This gave it the look of a mossy base. 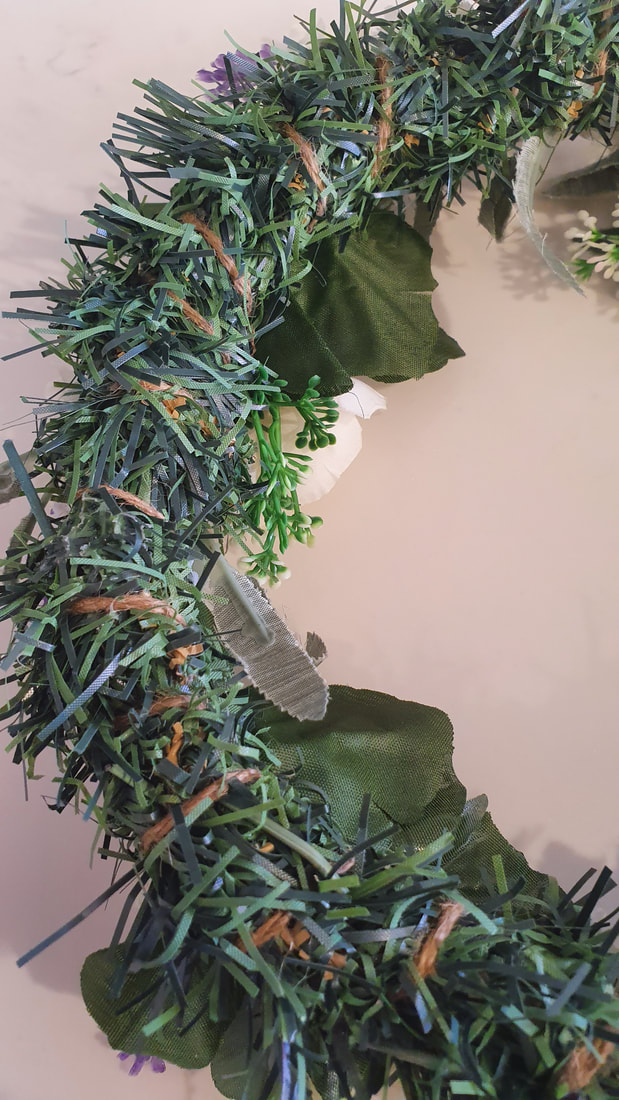 Branches have been squashed down and bound with twine to create a mossy or grassy effect wreath base. 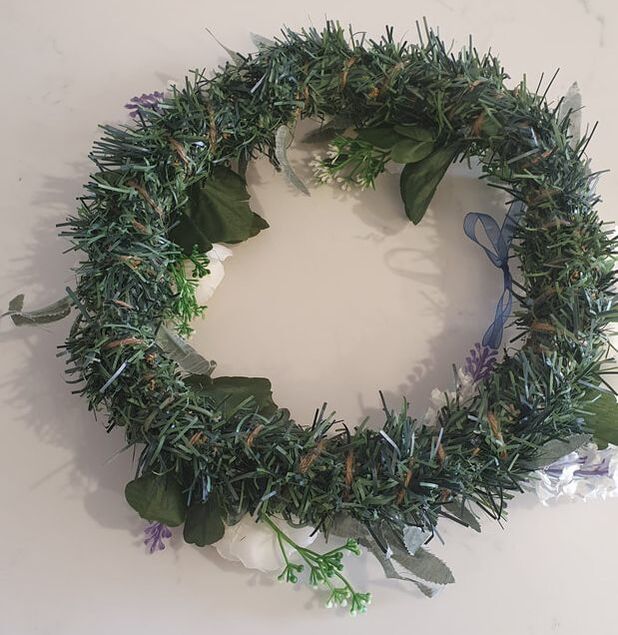 The twine binding can be snipped and the branches fluffed out for use next Christmas. Using florals that I’d put away for Christmas, I trimmed the stems short. This mean't trimming the lavender florets away from the lower leaves and using the foliage and blooms seperately. The rose leaves were pushed up the stem to sit directly under the bloom before trimming. Then I pushed them into the wreath going in a clockwise direction. I spaced the roses and lavender and foliage evenly to create a balanced circle. After i'd finished I needed to adjust the stems by bending them so that the flowers faced the way I wanted. 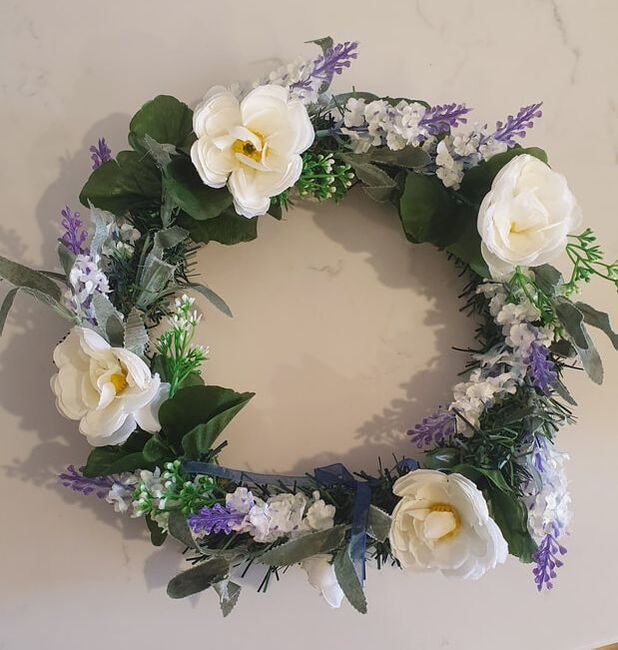 The floral stems are held tightly enough that they don't need any hot glue to keep them in place. If you’ve been following me for a while, you know that I love crafting for the joyful feelings it creates. It’s an act of self love and so perfect for creating a Valentine's Day atmosphere. Because I’m now married I’m doing it not just for me but for both of us. Sam enjoys all my home made creations and decorating and celebrating our love is a big reason for both of us.
While I’d been wondering if I would bother to decorate for Valentine’s day, this lady’s post helped me clarify what I’d be missing if I didn’t. Everyone loves someone or is loved by someone. Life these days seems to be full of distractions and pressures. When we distance ourselves from the commercialization of the day, shops pushing expensive roses and jewelry, and keep it simple and personal the true meaning emerges. Carving out a small amount of time on one day each year to notice all the love in our life, in all its forms can’t be wrong. Making handcrafted decorations and displays for Valentine’s day helps to shift the focus to what really matters for you and your loved ones. Dora Bramden writes heart-melting, passionate romance. The Scottish Billionaire’s Secret Lover The Italian Billionaire’s Secret Baby Follow Dora on Instagram, Facebook and Pinterest  Crafting with pretty paper gives me so much pleasure. Cutting and pasting was a favorite activity when I was young. My thrifty grandmother would make glue on the stove from flour and water and give me magazines to cut out the pictures. These would then be pasted into an old Readers Digest. I didn't mind the writing behind the pictures, I liked the contrasting pattern it made. When scrap booking became popular I couldn't resist stocking up on supplies. Apart from making pretty photo albums, I enjoy using them for general crafting too. These little notebook covers don't use up a lot of paper but are a treat to put notes in and small enough to pop in my handbag. What writer doesn't have a notebook and pen handy? 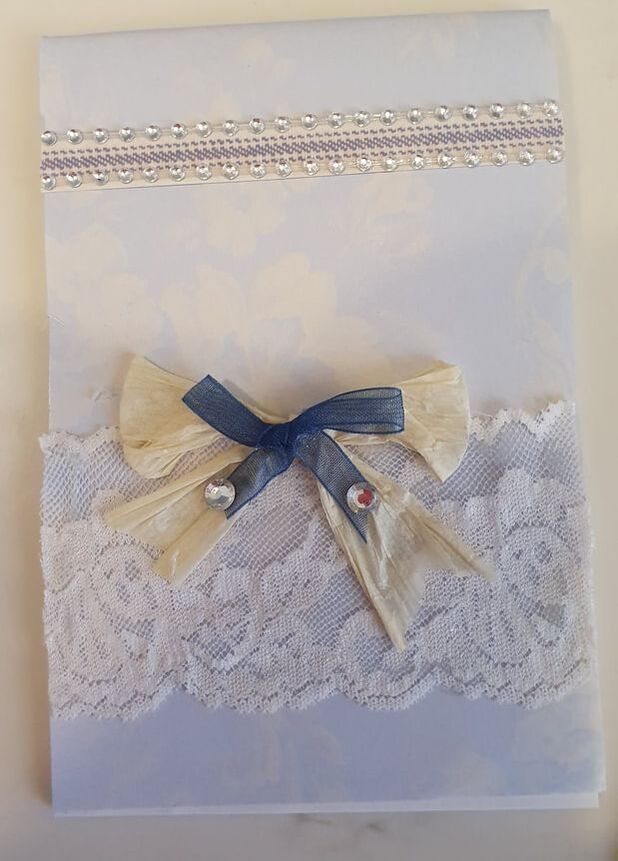 I chose papers that have an interesting or beautiful background. I cut them to the size of the notebook plus extra at the top to fold over and glue at the back. I used a double sided tape runner for this but you can use any glue that you have on hand. I then layered embellishments on using hot glue. The notebook above has a fussy cut strip of stripped paper layered with strips of crystal stickers. A raffia bow is layered with a blue organza ribbon bow and a couple of crystal stickers hot glued keep the tails in place. 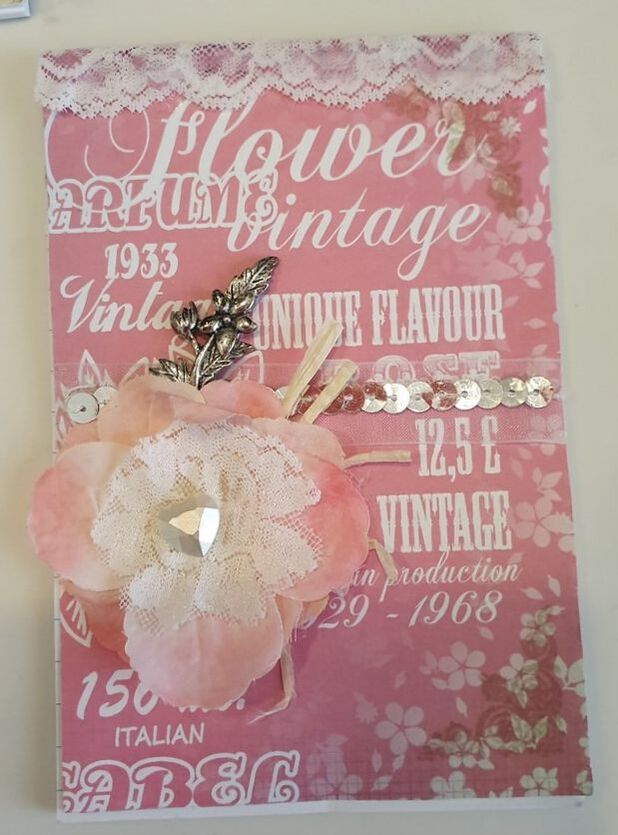 This shabby chic inspired notebook cover was inspired by the backing paper. It helps to work with a theme if you can. A cream organza ribbon was layered with a strip of silver sequence. Overlapping that are some raffia strips and a fabric flower. I found that pulling the petals apart in a small flower and removing the plastic center allowed me to stack them flat with hot glue. I fussy cut a rose from the lace strip that I also used at the top and hot glued a small heart embellishment. A metal embellishments from my stash was glued behind the rose to add texture and interest but also to tie in the small flowers from backing paper. The lace at the top was added using a fabric glue, which is still a little opaque in this photo as it's not completely dry yet. I used this type of glue because I wanted the lace to wrap around to the back and needed the ability to adjust the lace before the glue dries. 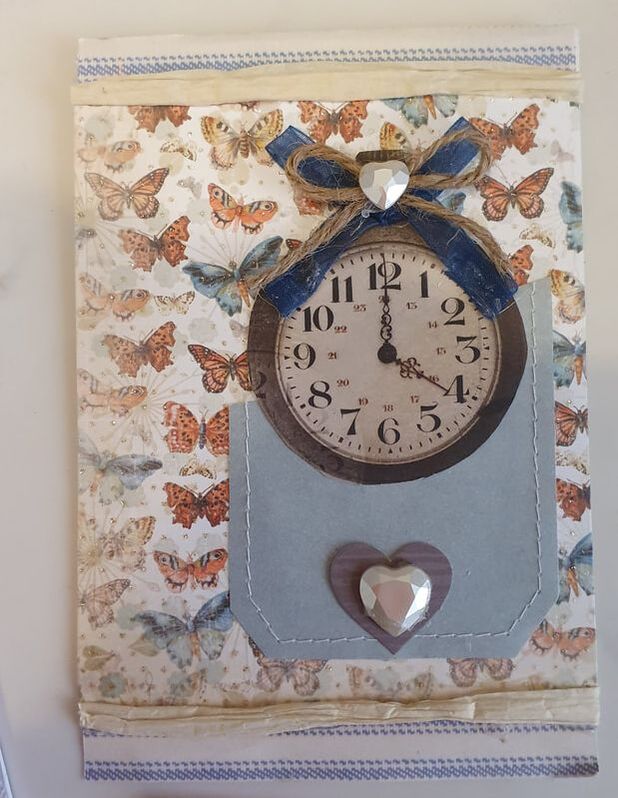 By now you'll be getting the idea that this is a time theme. The butterfly reminds me that time is fleeting and that it takes time for something beautiful to emerge. The hearts are for love. There should always be love in the time we have here. The embellishments were adding in order of how they appear. the paper strips at the top and bottom were layered onto the backing paper first then the raffia strips. I like using hot glue because it grabs the embellishment and secures it in place quickly, but do be careful with hot glue, it's easy to burn your fingers. The blue organza ribbon bow echos the shape of the little butterflys, and of course it's pretty. 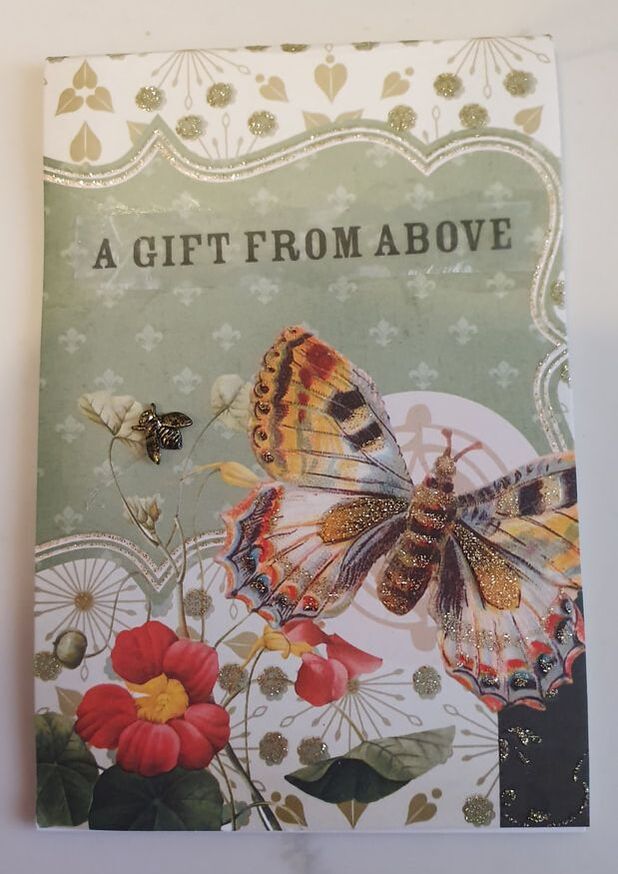 This last notebook is about the garden and how nature is a gift to us all. The only embellishment I wanted to add was the little metal bee and the strip of text. This sheet of scrapbook paper is so gorgeously detailed it didn't need a lot.
I added the bee because gardens need bees to fertilize the seeds and they give the gift of honey to us. The text 'A GIFT FROM ABOVE' was the closest quote in my stash to express the value of nature. For me it is a gift from God that we need to take care of and be grateful for. It's lovely creating something beautiful, but as in my writing I like it to say something or express something I feel, mainly joy. The wonderful thing about paper crafting is that there are so many different combinations you can make you'll never run out of inspiration. I included several different styles and color combinations as an example of what can be done. I hope you enjoyed this paper crafting post, I will be doing more of these in the future with larger projects. I think starting small gives us the confidence to move on to bigger projects. If you're still with me at the end of this post, thanks so much for stopping by to see what I've up to in my romantic life. Happy crafting, Dora. Dora Bramden writes heart-melting, passionate romance. The Scottish Billionaire’s Secret Lover The Italian Billionaire’s Secret Baby For updates on what's happening in my life and book releases, follow me on on Instagram, Facebook and Pinterest When deciding which DIYs to take on, I needed to be strategic and also consider the time I'd have the day before and on the day to get it all done. I wanted to have personal involvement with creating our special day . Making some of the things myself was how I achieved it. Read on to find out what I DIYd and how I did it. 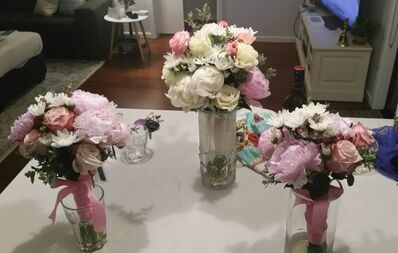 1. Making a bouquet. I knew I could make the bouquets myself, if I went with simple posies tied with satin ribbon. I found inspiration on Pinterest and watched YouTube videos on how to make them so that when it came time to act, I had a plan in place. What you'll need Florist wire on a roll or pre cut lengths of wire. Rolls of 1 inch wide ribbon in the colors you desire I used one roll per bouquet Lace of choice Florist's pins for attaching lace. Per Bouquet,Three bunches of flowers of choice. For all three, 1 bunch of greenery The flowers I used in the bouquets were: The bridal bouquet 1 branch of eucalyptus, separated into about 5 stems 5 white peonies and 1 pink, 10 white roses 1 multi flowered stem of white chrysanthemums Each bridesmaids bouquet contained I branch of eucalyptus separated into about 5 stems 5 pink peonies 10 blush pink rose stems 1 multi flowered stem of white chrysanthemums Method used for all bouquets I began with a center flower and kept adding in a circle around it. Holding the bouquet in my left hand and adding flowers with my right, letting the flowers sit at an angle as the bouquet grew. I Alternated the flowers and eucalyptus stems as I went. To make the classic dome shape, I placed the flowers lower near the edge. The stems will make a fan underneath below where you are gripping them. That's okay. Tie them off tightly with florist wire. 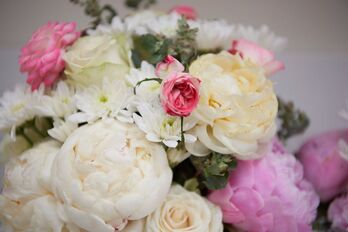 I included a few fairy roses, from my garden, to the bride's bouquet to add touches of blush pink. Wrap the stems tightly with ribbon starting at the top and leaving a length free. Wind down the stems (this brings them back together) stopping a couple of inches before you get to the bottom and then wind back up to the top. Using the length left free at the beginning, tie it off and make a bow . Using sharp kitchen scissors or secateurs, snip the stems even at the bottom and place in a vase with an inch of water covering the stems but not wetting the ribbon and or lace. 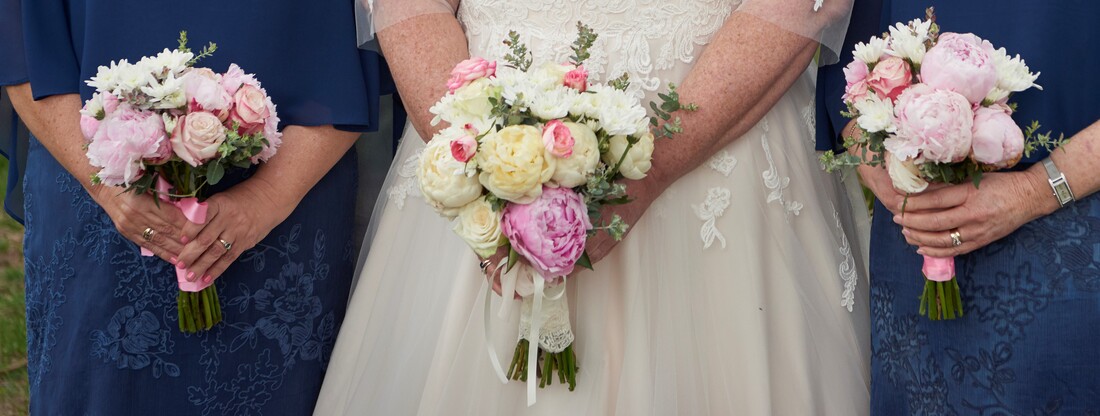 On my bride's bouquet I pinned on lace that matched the lace on my wedding cake and guest book. I made the bouquets the day before and stored them overnight in a cool room (the laundry in my house) with enough water to wet the stems but not come high enough to reach the ribbon. About an hour before I left for the ceremony I emptied the water from the vase and patted the end of the stems with paper towel. We didn't have any drips and the flowers lasted very well. They were put in water after the reception and kept well in vases for the next week. 2. Decorating the cake. Although making the cake would have been too big a challenge, I saved money (and got the cake I wanted) by decorating it myself. Cake decorating has been an interest on mine since I was a teenager so I felt confident enough to take this on. Again I got an idea of what I'd like from the DIYers best friend, Pinterest. The gold acrylic Mr and Mrs sign was purchased cheaply from Ebay. This one was only ten dollars plus postage. I hot glued a bamboo chopstick to the stake for extra height and then wrapped the join with ribbon to make sure it stayed put. I found the silk faux peonies I wanted at Kaisercraft. I trimmed the green petals away and the darkest pink outer petals then I popped them off their stems and hot glued them to stiff plastic drinking straws that I'd cut in half. This allowed me to push the straws into the cake and keep the flowers secure. I added the hydrangea florets from my stash to fill in the spaces between the peonies using toothpicks to anchor them into the cake. Some time ago, I bought a length of beautiful cream lace from a vintage fair to use as inspiration for my wedding. I wasn't sure how I'd use it, but I ended up having enough to use on the flowers, the guest book and to wrap around the two tiers of the butter cream cake. I had toothpicks on hand to secure it at the back with some florets but didn't need them. The lace stuck to the buttercream easily. I added a gold non toxic washi tape to the base of each tier so that it would tie in with the gold sign on top. 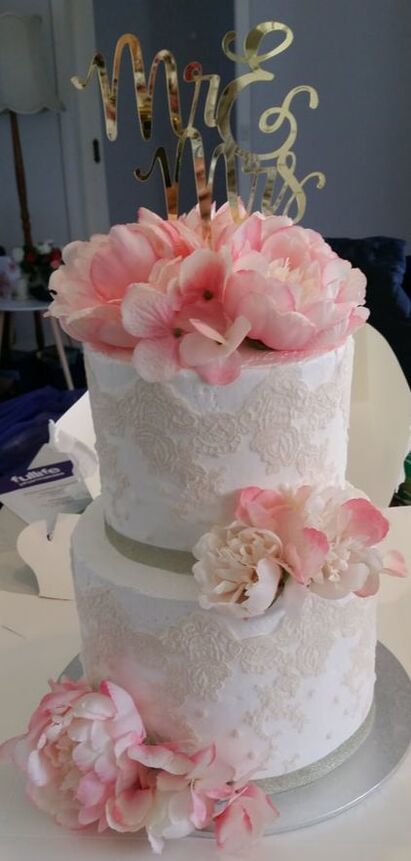 3. Blinging up vases. When we were at the reception tasting night there were samples of decorations for the tables. We were enchanted with a setting that included three small vases set around a central tall crystal candle holder. The table center pieces we chose were included in our package but the flowers would have been extra. But I had an idea for blinging milk bottles from Kmart to hold our flowers.  Picture courtesy of Ballara's Facebook page. @ballarareceptions I cut a single line of bling from the tape and hot glued it to the neck of each bottle. 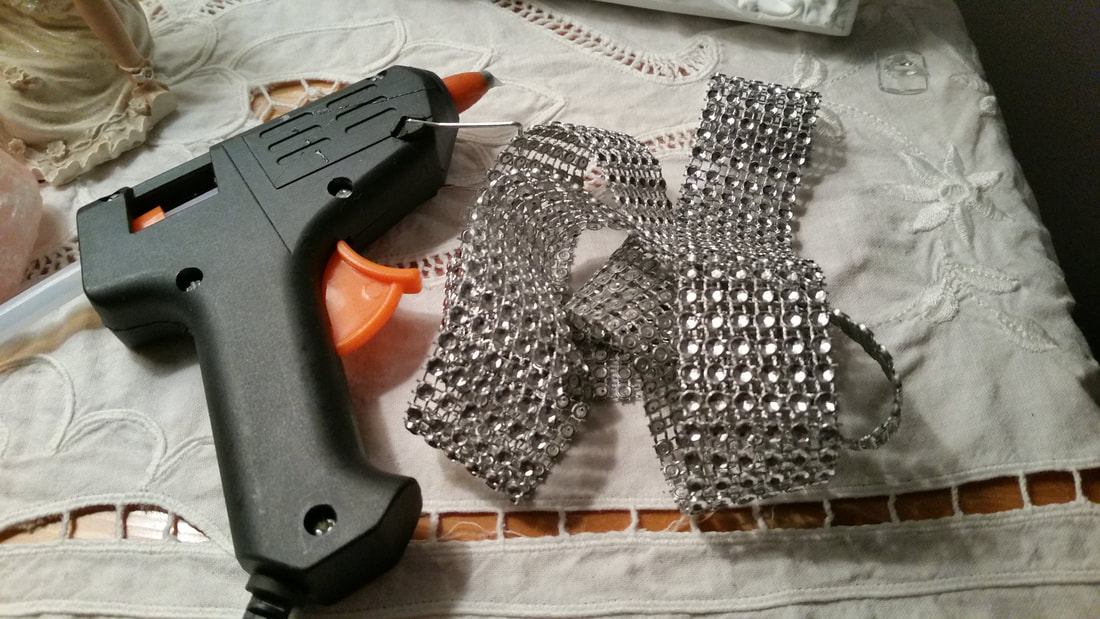 The tape can be cut into single strips using normal scissors. Then I applied 6 single crystal stickers in a flower shape to the front of each bottle. 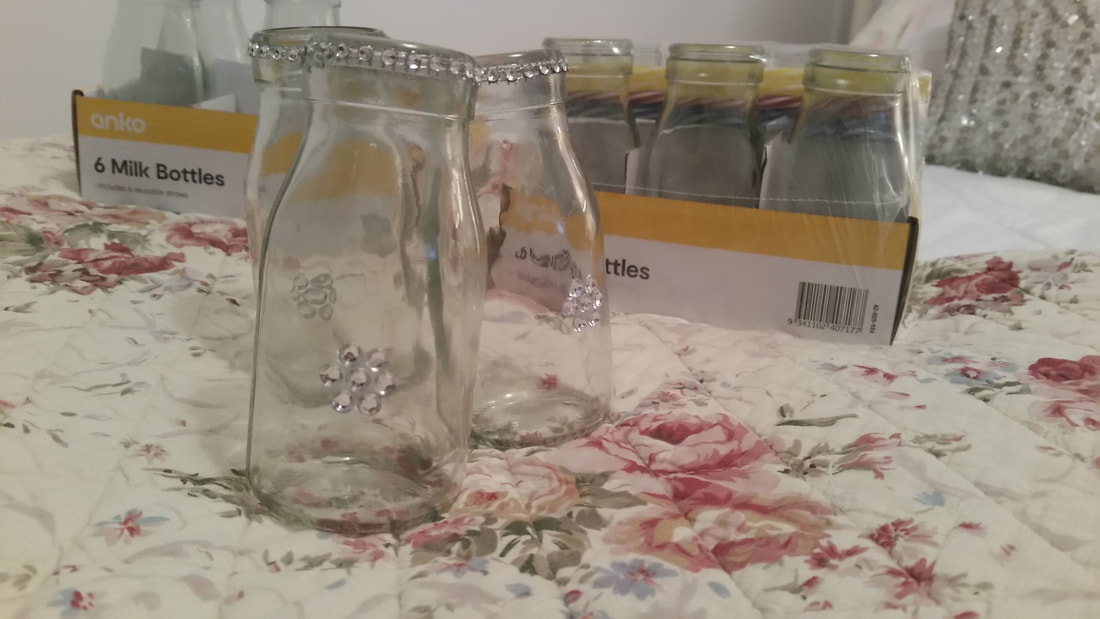 My girlfriend did the floral arrangements in the vases I created with Kmart milk bottles, bling ribbon and stickers and hot glue. The bottles cost $5Aus for a pack of six. 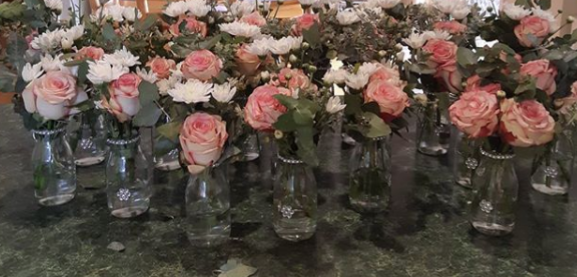 Unfortunately, we didn't get a photo of the tables set up but my girlfriend sent me this picture of the vases with flowers arranged ready to be taken to the wedding reception. We chose the flowers together, they included blush pink edged roses, white chrysanthemums and eucalyptus. It cost a lot less than if we'd paid the price quoted for a florist to do them. I was very fortunate to have a friend who volunteered to set them up and she purchased the flowers for Sam and I as a gift. Having such beautiful fresh flowers on the table really added elegance to room. To help out, I've hyperlinked the items I used in my DIY's, where I could find them. But they are Australian sites. For other countries, you should be able to source similar items from your local online retailers. (I also created a guest book which I posted in an earlier blog. Link to that is here if you'd like to see how I made that.) I used the same lace on this book that I also used on the cake and the bridal bouquet which helped link the ivory lace, navy and pink theme. 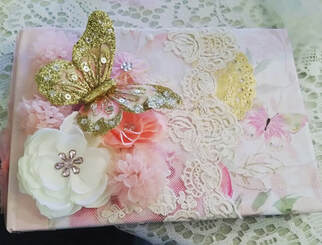 Comment and let me know if you're planning DIYs for your wedding or if already married, what you made for your wedding. I'm happy to answer any questions you might have as to how I made any of these DIYs. Thanks for stopping by to read the blog.
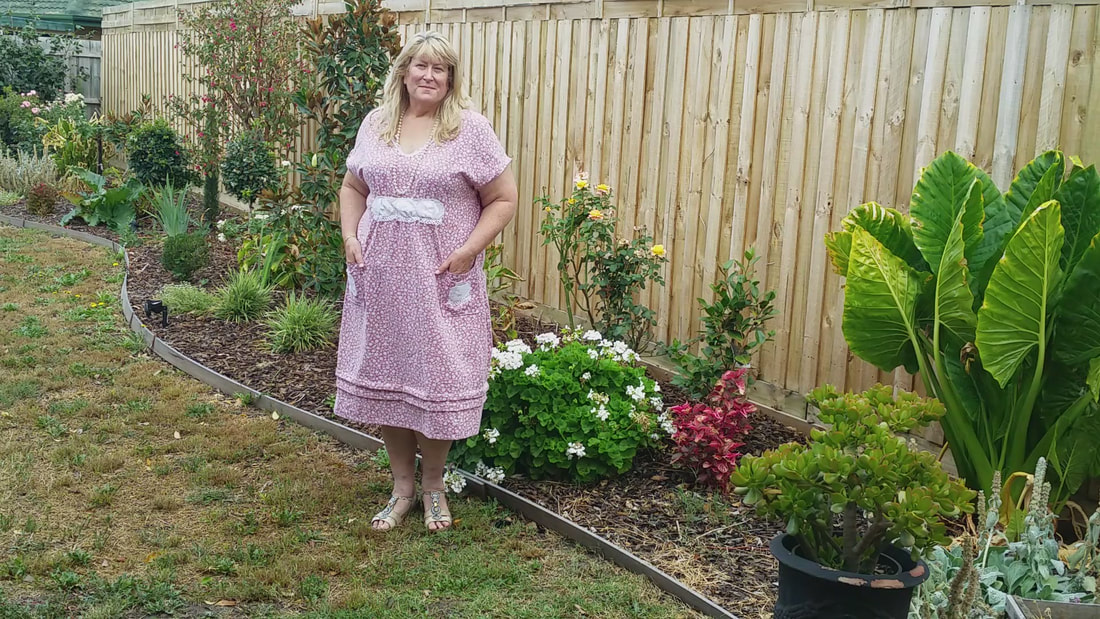 Sewing a dress on Saturday afternoon, to wear on Saturday night, was something I though nothing of doing when I was seventeen. But other than taking up a hem or resewing a seam that has frayed from wear, it's been years since I've sewn my own clothes. I've bought fabric and patterns on sale but haven't actually jumped in at the deep end and tackled a large sewing project. When I was a student, I sewed from necessity. Dresses were expensive but fabric was cheap. Now it's the opposite, you can buy a dress cheaper than it costs to make it yourself. But I long to feel the thrill of wearing something I've created. Some YouTubers I watch have great tutorials on sewing and it's given me the bug to unpack the sewing machine and actually make up a simple dress. For economy purposes, I'm using a cheap craft fabric that I picked up on sale years ago. I like that it's cotton though, as I think it will be light and cool as the last hot days of Summer stretch into Autumn, here in Melbourne. But my northern hemisphere friends are eagerly awaiting the warmer days of Spring to arrive. I can imaging wearing this romantic dress to pick the first blooms of the season with a basket slung over my arm and a pretty shade hat to guard my complexion. 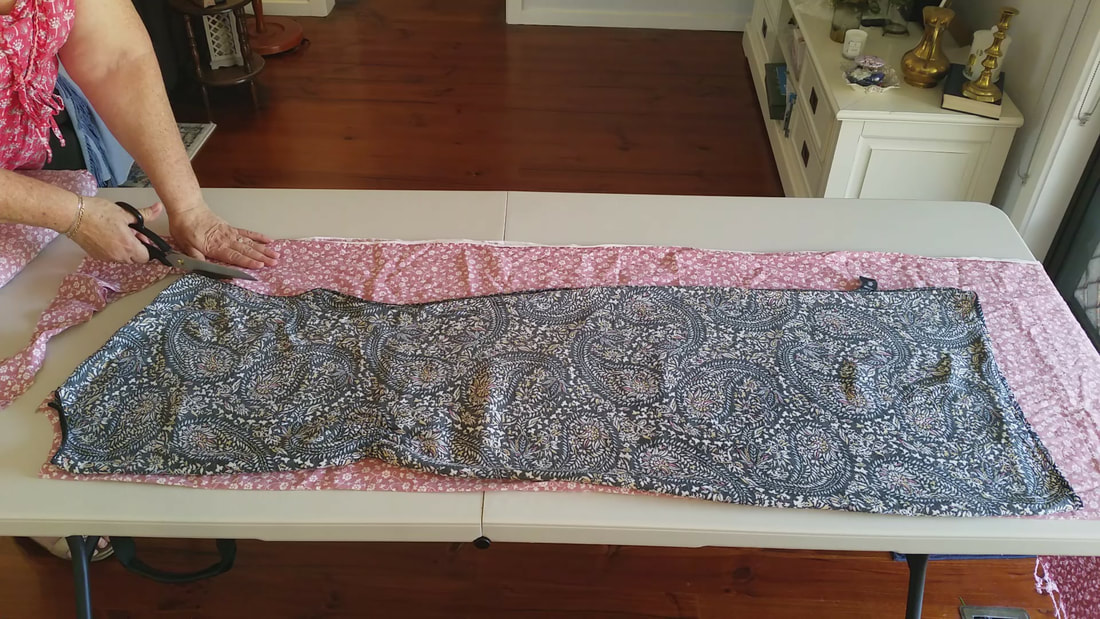 The first step is to wash, dry and iron the fabric. Cotton is likely to shrink, so make sure this has happened before cutting out the fabric. Cut out the pattern using a loose fitting dress that only has four seams, the shoulders and side seams. Fold the dress in half with the back facing out. Place the fold on the fold of the fabric. Cut around it leaving a 1cm seam allowance. Add 4 cm to the bottom for hemming. I didn't because I wanted the new dress to be shorter. Next, fold the dress in half with the front facing out so the v neckline is visible. Place that on the fold of another piece of fabric and tuck the back under at the neckline, revealing the v. Cut around leaving a 1cm seam allowance all around. If you want the dress to be longer or shorter simply add or subtract that amount when cutting out. If a shorter dress is desired fold the bottom up to where you want it. A tip is to put it on and insert a pin where you want the hem to be. 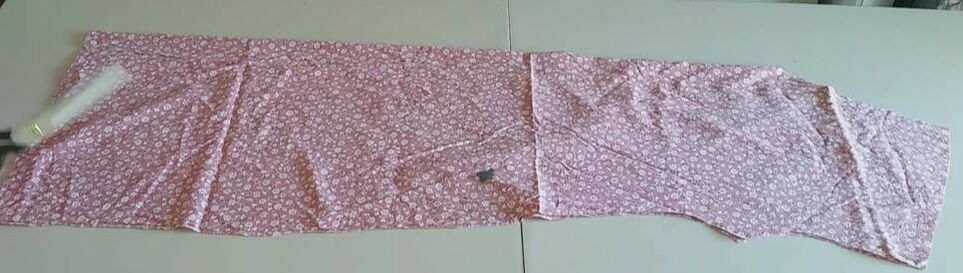 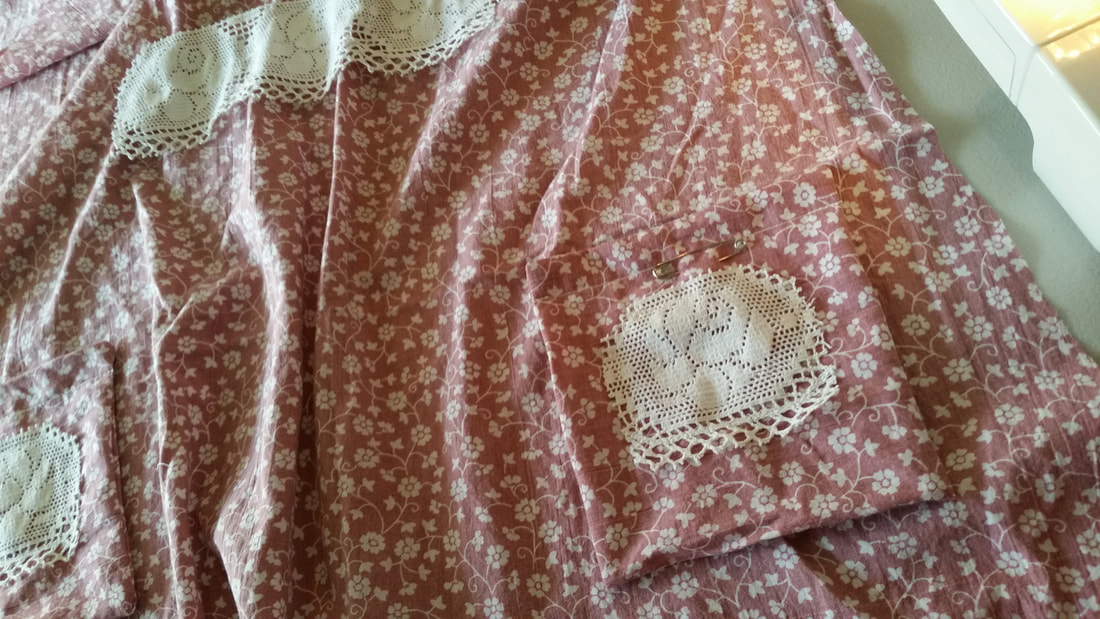 Because I had a stain on my fabric I decided to add pockets so had to make sure it would sit under a pocket placement before cutting it out. To make the pockets, measure a square by eye and cut it on the fold so that makes a rectangle. Turn it wrong sides out and stitch around leaving a gap to turn it out. Sew straight stitch about an inch from the fold. This will be the top of the pocket. The double layer of fabric will give it added structure and strengthen it. Last I sewed on a lace embellishment with zig zag stitch. Top stitched the pockets into place on the front panel. I sewed the pockets to the front before sewing up the seams because it was easiest that way. 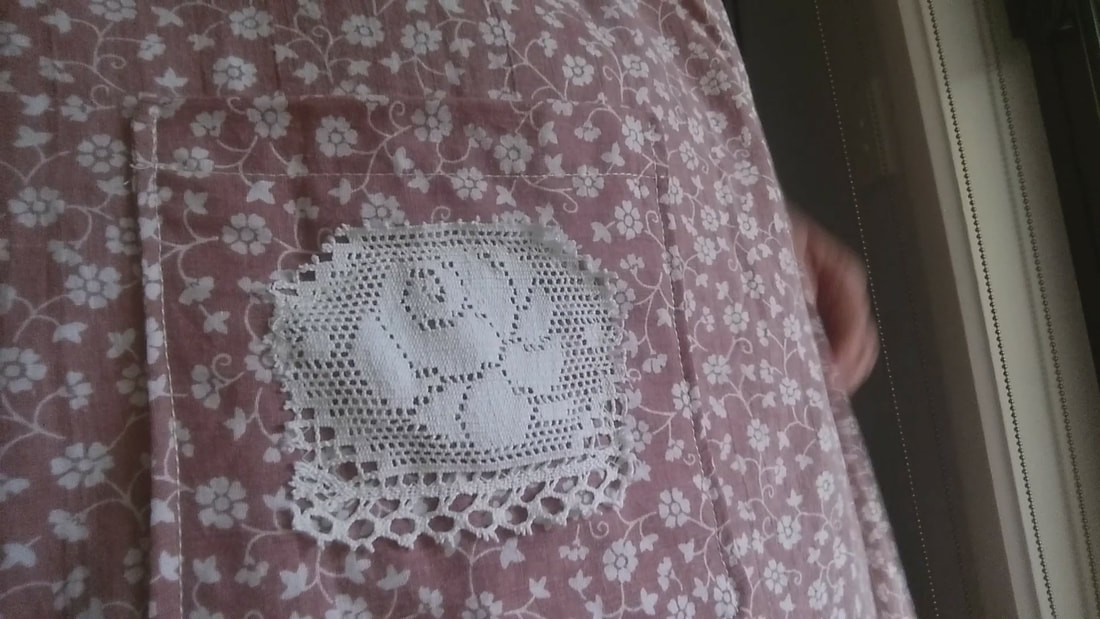 Also on the front panel I hand stitched a gathering thread under the bust and pulled it in. I sewed a thick panel of lace over it. However, when I tried it on after the dress was made up, it wasn't gathered enough so I put it on the sewing machine and bunched the lace up as I sewed straight stitch at the top and bottom of the lace panel. This gave it the look I was after. You could instead treat the front the same way as the back, sewing a length of elastic on the wrong side, if you don't want lace. Instructions are following. 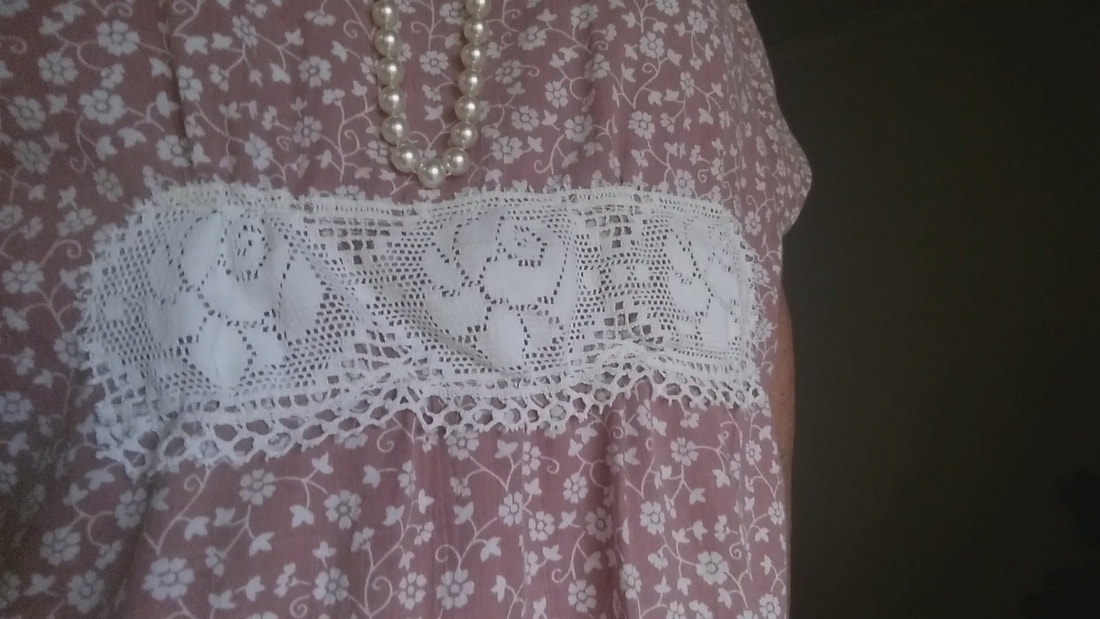 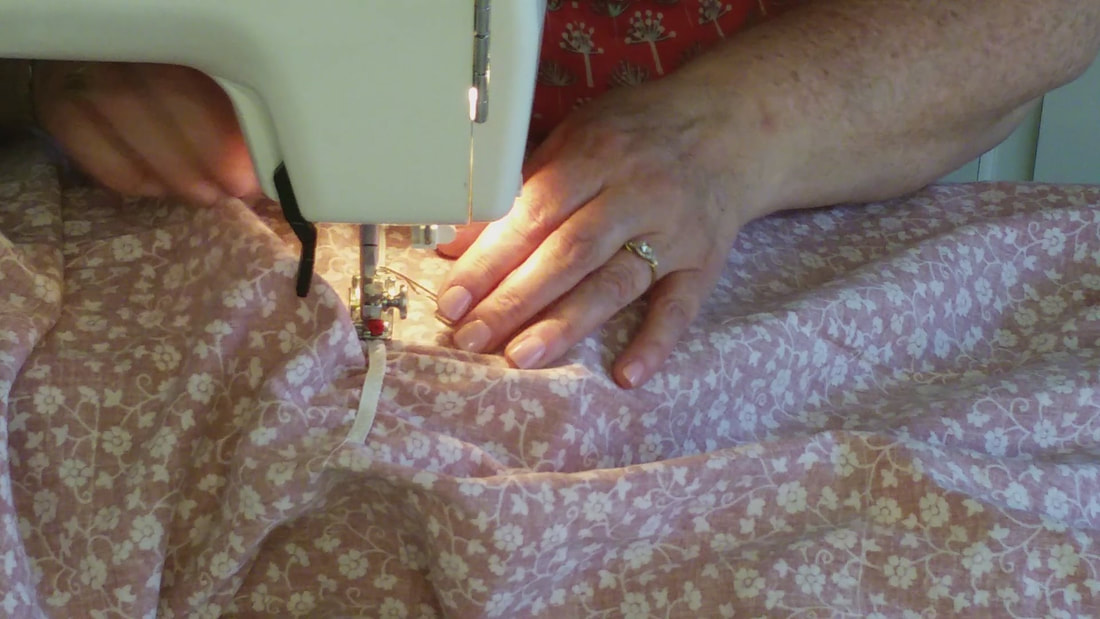 I sewed a piece of elastic to the back panel to pull it in like the original dress does which gives the dress shape. Work out where to place the start of the elastic by stretching it out and centering it over the back panel. Keep holding the left edge in place and let go of the other end. Pin the left edge to the fabric. This is where you'll begin stitching. Start sewing the elastic and then stretch it as you sew to create the gathers. 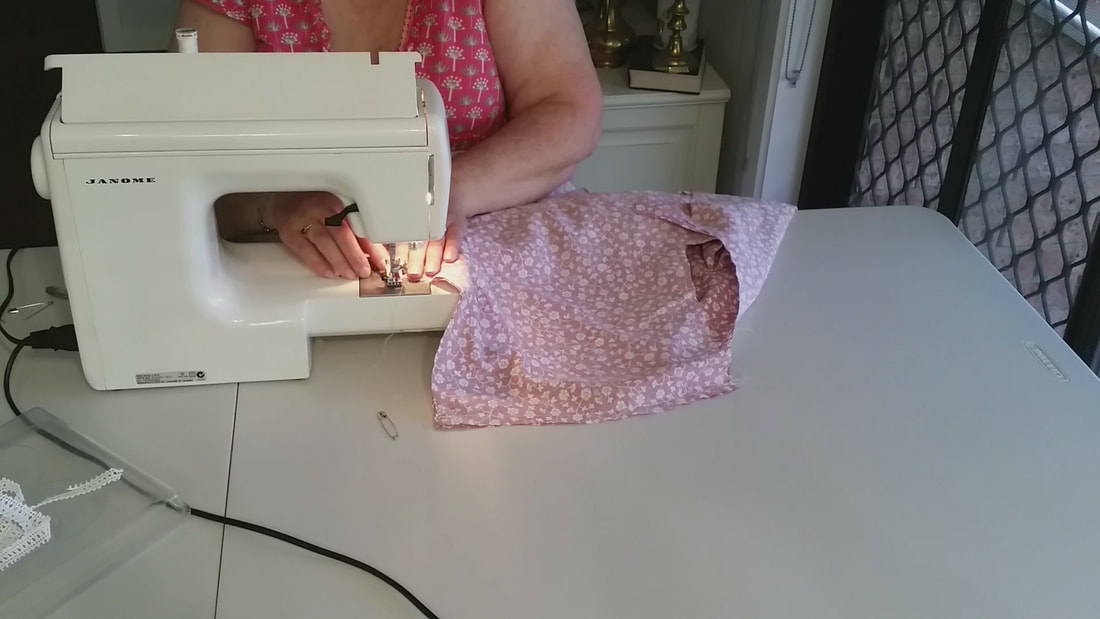 Sewing the front and back panels together can be done in any order but I like to sew the same direction for each seam. Start under the armhole and stitch down to the hem. I don't flick it over and sew up, but start at the other arm hole and sew down so that the dress falls evenly. I used quilting clips to hold the seams together until they were sewn but pins work great too.  As this is a pull over your head style of dress you don't have to worry about buttons or zips however I did add lace for interest and to bind the neckline. I sewed the lace to the wrong side and flipped it over to the right side and top stitched it down. You could sew it to the right side and fold it inward and stitch if you don't want lace to show or use bias binding. 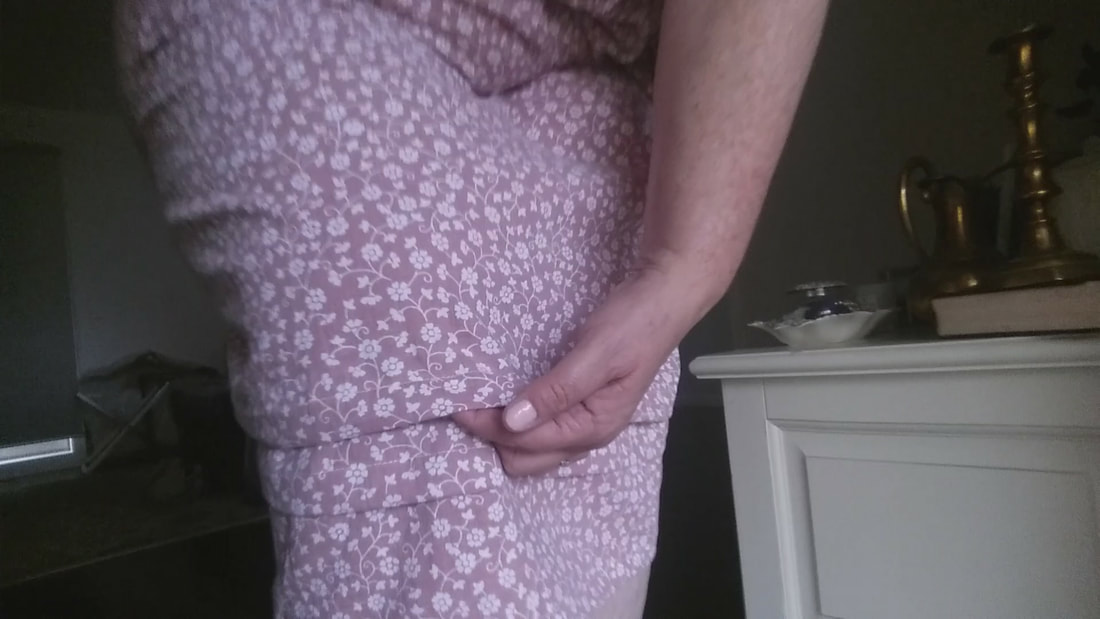 I hemmed the dress turning it over about 2cm and then another 2cm and stitching it down on the machine using straight stitch. The arm holes were hemmed the same way but turning it over half a cm twice and stitching down. After trying it on it felt too plain at the hem and too long, so I added interest by sewing two bands of folded over fabric, parallel with the hemline. I made them the about the same width as the hem and the top stitching on the pocket so that elements were repeated and made the design cohesive.
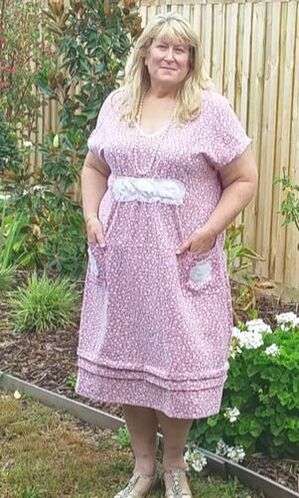
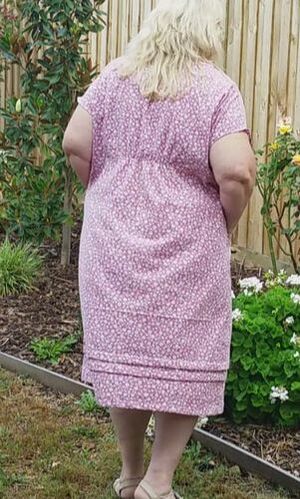
Here's the finished dress. I added lace because felt the all over small print needed something to lift it. I also like to accessorize with a strand of pearls.
I've worn this dress quite a bit since I made it a couple of weeks ago. It's so comfortable and roomy. Being cotton, it's cool and breathes in the hot weather. Anyone could make a version of this dress, the lace could be left off. It would be beautiful with a matching bias binding around the neck and sleeves. Because you make it from a dress you already own, it will fit any size. Use a shift or caftan style dress already in your wardrobe that you can pull on over your head. If you'd like it more fitted, elastic can be added all the way around under the bust line or at the waistline, whichever suits you best. The hemline detail required measuring and careful pinning to keep the lines accurate but this feature and for that matter, the lace wouldn't be needed on a larger print. A short stint working in the office of a fashion house was part of the inspiration for the book I have recently finished revising. Ruby is a fashion designer and, like me, grew up making her own clothes. I hope to have her story for sale this year. If you haven't read the Katrina or Natalie's stories you can find them here. Dora Bramden Heart melting, passionate romance. 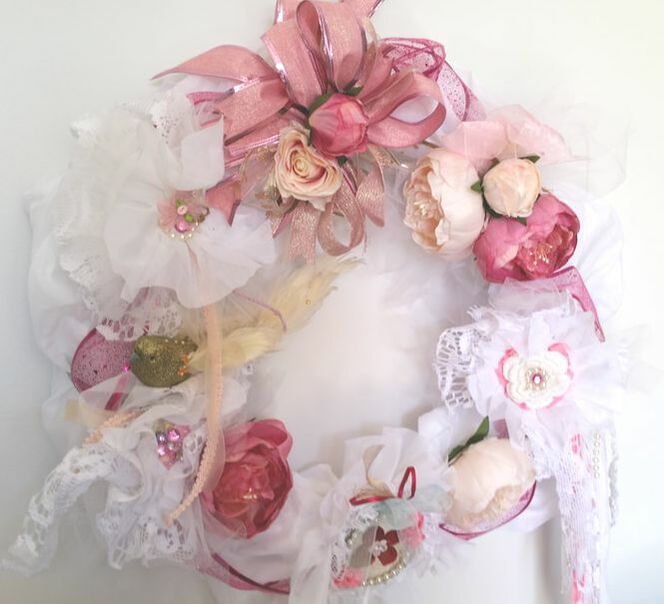 I’m amazed how well this wreath turned out using recycled Christmas decorations, a curtain scrap and ribbons I had on hand. The roses mixed with tulle and lace rosettes lift this wreath out of the ordinary. It’s one of a kind which is the best thing about crafting your own home decor. I was inspired by a wreath made by Olivia from Olivia's Romantic Home to create this romantic themed wreath. Hers is so beautiful, but I think I got a little daunted at how fabulous it looked. Could I recreate the effect with the supplies I have on hand. Now it’s finished I love how it came out. I had a couple of dry runs before settling on the method I used. I encourage you to have a play with your supplies and see what you come up with. 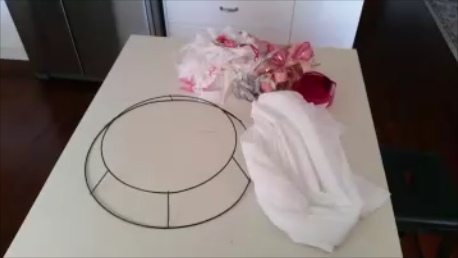 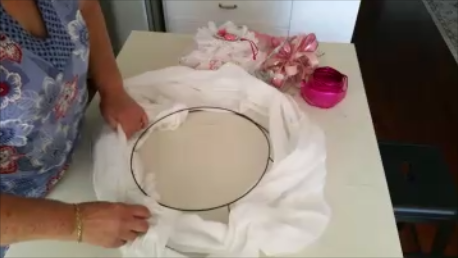 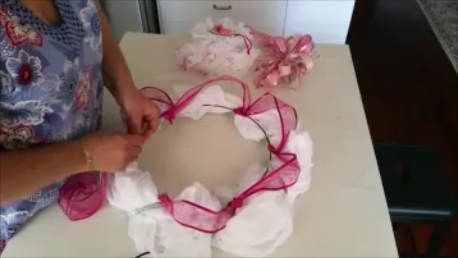 The wire base is from a Christmas wreath. I removed the garland of greenery and stored that away for next Christmas. Next I lay an old curtain scrap around it. Enough to go about twice around the frame . I found the center and put that at the top of the wreath and then gathered the fabric loosely around the rest. Once I had the placement how I wanted it I tied it on with a ribbon at the top and then wound the ribbon around the wreath down each side catching the curtain at the struts of the wreath and tied it off at the bottom. I looped a Pink glitter Ribbon around the wreath securing it at the struts by folding the wire edged ribbon over the frame at these points. I hot glued the curtain to the inner wire support and also where I’d attached the pink ribbon to secure it.  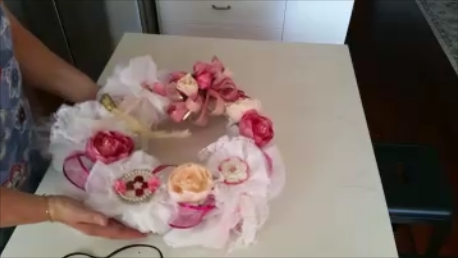 Then came the fun part, adding the embellishments. At the very top of the wreath, I tried on a funky bow that had been used on top of a Christmas lantern. Follow this link to Arlynn's Country Craft Youtube video for how to make one. I hot glued two small roses to the center of the bow. Rosettes from the Christmas tree were placed around and hot glued where the pink ribbon was secured to the frame. YouTube tutorial for how the rosettes are made is on Olivia's Romantic Home. Roses were added, alternating the pink and cream, in between,with hot glue. Scraps of ribbon were looped or tied into bows and glued on to add dimension and whimsy. 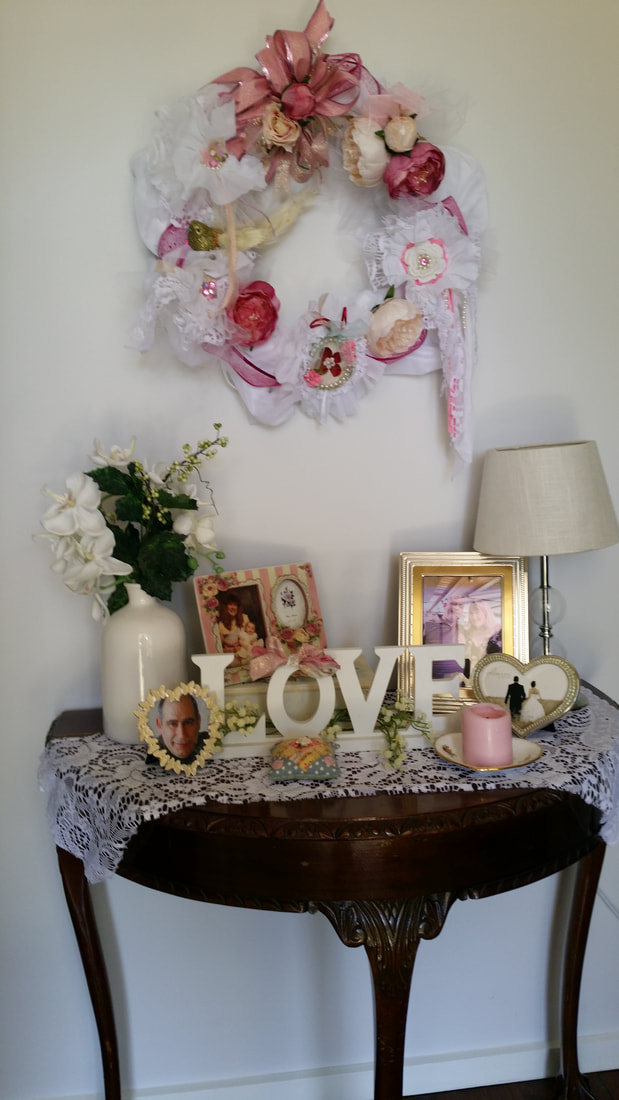 And here is how it looks above the hall table all decorated for Valentines Day. I have used a scrap of lace curtain as a runner and brought out my romantic trinkets that I've collected over the years.  The picture of Sam in a heart frame sat next to my bed before we moved in together, so I could kiss him goodnight.
A very young Dora with my baby girl is in a sweet rose embellished frame. The picture of Sam and I was taken at our engagement dinner. The printer ran out of yellow ink and so we're very rosy hued but I love it, a happy accident. The heart frame has the picture that it came with. It's a lovely image and it was my hope for the future that Sam and I would one day get married, and now we planning our wedding! The centerpiece is the love sign I've had in my office for years. It lives there because I like to have romantic things around me when I'm writing romance. Hearts, flowers and a candle say romance added to that is the pictures that remind me of all things loving. Last year I decorated the hall as a surprise for Sam, this year he watched me do it and enjoyed the process of it coming together. I'm going to keep it up from now on because I enjoy so much coming home to our sanctuary and being greeted with this pretty festival of love. Further reading Published last Saturday on Romancing the Genres, A Detailed Account of Where I Got the Inspiration to Write my Novel by Dora Bramden Check out the Romancing the Genres blog next Thursday for my post on why I chose to celebrate Valentine's day. Dora Bramden writes heart-melting, passionate romance. 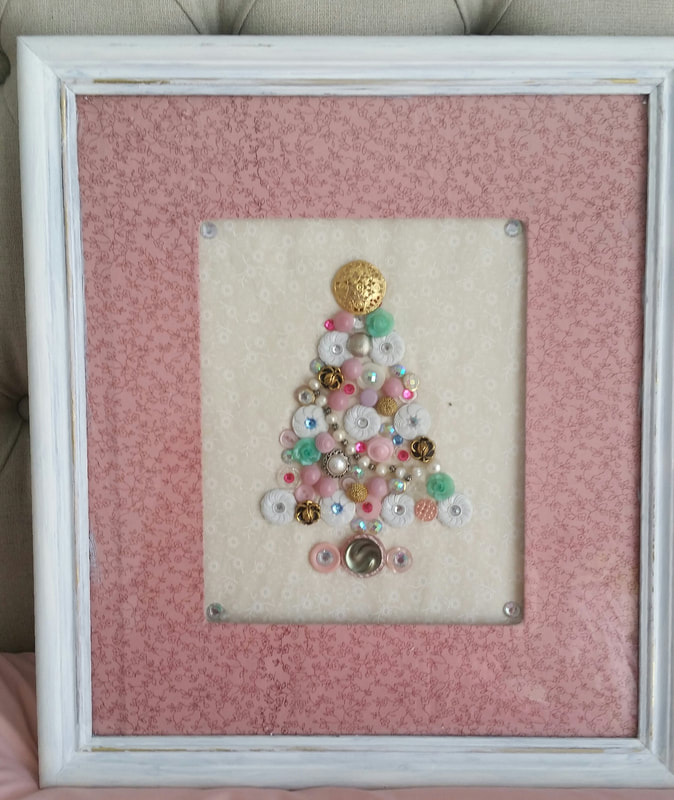 Creating something sweet for Christmas while not spending money is this year's challenge because I have our wedding next year to save for. All romance heroines know, that not having a lot of money to spend doesn't mean you can't do things. It requires being more resourceful, which is a good skill to cultivate. For me that means an appreciation for whatever resources you have available and making the most of them. One of the lovely things about using what you have is that you can include items that are sentimental to you. I have a broken bead bracelet that Mum gave me which I couldn't throw away, so I used it as a garland on this tree. Many of the buttons were my great aunts and came to me through Mum. If you don't have a craft stash like mine, go to second hand shops. It's much cheaper to shop the craft section of your thrift store and women's or girl's second hand dresses or shirts in pretty fabric with sweet buttons can help bolster your supplies. The Reject Shop or dollar stores sell bling for only a couple of dollars. My button and bling tree is hot glued to fabric but a sheet of scrap booking or other craft weight paper would be lovely also. I used an old framed picture that I had stored in the garage. Again if you don't have an existing one crying out for a makeover, thrift one. I painted my frame white with craft paint and covered the mount and backing picture with fat quarter quilt fabric. I added a layer of thin batting under the fabric but I don't think this is really necessary. 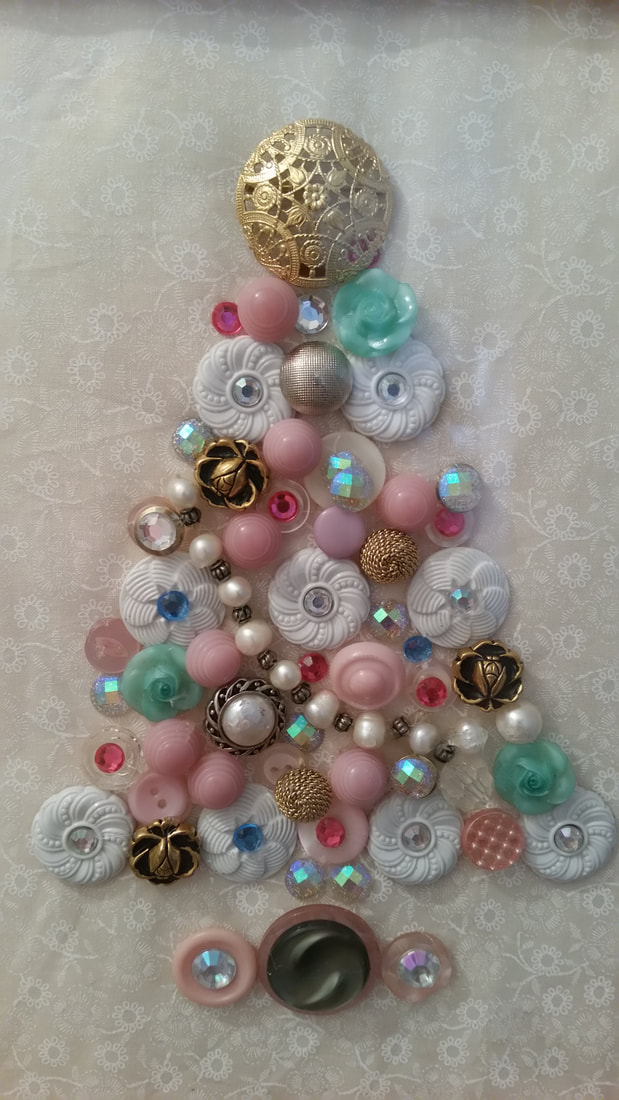 The color palette was chosen to go with my Romantic Christmas theme. Romantic for me has a shabby chic feeling. so the colors are soft with pops of pink however it would look wonderful done in traditional red and green or whatever your decorating pallet is this year.
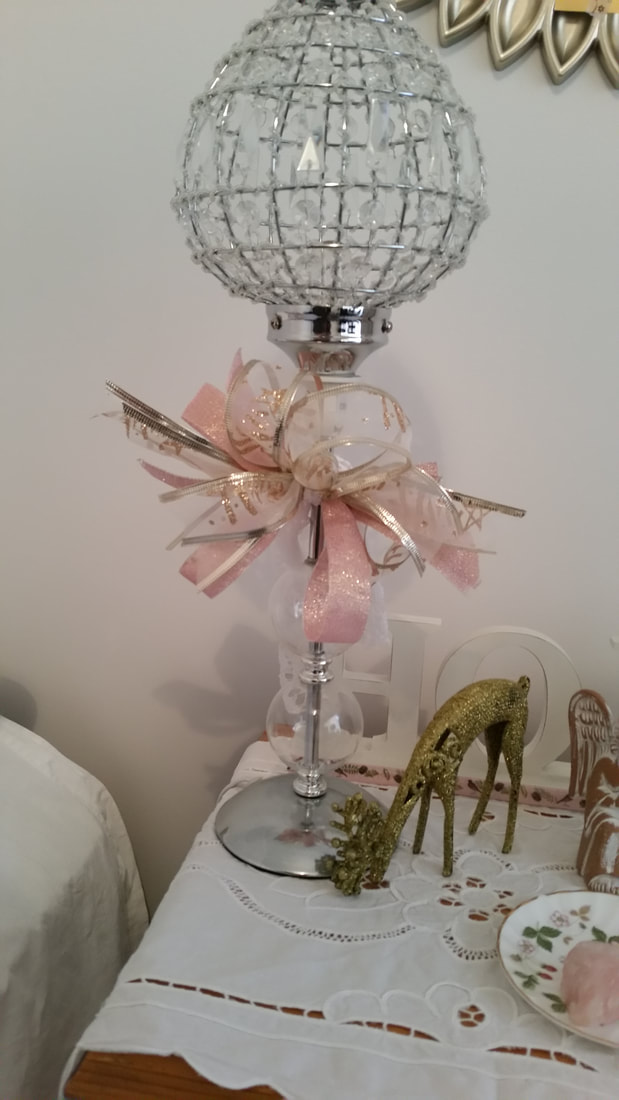
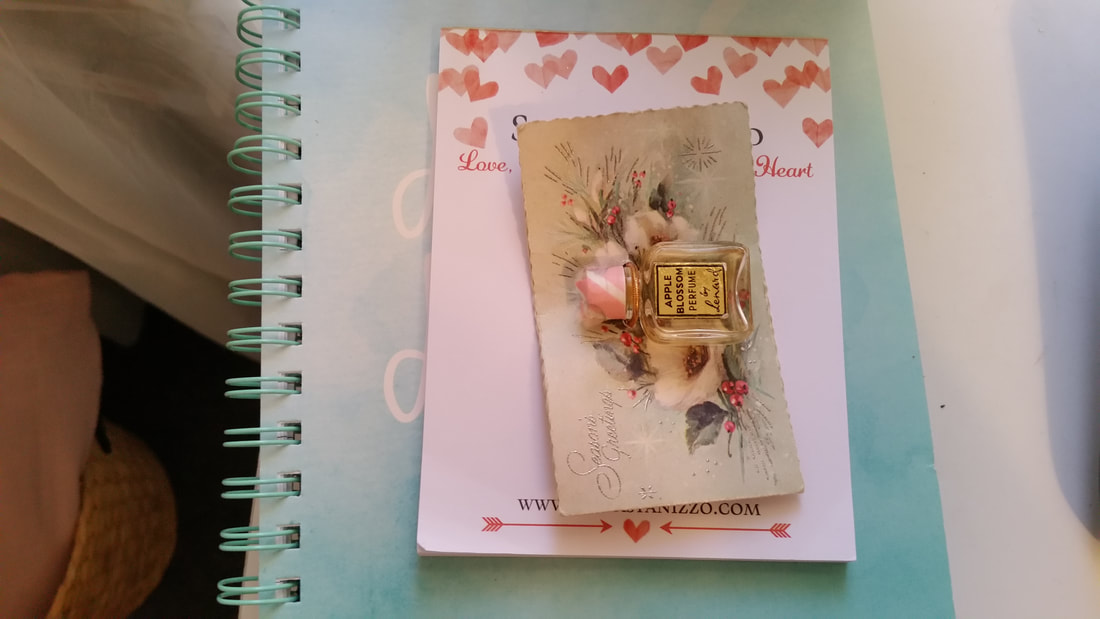
I made an arrangement that I liked without gluing first. I recommend taking a photo of it. I didn't however it still came out okay. I used the big white buttons to create a form work, then I draped the garland down between those. I used three of each brass and green rose buttons arranged in a zig zag shape down the tree. The green ones point left and the brass ones point right. I glued all of that down first. After that I glued the single feature buttons around the tree to draw the eye over the whole picture. Next I filled in with the random smaller buttons and bling. I layered bling onto buttons to add dimension. Some of the blingy bits were self stick and I made the mistake of just adding them without hot glue. One has shifted in the picture above so I recommend a small dab of hot glue on the self stick ones also. I crowned the tree with a vintage gold filigree buckle. Again this was from my great aunts stash. A vintage broach or a sparkly one from a thrift store would be gorgeous also. If you need inspiration, Pinterest has lots of very beautiful examples of these trees. You don't have to make an arrangement the same as mine. This was inspired by the buttons I had. If you don't have more than one of each kind of button you can group similar ones together and use some of my principles to help get you going. But really it's got to be what you like. Everyone's tree is destined to be unique and special because you created it. I've hung mine in the hall leading to the bedrooms and bathroom. Each time I pass I enjoy seeing it. When the hall door is open, which is most of the time, I can see it from the kitchen and family room too. Even though Christmas is nearly here. Just a couple of sleeps away and it's exciting and wonderful, my heart is calling to love ones who've gone ahead of me to spirit. If you are also experiencing sadness at Christmas, I understand how you feel. I love the memories that this tree helped bring back. They are mine forever. But the greater the love the greater the loss, so at Christmas I have to focus on being grateful for their many gifts over the time I had them for. However, I know it's my turn to carry on and make the most of this festive time of year with the family and friends who bless my life and fill me with gratitude. So dear readers of my weekly blog, thank you for stopping by to see what I've been writing about each week over the last year. It means so much to me and I'm truly grateful for your support. I hope you have a lovely Christmas day planned for yourself and wish you and your loved ones a very happy Christmas. Sending you all a big hug. Merry Christmas Love Dora xoxo The Bedroom 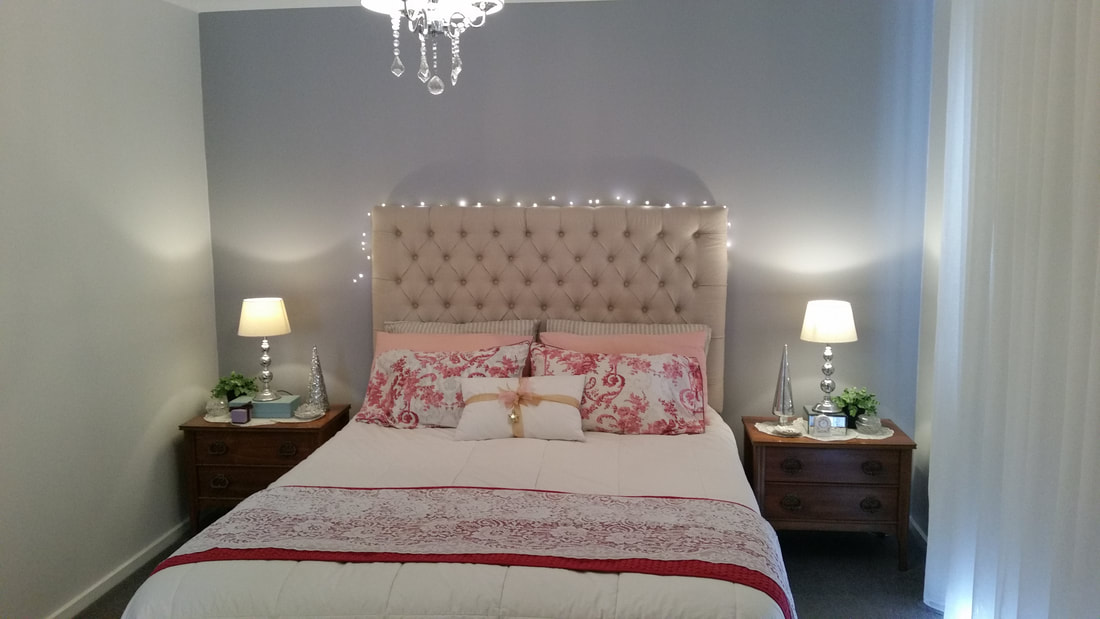 The bedroom is one of the most romantic rooms in the house. There's no TV to distract us from being present with each other. We usually have our heart to heart talks in here. It's very much a place that we live and I wanted to include the coziness of Christmas romance in here too. Lace is an important part of this year's theme but I've learned to use it sparingly. If you follow my Facebook page or Instagram you'll see the first version of this room which was just a tad over the top with lace. This is a more restrained, elegant arrangement that highlights the lace without letting it over power the room. 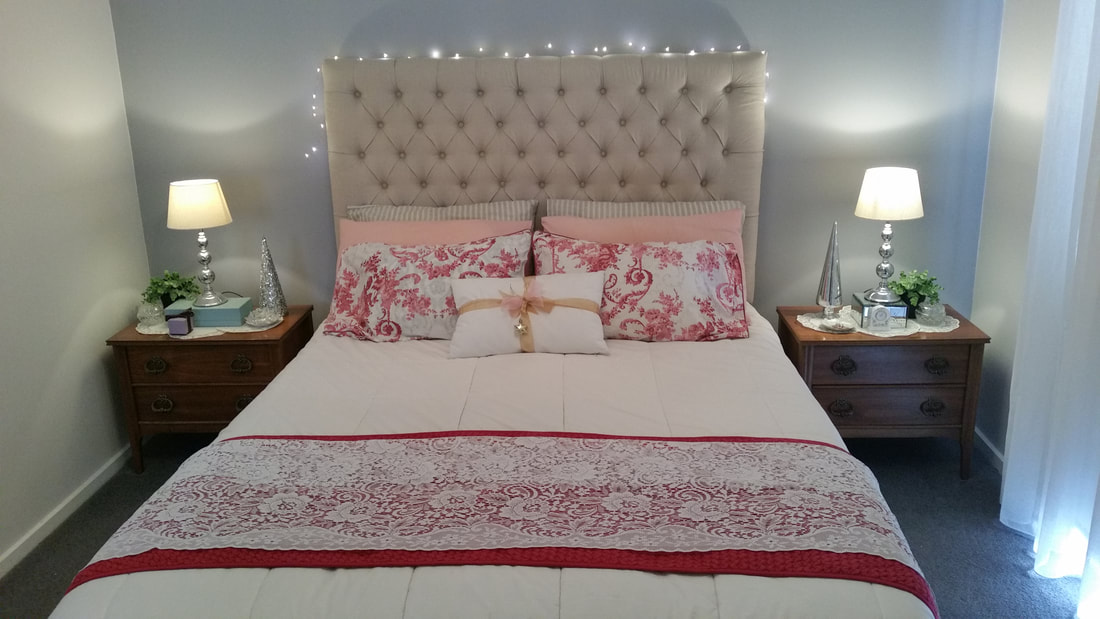 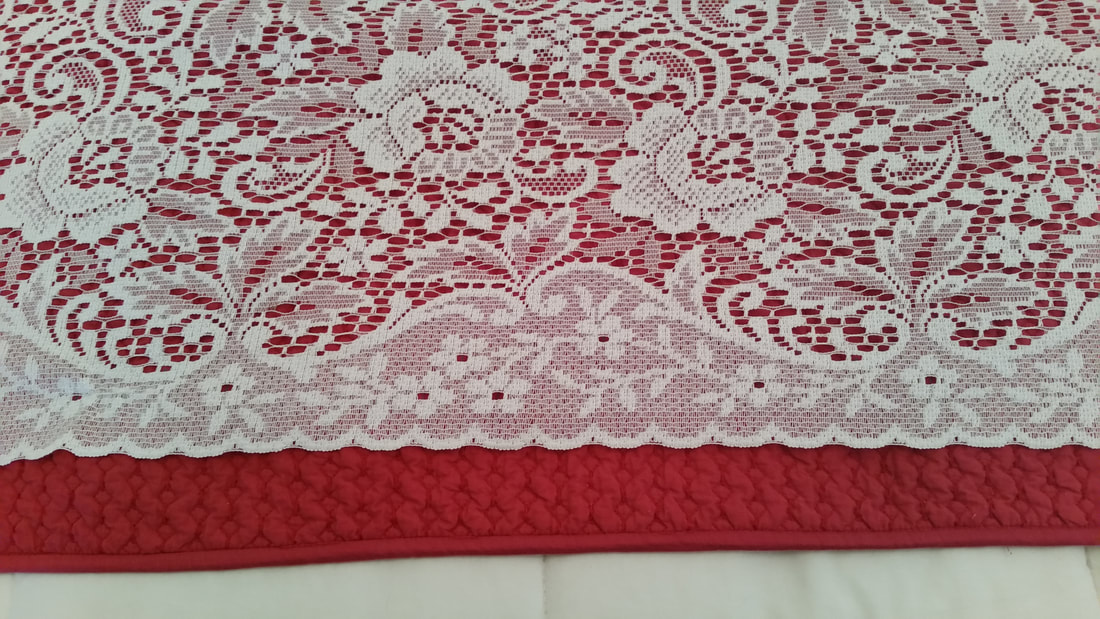 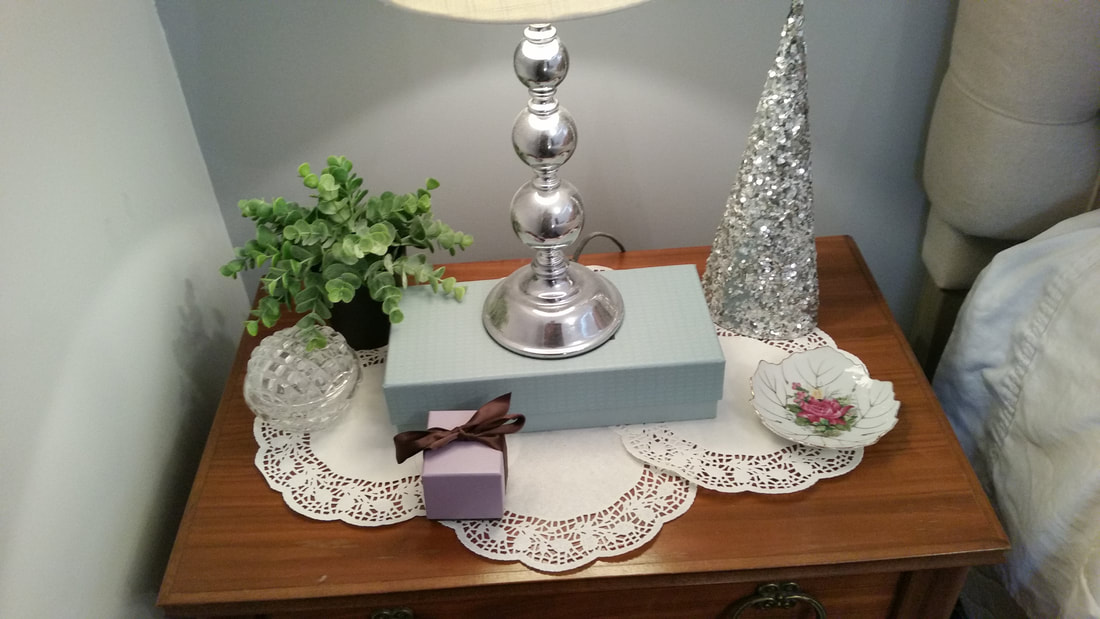 Paper lace doilies are cheap but add romantic texture. I found these in the bottom draw with the casserole and serving dishes. The ring box with a bow is the one that Sam gave me when he proposed.  The little clock belonged to my mother. There are memories of her in each room of the house because I need to feel her presence at Christmas time. The little leaf dishes belonged to Sam's mum. I want him to feel her close by at Christmas also. The En-suite 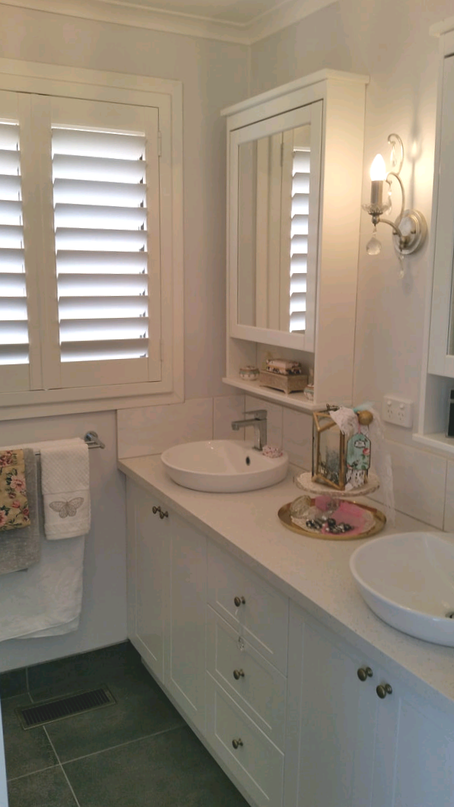 The en-suite has been prettied up with festive trinkets. The gold tone lantern had been outside and was very dirty but it cleaned up like new with dish-soap and warm water. I placed it on a cake stand and sat that on the gold tray which lives in the en-suite year round. 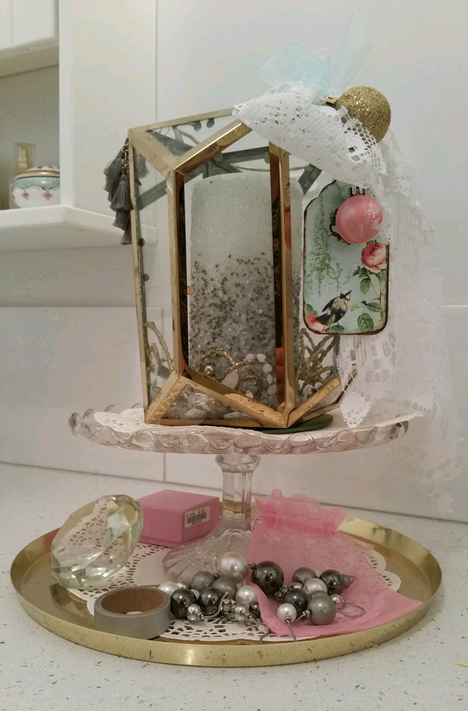 I made a lace bow and attached some ornaments. Inside the lantern is a battery candle, some more of the gold swirls from a broken decoration and a necklace of pink quartz beads. On the tray below is a faux pearl necklace some pink things, washi tape in silver and a crystal. It feels romantically glamorous to me. 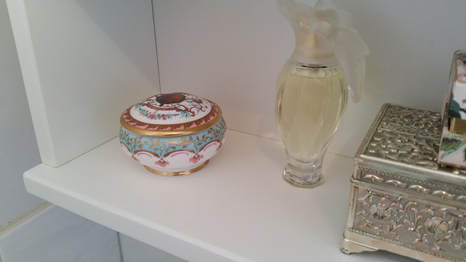 The perfume was a gift I gave Mum so it came back to me. I bought the trinket box when I toured Windsor Castle. That's a bit glamorous too.  Fluffy towels speak luxury to me. I chose my very best to display. Mum gave me the embroidered hand towel for Christmas about seven years ago. The grey with white polka dot towel is cute but Christmassy because it reminds me of falling snow. I scrounged a fat quarter from my quilt stash to add pink and gold tones. The Study 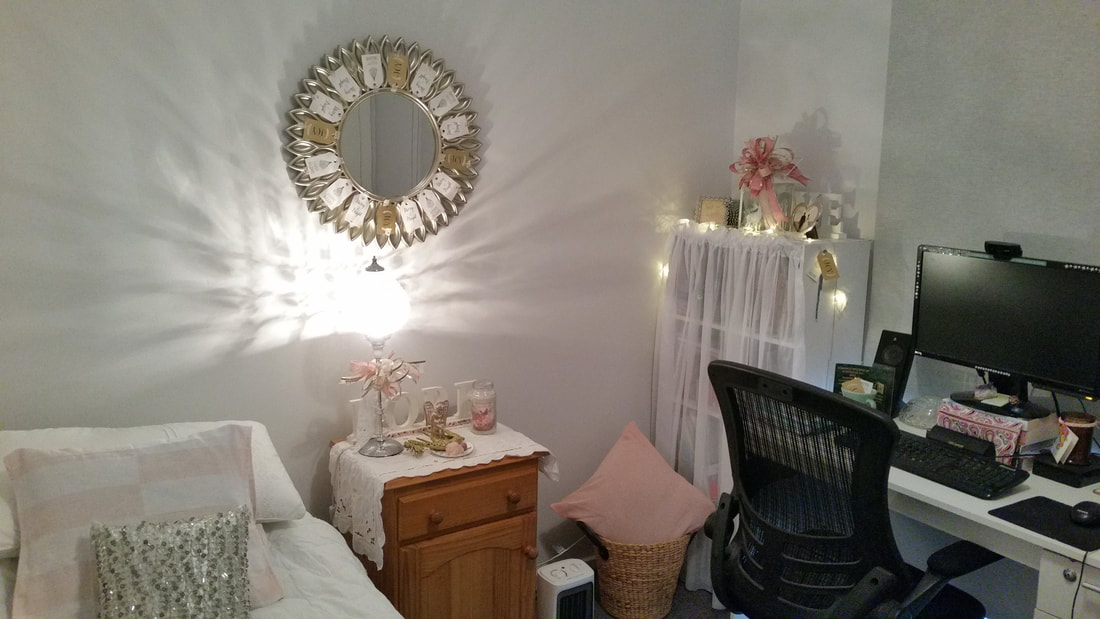 This room took on a romantic glam theme as I began to decorate with what I had left after doing the rest of the house. I confess to spending $4.50 on ribbon to help this room have some softness and romance and $10 on this lantern from spotlight on sale. 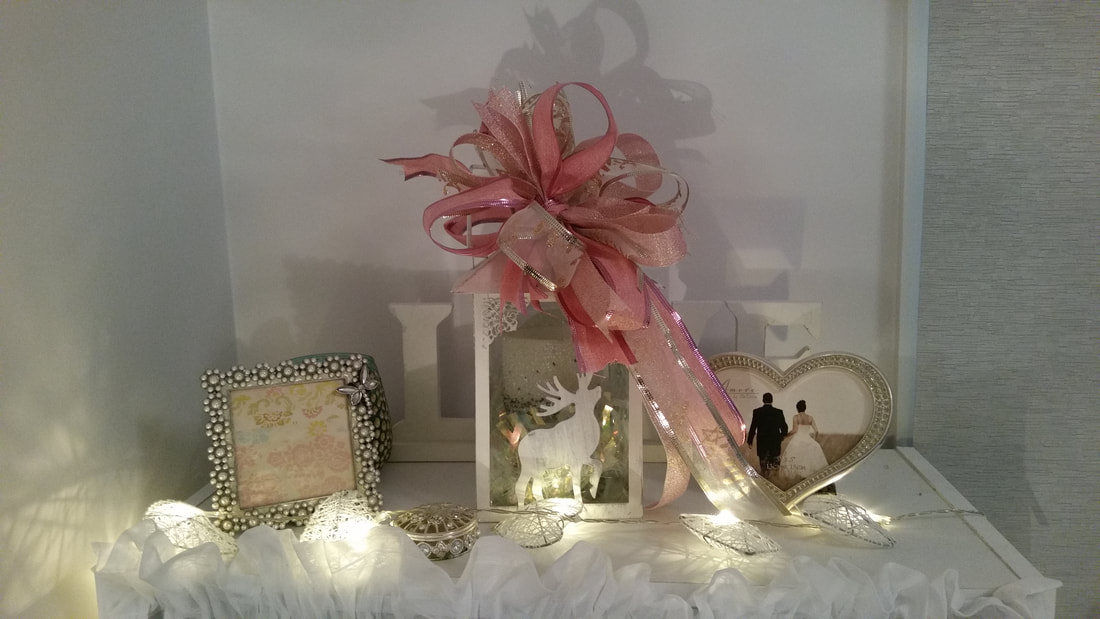 Thanks to Arlynn's Country Craft Corner, I learned to make a funky bow. It takes a lot of ribbon but the effect is charming. This is nothing compared to what Arlynn creates but I'm grateful to her for all the inspiration her YouTube channel provides. She's such a sweet warm hearted person too. 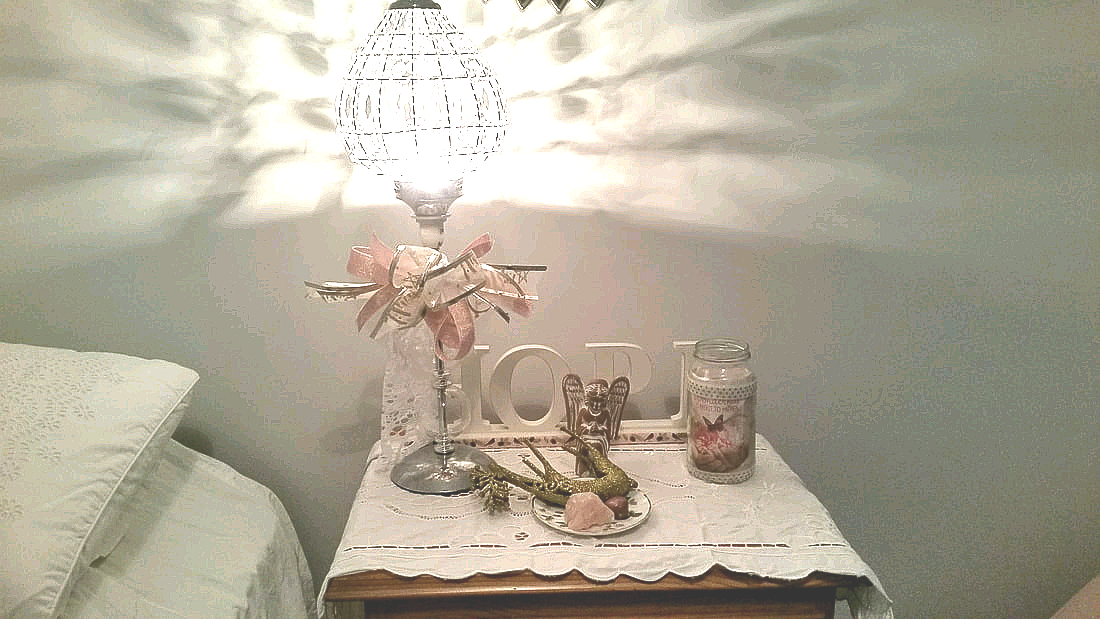 Oh dear, the reindeer fell over. Didn't notice it when I took this shot. But never mind, I'll stand him up again. Being hopeful at Christmas is always a good idea. 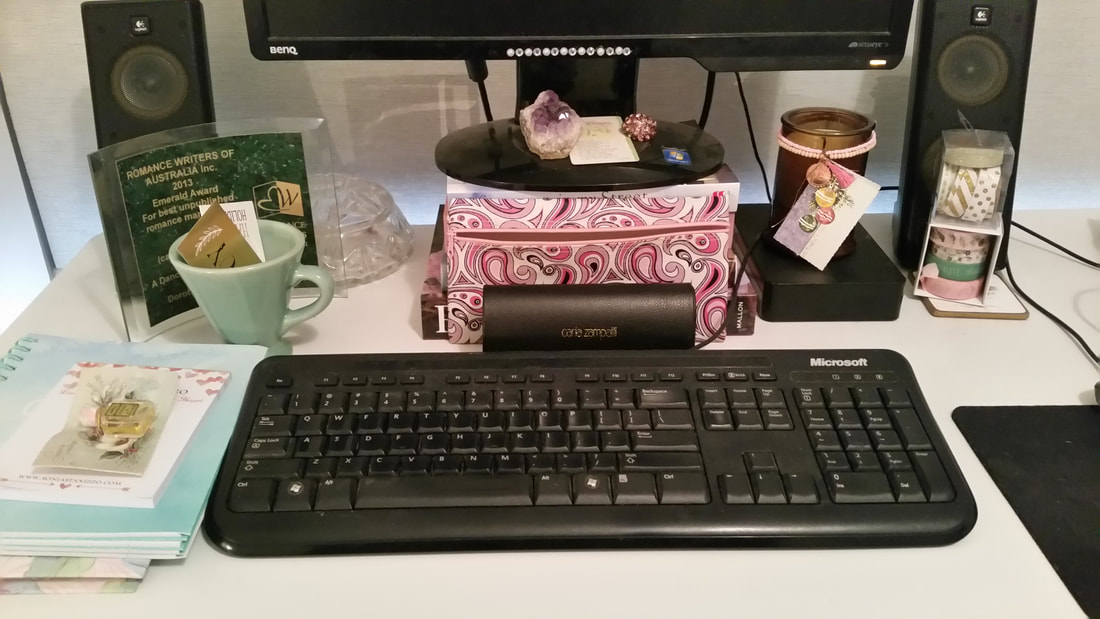 Christmas at my desk includes little gift cards I gave my mother when I was at primary school. One hangs from the candle and the other, with the mini perfume bottle still attached, sits on some note pads. When decorating my home for Christmas, I'm using my heart. I want to create a cozy retreat full of warm memories and a lovely space to create new ones. I'm thinking ,how does this make me feel?, when I finish and look at what I've put together. If I don't feel what I want to it gets changed. Several attempts are required for every vignette before I feel warm and want to smile but I know it's worth all the effort.
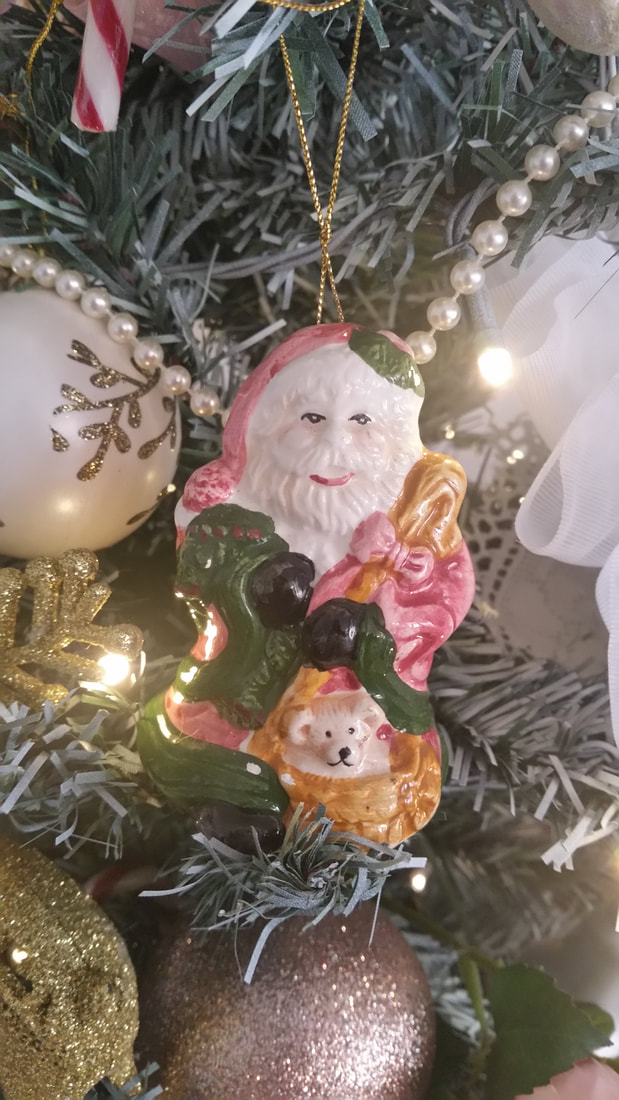
At a time when I'm thinking about spending time with my family and friends I'm also feeling the loss of those who won't be here this year. Decorating helps me cope with painful emotions. Doing what gives me joy helps to create a scale that is balanced. There's sadness and happiness. That's how life can be but it's okay. I'm hosting Christmas lunch this year for Sam's and my families. I'm really looking forward to that and am currently planning the menu. Next week I'll be blogging about how I prepare for a traditional Christmas lunch for thirteen. I'll be including the menu, the shopping, baking and preparation schedules and my Christmas tablescape. I hope you'll join me next week. Dora  This last week I've been working on creating a romantic Christmas theme for the family room and kitchen. I told my girlfriend that I'd done a pink color scheme and she said, 'Oh so you've been out and bought a whole new lot of Christmas decorations.' I told her I didn't. The catch was I mustn't buy anything new. I had to make do with what I already have from previous years and make new decoration from my craft stash. I found a way to do it even though it was quite a time commitment. She's coming over next week to see it in person. 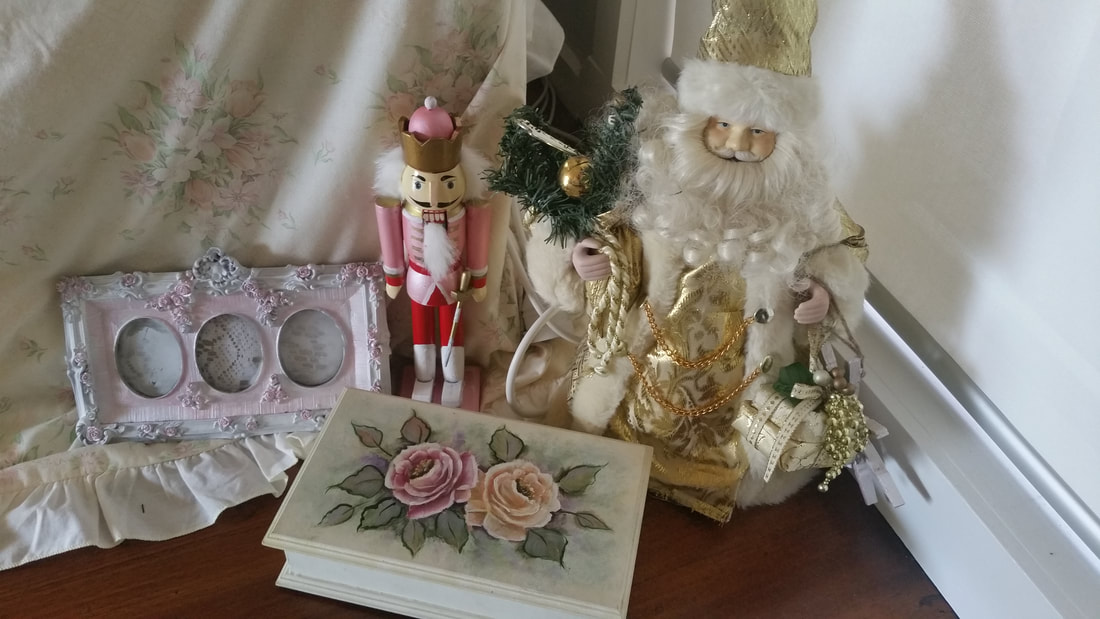 This is the corner below the TV. I painted the roses on the remote control box about fifteen years ago, but they still look fresh. I added my favorite Father Christmas. The nutcracker used to have a green coat and black boots but he was given a touch of romance and brought into line with this year's pink palette with folk art paint. I also painted the picture frame I found in the garage and put a piece of lace from an old curtain inside. That lace curtain certainly came in handy. 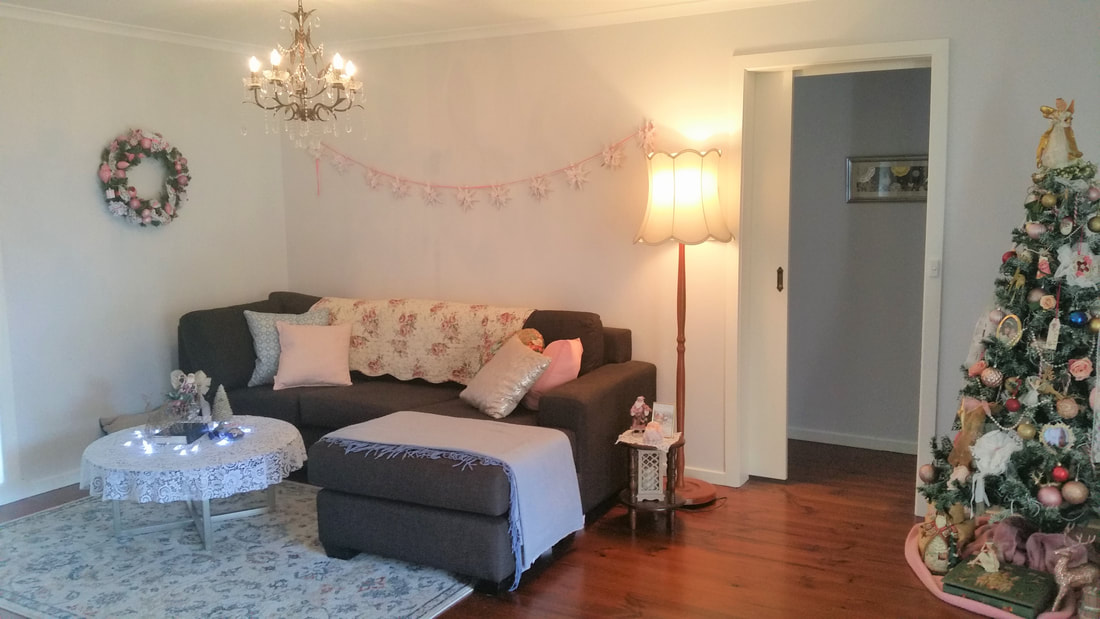 I dug around in my linen press to find some pink pillow covers. I also discovered a pretty rose patterned throw which I put over the back of the couch. I made the wreath using baubles that I painted using folk art paint. I mixed shades of red and burgundy with a pearl white to get varying shades of pink. I made lace ribbon by cutting strips from the before mentioned, the old lace curtain which I also discovered when exploring the linen press. I used hot glue to stick all the ornaments and lace in place. The gold scrolls came from a broken Christmas tree that was made up of them. I broke them all apart and wove them in. I like the lux effect they add. 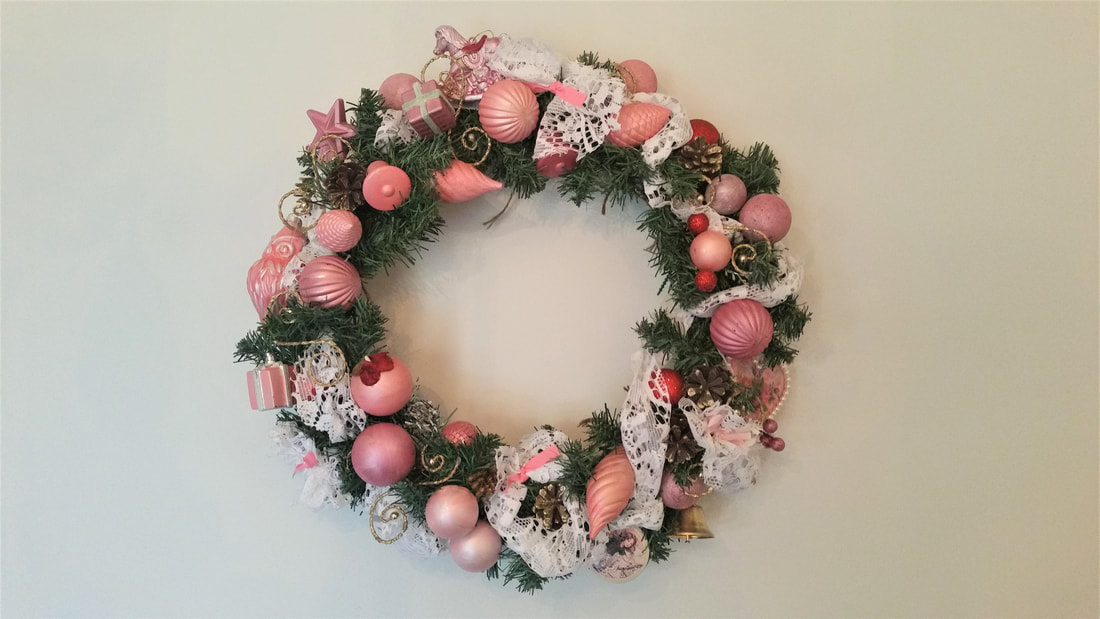 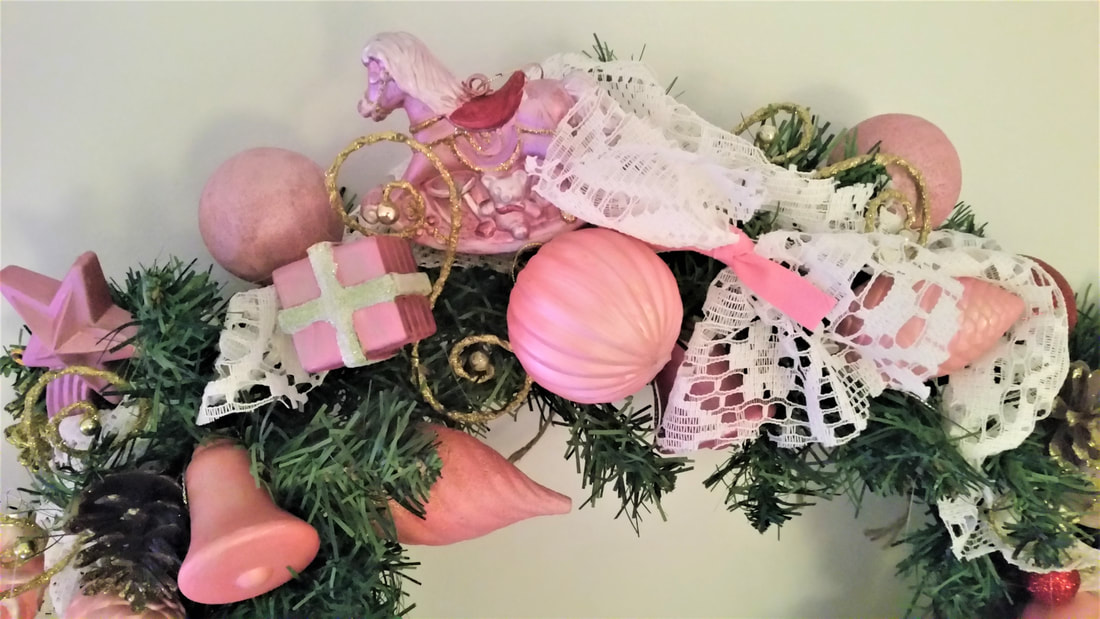 Last year I spent ages hot gluing wooden pegs together to make stars. This year I painted them and made mini lace rosettes from the curtain strips, scrap ribbon and glued faux jewels in the middle. I tied the stars onto a strip of bias binding from my quilting supplies to make a garland for the wall behind the couch. 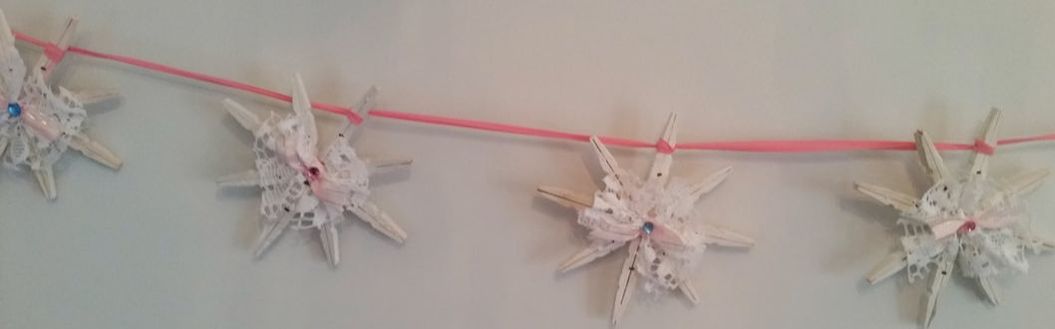 That curtain came in handy when I looked around for a lace cloth for the coffee table. I folded it into a triangle and then halved it and cut it to size making a round piece of fabric, much like cutting paper for the bottom of a round cake pan. 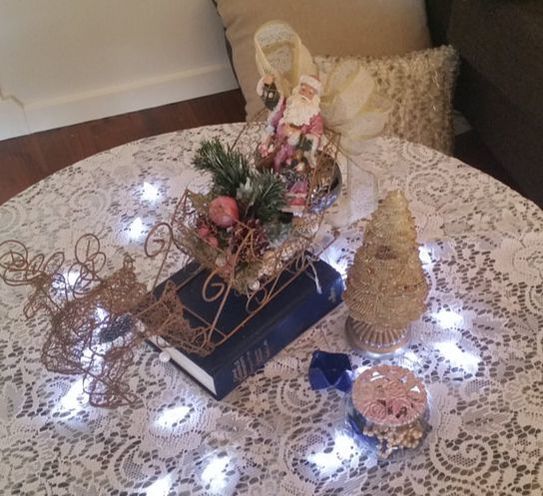 Santa in his sleigh was given a makeover too. I used the same paint as for the baubles to lighten his coat and make him a pink Santa. 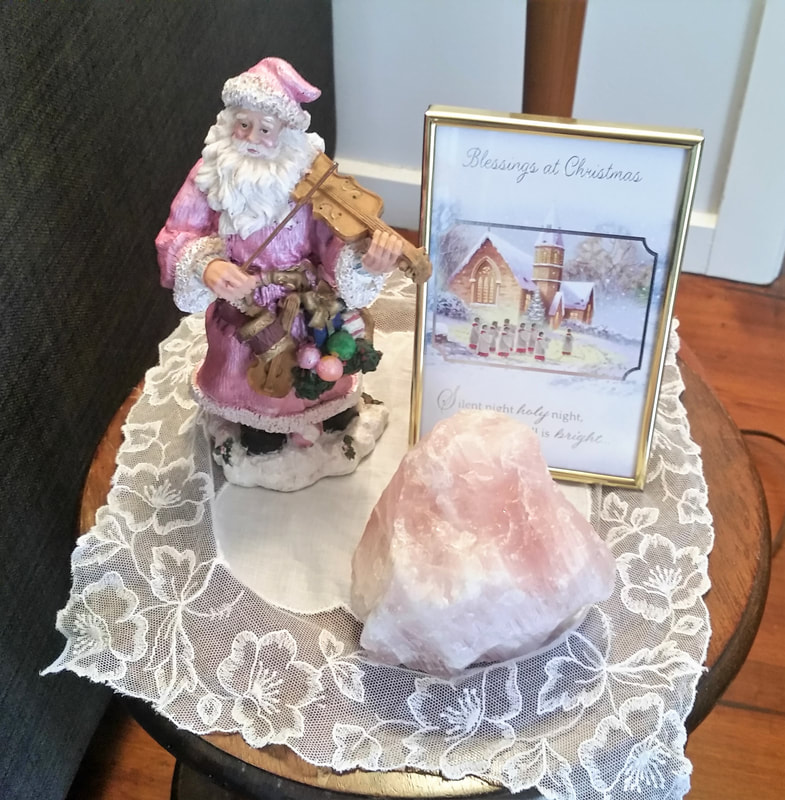 Fiddler Santa was given a pink coat also. I sat him next to framed card from last year and a hunk of pink quartz which is meant to give off love energy. Well, it is romantic Christmas after all. The lace cloth is one of my mother's special handkerchiefs. 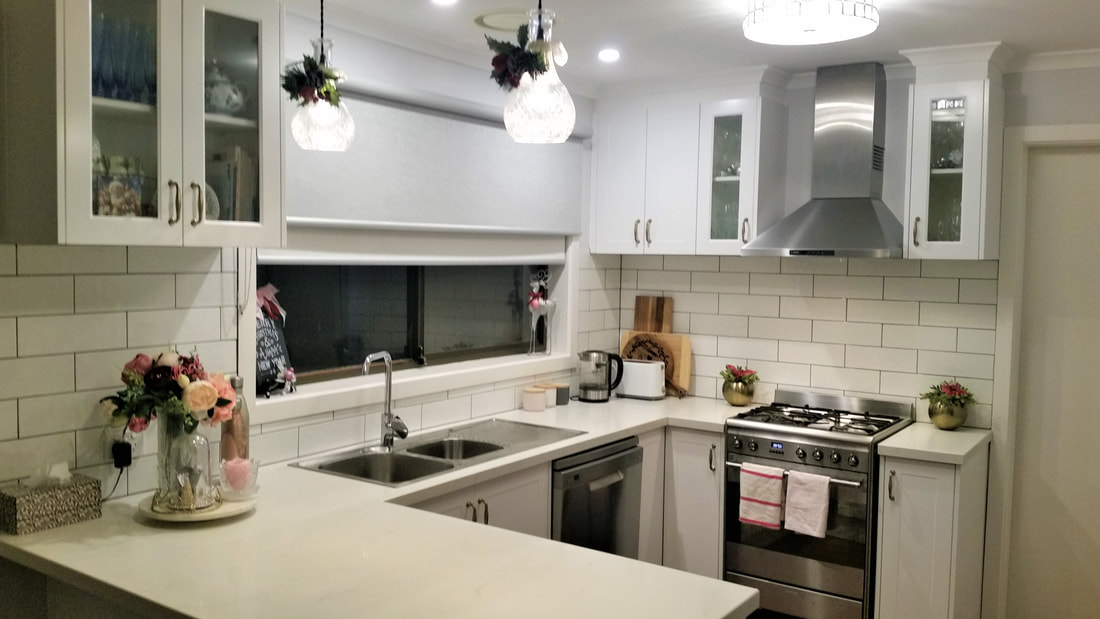 The kitchen only has a few decorations as there isn't a huge amount of bench space. I added poinsettia picks to the pots of faux sage that sit next to the stove and hung pink check and pink and red striped tea towels over the oven handle.
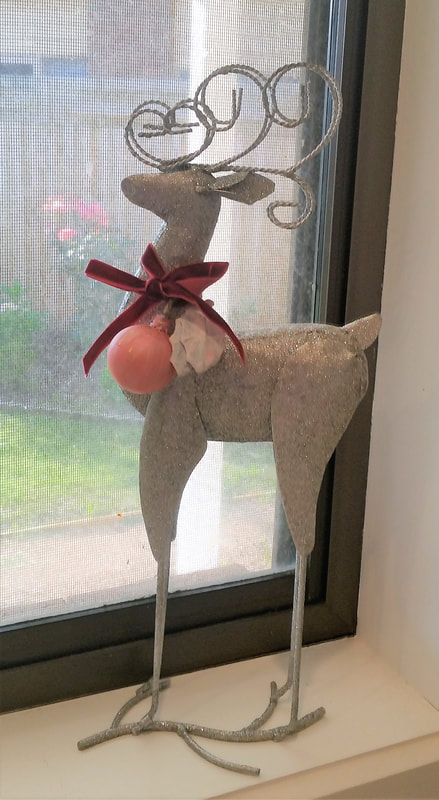
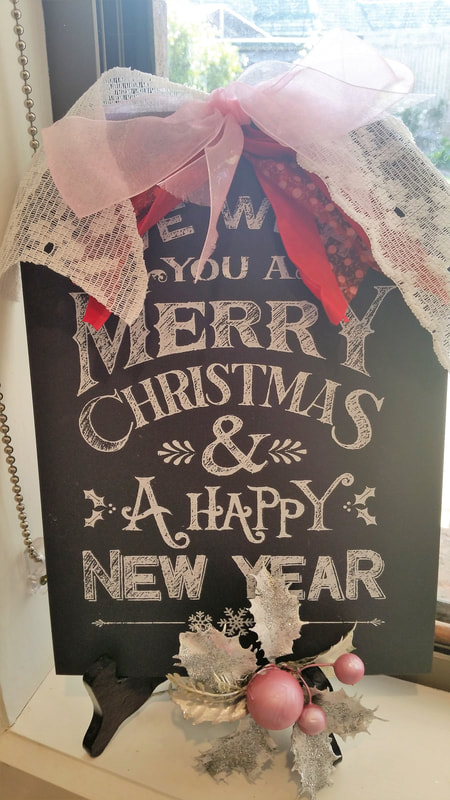
On the window sill above the kettle, I placed a reindeer that I dressed up with a bow and painted bauble. On the other side is a sign with some ribbons, lace and a pink holly pick to make it more romantic. 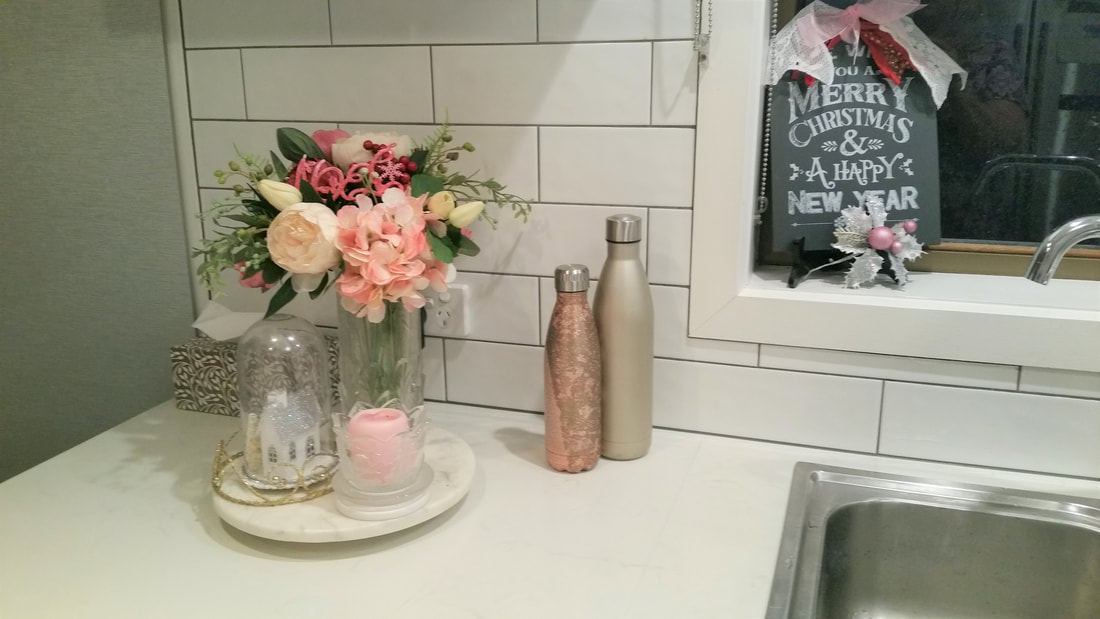 I always have roses next to the sink. For Christmas I used a bunch in shades of pink and added some berries and a Noel sign. I teamed it with a Christmas dome and bowl with a pink candle. The water bottles are mine and Sams. I thought they looked cute standing there so I didn't put them away. 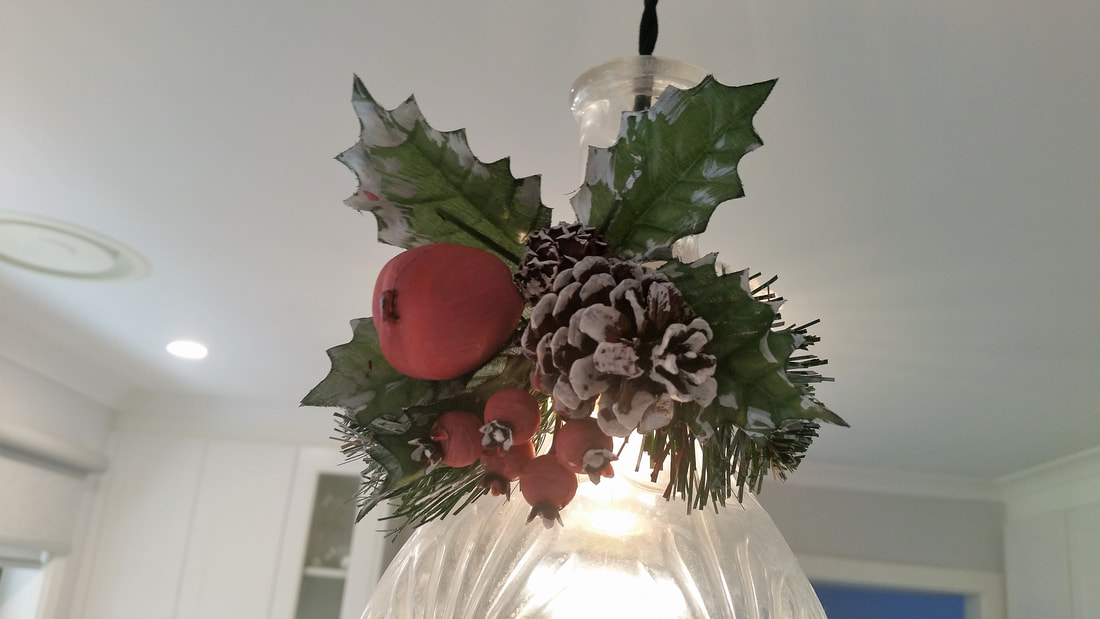 The lights over the island bench got some festive attention this year. I added picks that I found at Savers a couple of years ago. I added white paint to give them a frosted look and painted the deep red berries and fruit a lighter shade of blush pink.  I'm hosting Sam's and my family for lunch this year. I wonder what they'll think of our romantic pink Christmas theme? The good news is the decorating is done for this part of the house and I haven't spent any money. That's right, zero dollars. I'm feeling proud of that. I only need to think about making a plum pudding and buying a huge turkey.
Next week will be the last in the Romantic Christmas series when I show you the master bedroom, en-suite and my study/guest bedroom. Again, without spending any money so there will be more home made decorations being used. Thanks for dropping by to see what I've been doing to get ready for Christmas. Dora 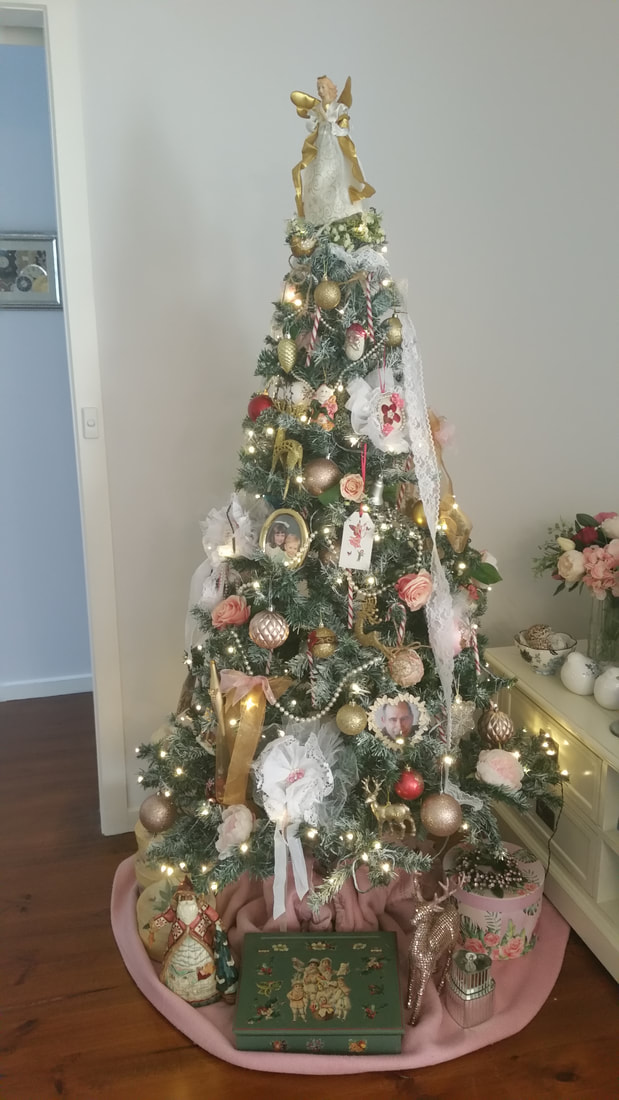 In past years I've enjoyed a traditional red and gold themed tree but this year I'm newly engaged and so a romantic tree fits my mood. I sprayed the tree with a can of white primer that I had on hand. It didn't turn the tree white but created that frosting of snow effect which I'm happy with.
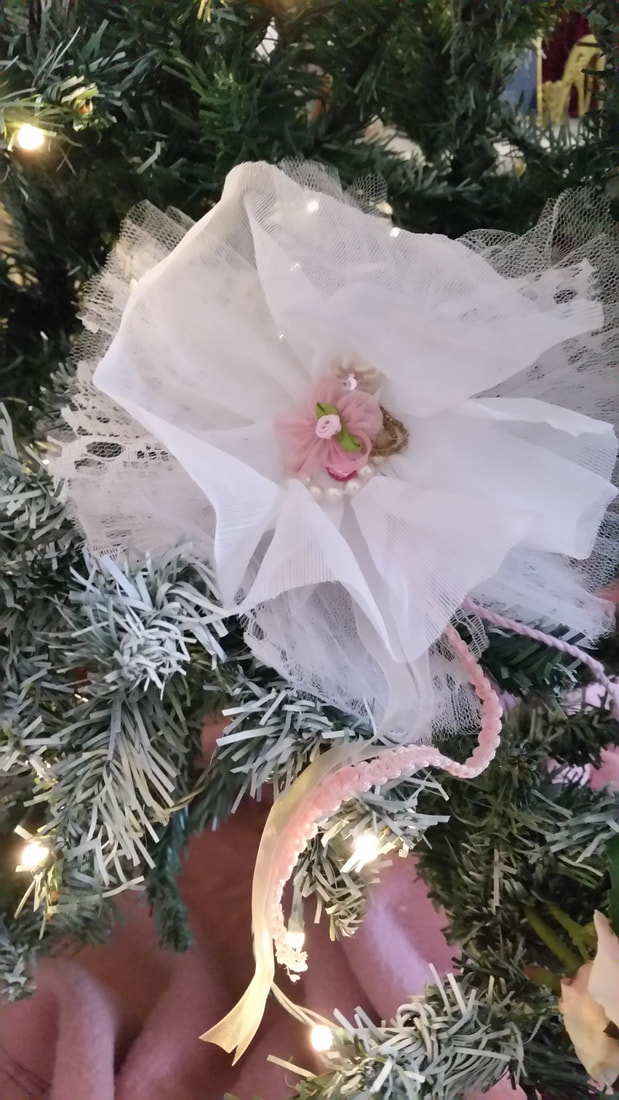
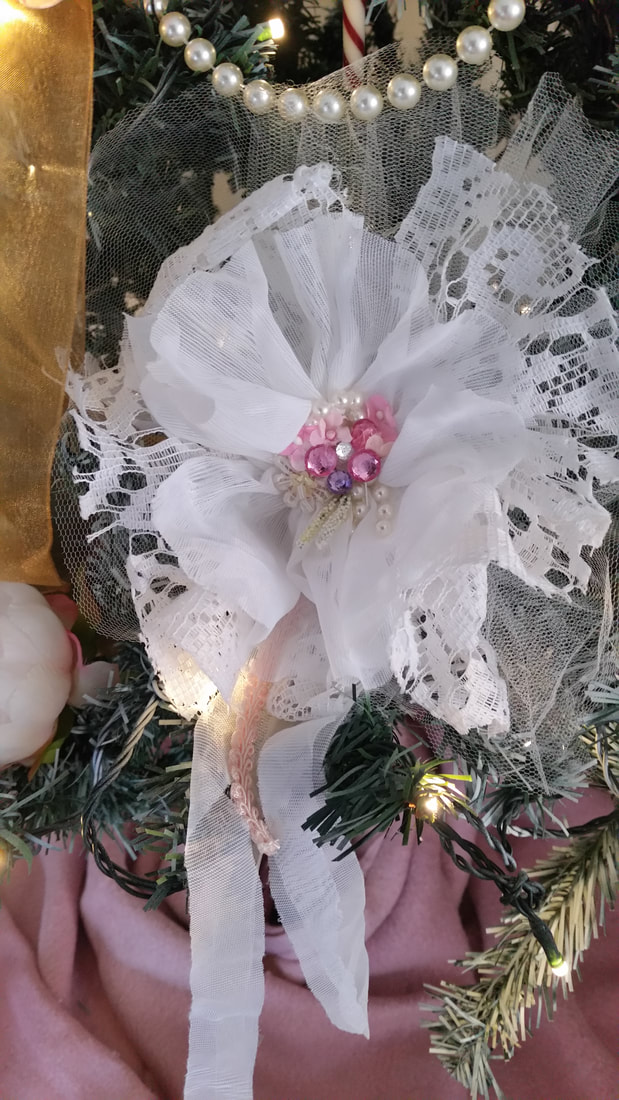
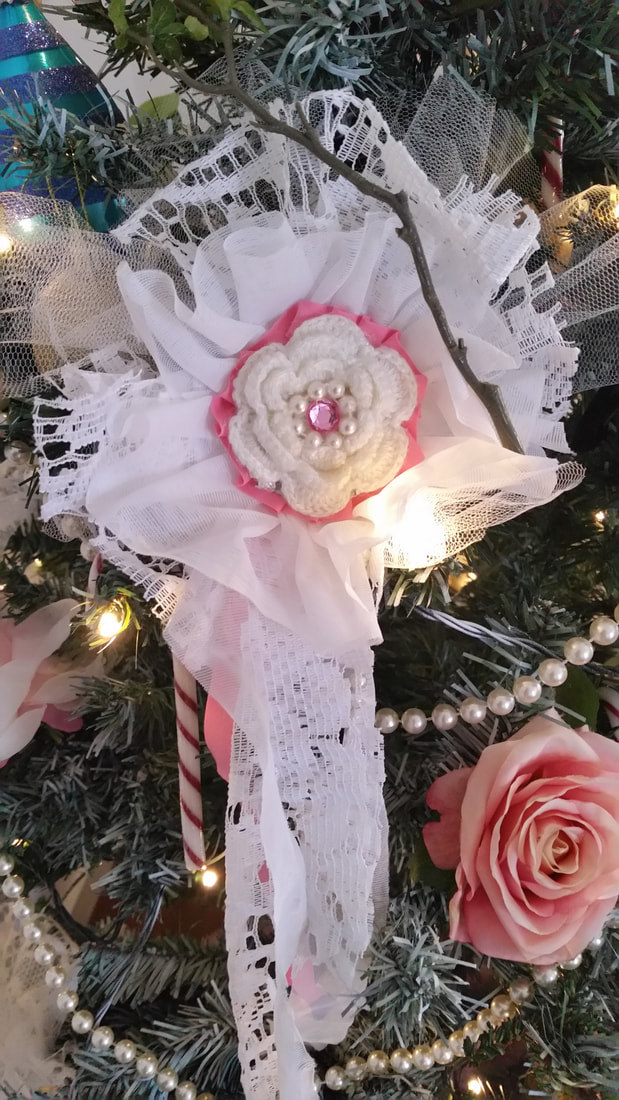
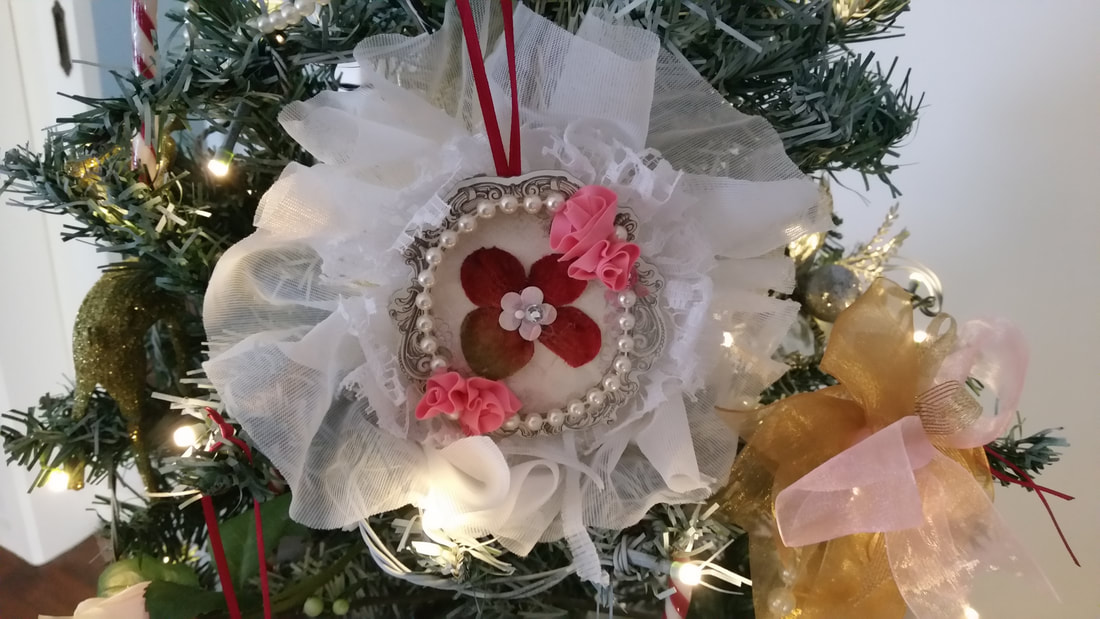 These rosettes are made without sewing. A rectangle of fabric, a hairclip and a peice of string work magic. Hot glue sticks the layers of rosettes together and attached the bling in the middle. The white rosettes are DIY. After watching a YouTube video from Olivia's Romantic Home I made these romantic decorations from old lace and scrim curtains, tulle and blingy bits from my scrap-booking supplies. If you'd like to make them too, here's a link to her YouTube video .
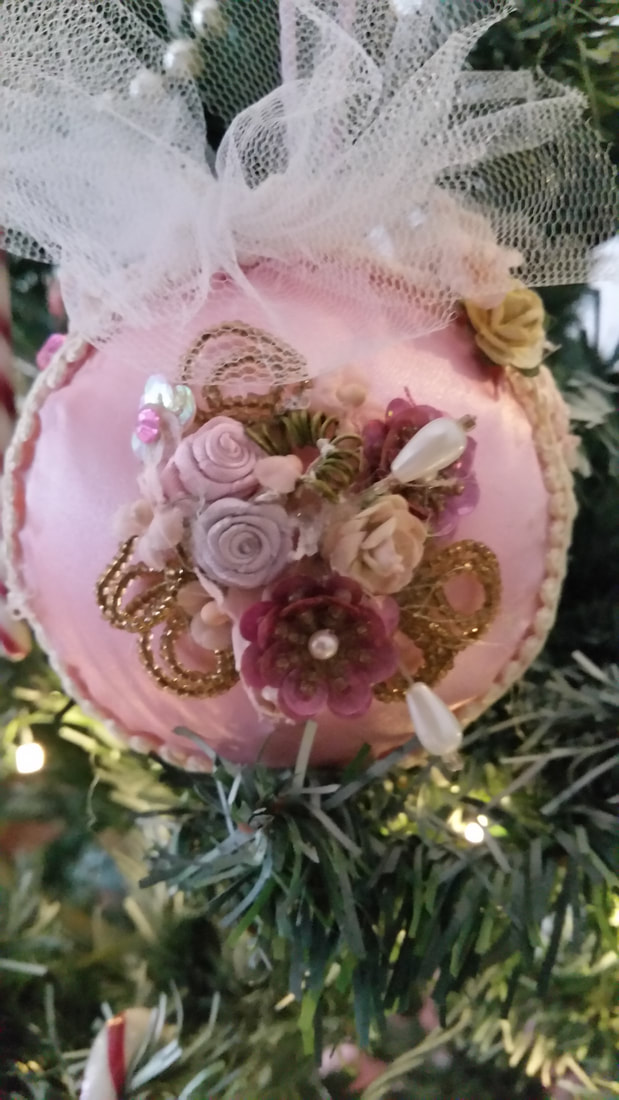
I went through my ornaments collection from years past and selected the pinky reds and every shade of pink I could find. I cobbled together some ornaments from broken things but I don't think you'd know it I didn't tell you. I shopped my home for romantic elements to use as tree ornaments. I found stems of pink silk roses that once belonged to my mother, I also found the peony roses from Kmart used in a previous post. From my jewelry box I chose long strands of pearls (which are my go to necklaces) and around the house I selected picture frames with Sam and one of my kids when they were little. In the craft cupboard I found a length of lace which I draped like a streamer down the sides of the tree. 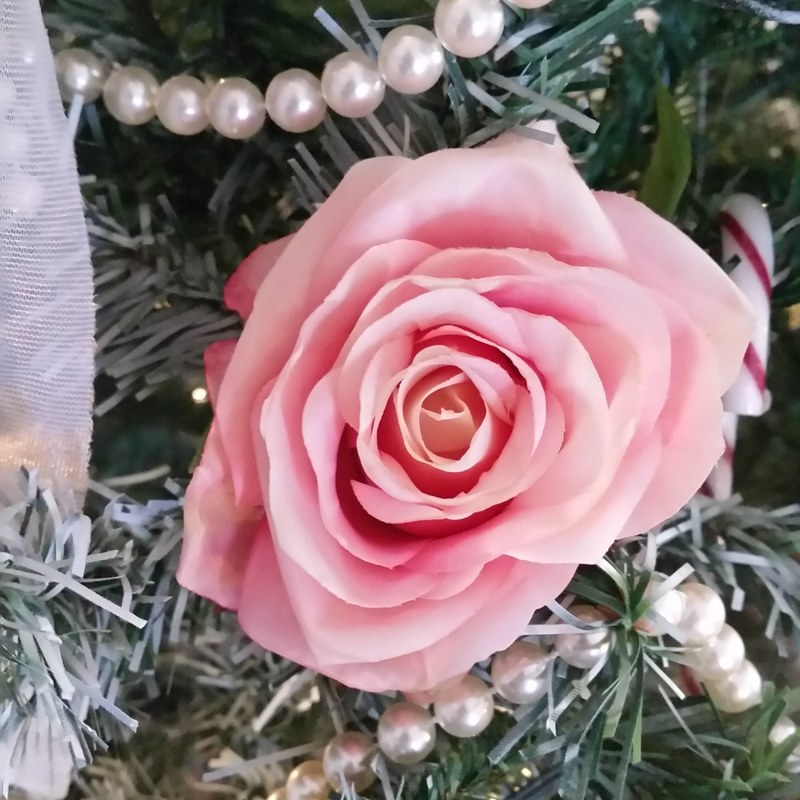 Lastly I added an old pink blanket as a tree skirt and put some pink gift boxes on it with a pink Santa and rose gold reindeer. The green box in the middle I painted and decoupaged years ago, to be used as a Christmas card box. I love the romantic Victorian feel this tree, created with timeless elements of roses, lace and pearls. I didn't spend any money to get this look. Well not much, beside the candy canes which need to be fresh, I just used what I had. I have to say it makes me happy to have this girly, pink and ruffly tree where I spend so much time. I can see it whether I'm cooking dinner or relaxing later on with a Netflix Christmas movie.
Next week the Romantic Christmas series will continue with decorating the kitchen and family room. |
Romance author and lifestyle bloggerMy whole life is inspired by romance. I write romance novels of course but also love creating DIY's and decorating in a romantic style. I'm rejuvenating an old garden, including rescuing a couple of old rose bushes and planting new ones. Archives
March 2021
Categories
All
|


 RSS Feed
