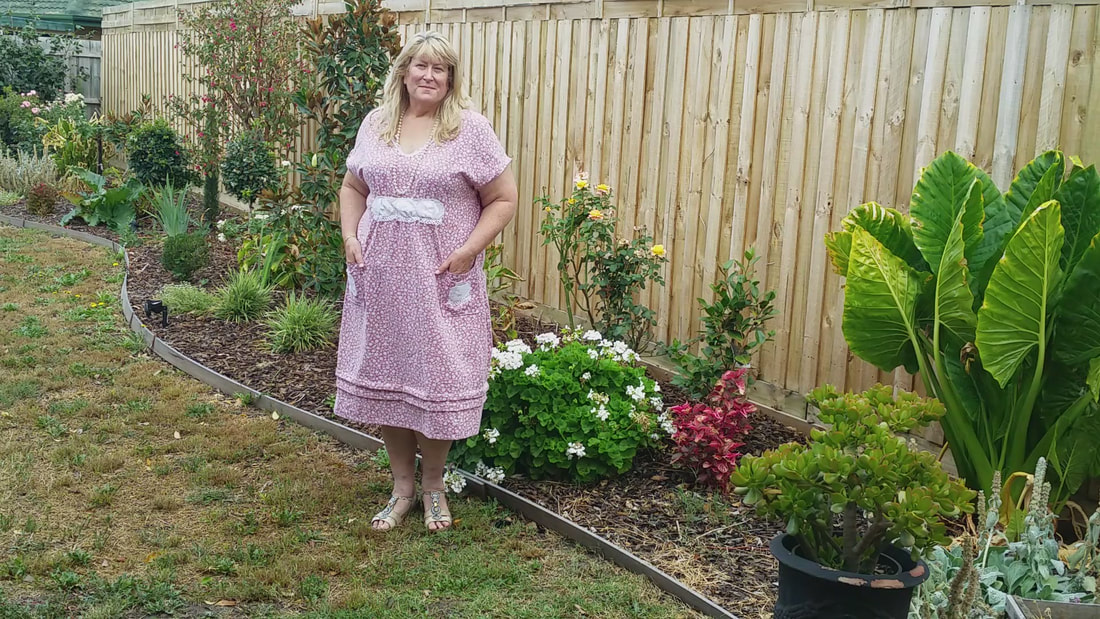
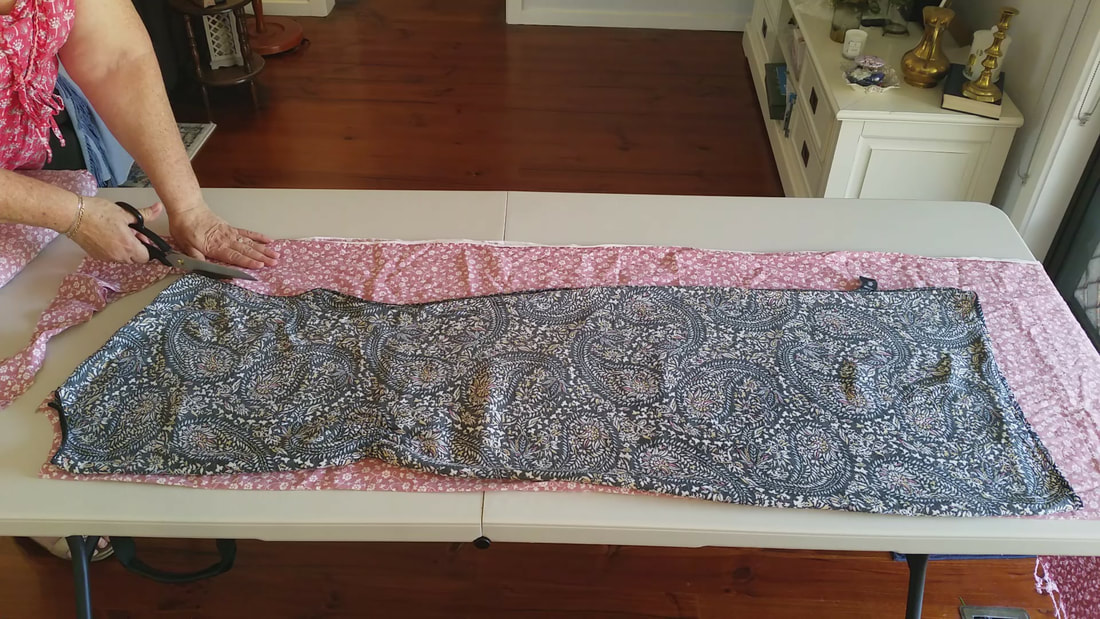
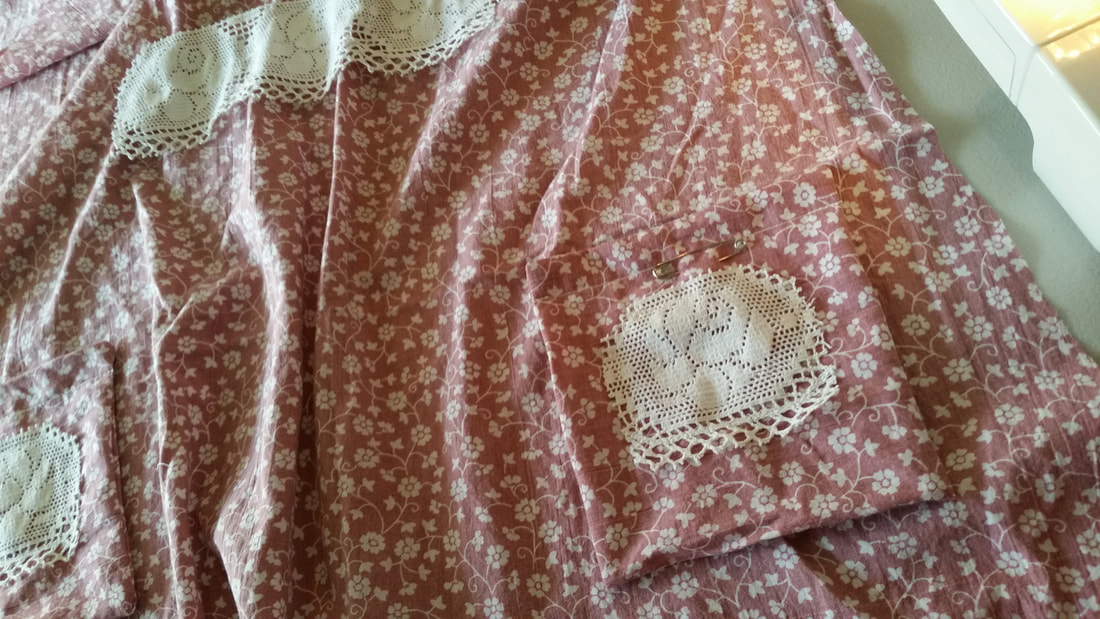
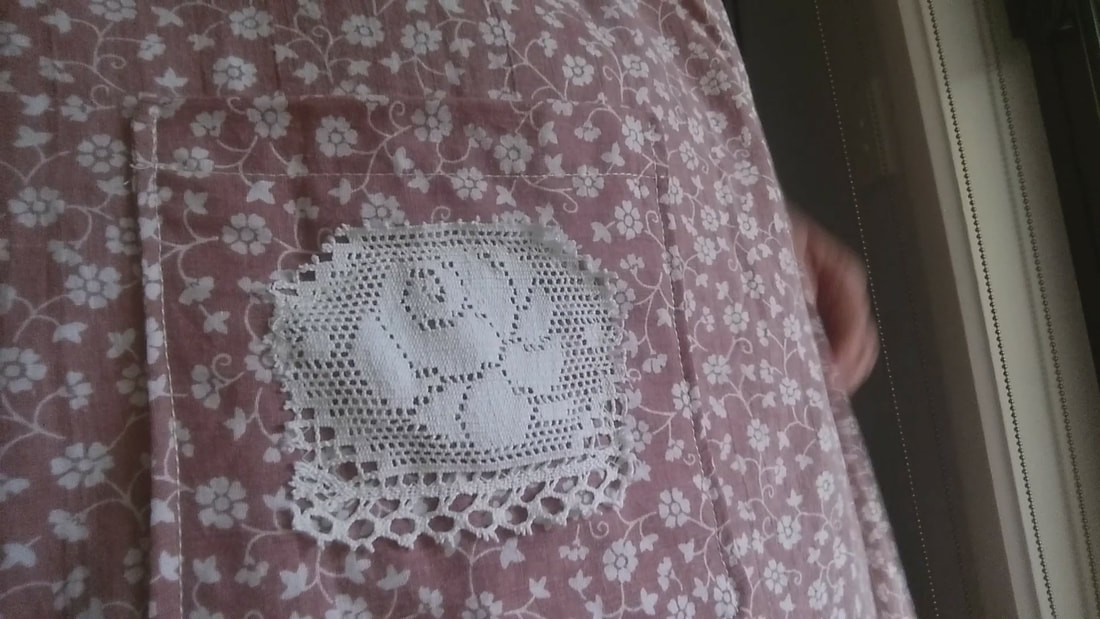
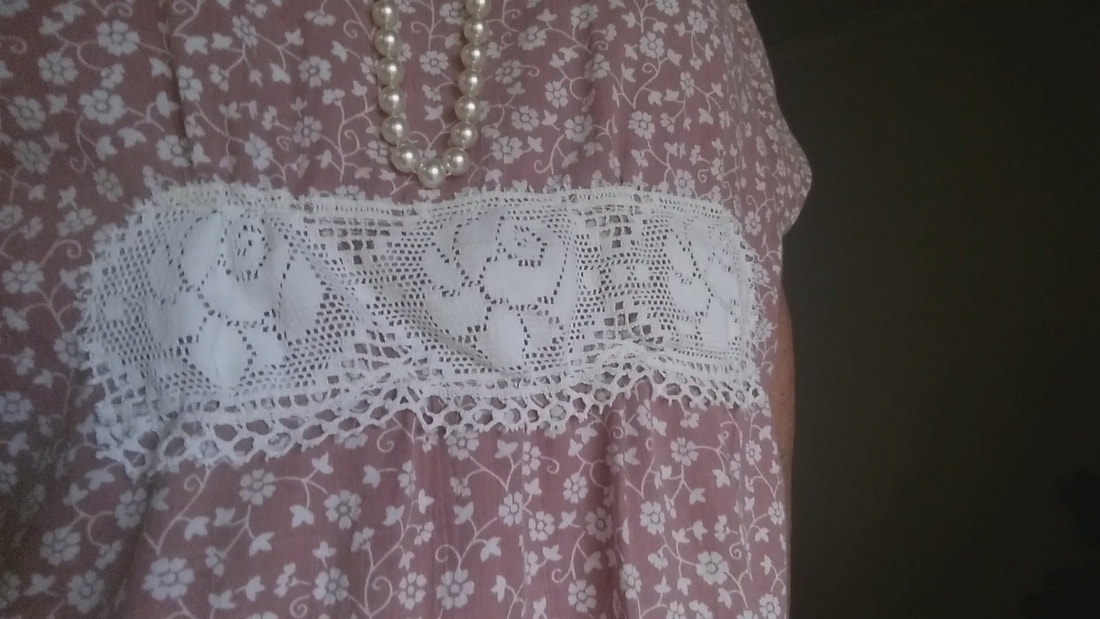
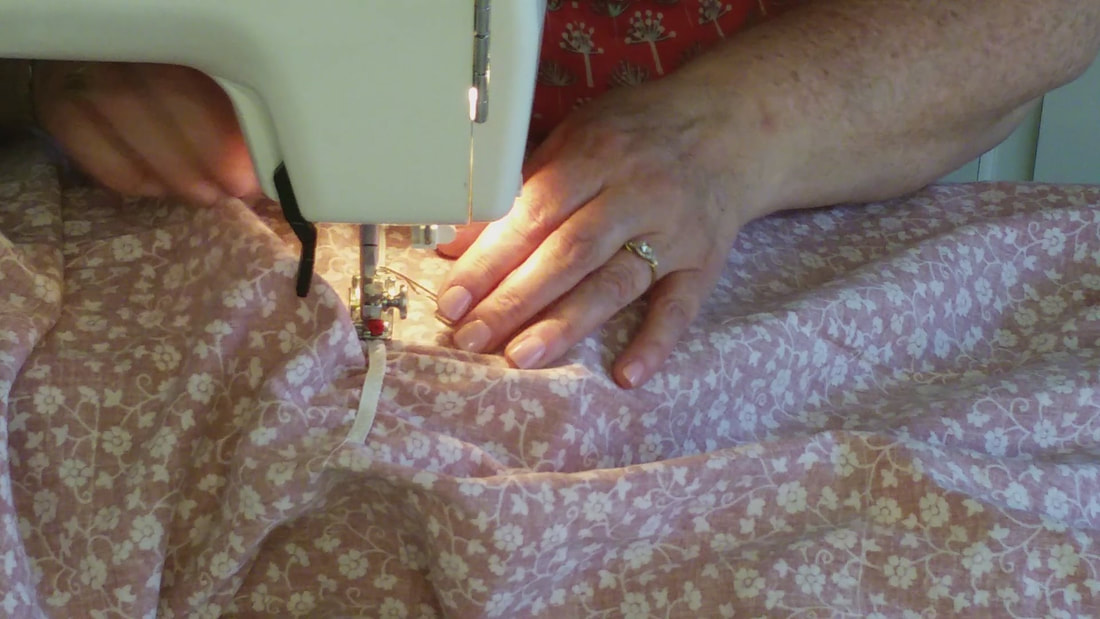
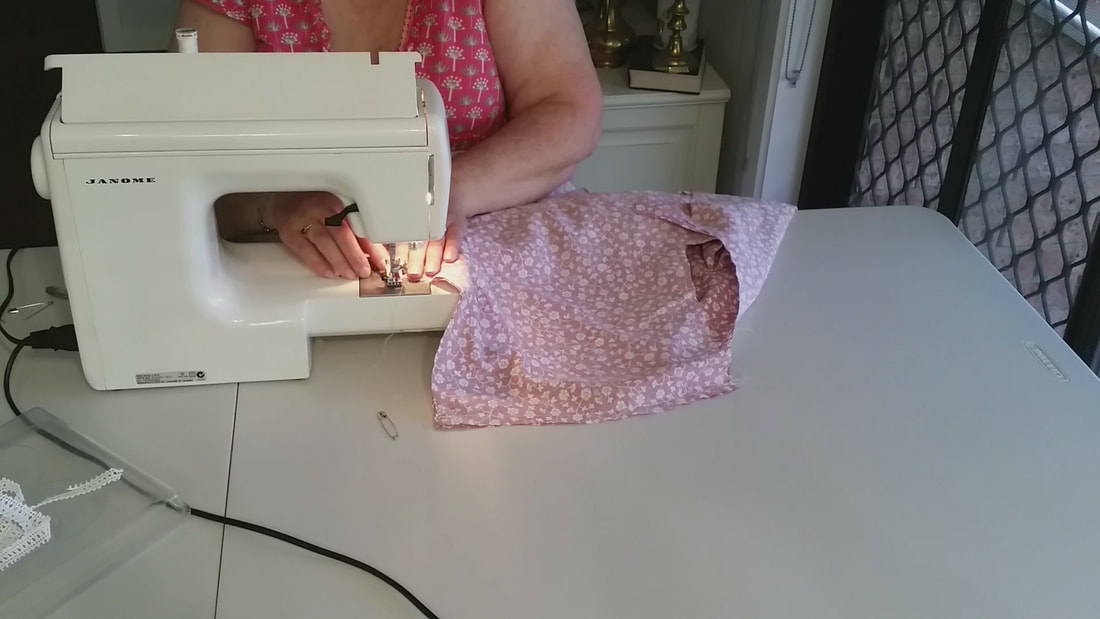
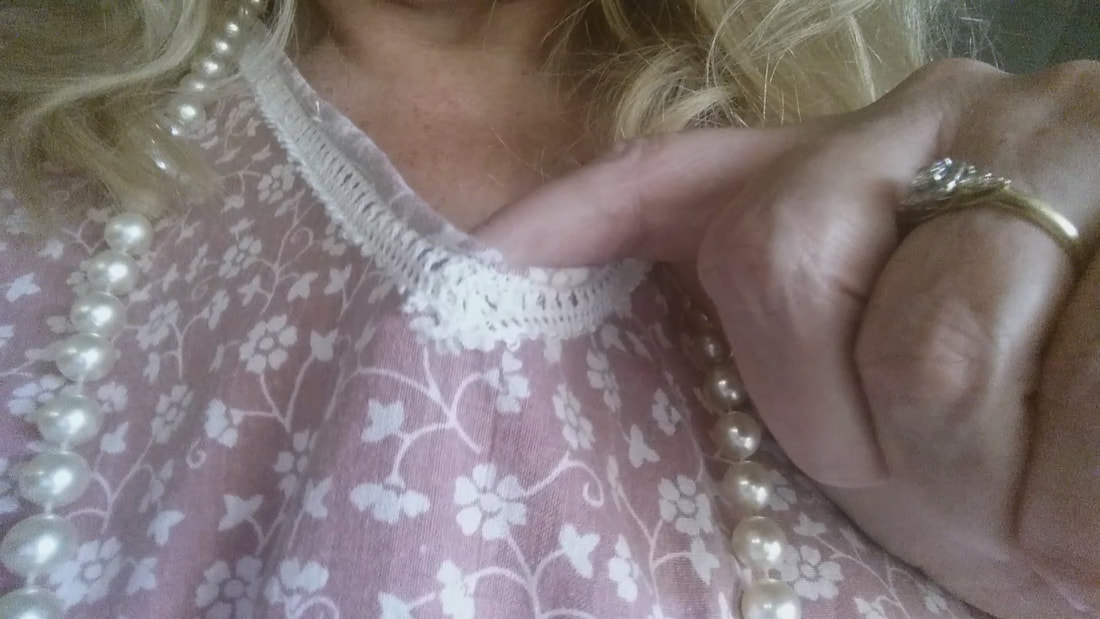
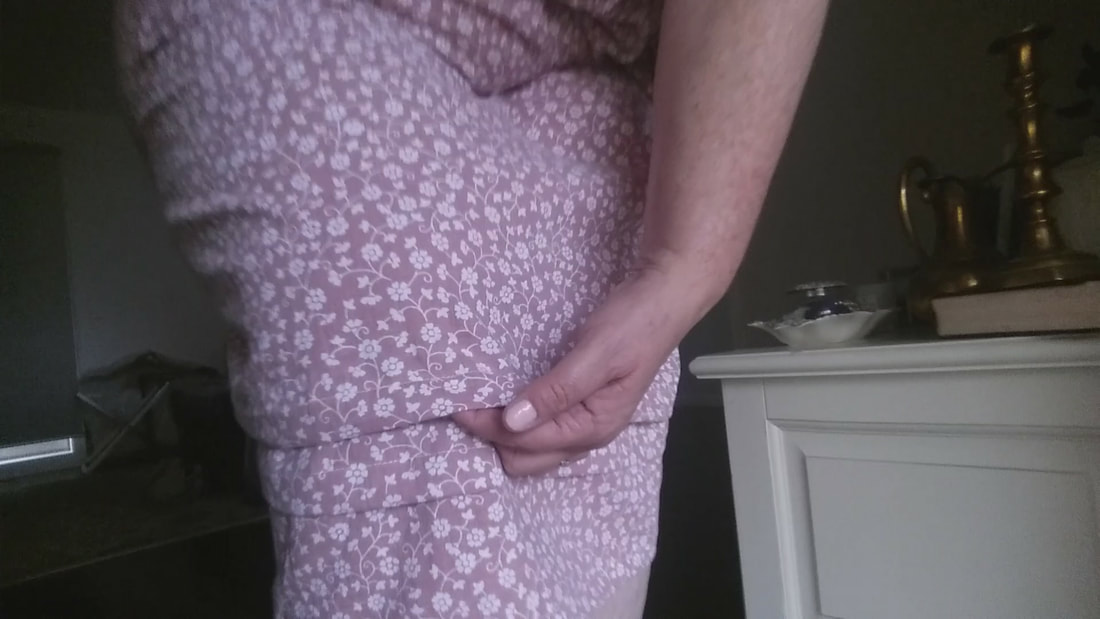
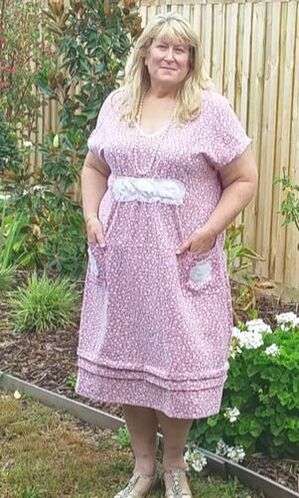
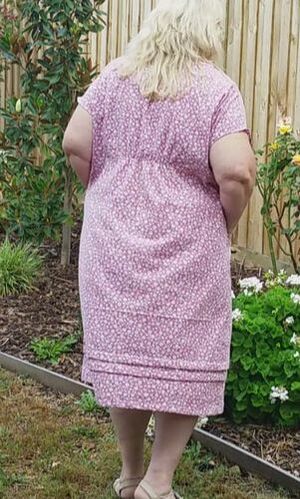
 The other night Sam and I spoke to the celebrant who'll be marrying us. We also made an appointment for our first meeting. The reality that I'm getting married again has suddenly set in. Not only do I need to start thinking about what I want to have included in our ceremony, but what to wear! Just kidding, but really, I thought I had months before I needed to do this but we have brought forward our wedding to the middle of this year so we can travel in October. It's close to crunch time regarding some key decisions. We became engaged last October and I posted our proposal story in November. Back then I thought I had twelve months to plan our wedding but that has been slashed in half. It isn't just the practical side of things that has hit me, but the feelings around being a mature bride and getting married for the second time have also snapped into sharp focus. I remember the first time I got married. I was a different woman at age twenty four. Naive but full of hope and romantic ideas about happily ever after. I can't help feeling some sadness about how that hope was stripped away and I found myself alone after 25 years of trying so hard and feeling like I'd failed. I'm sad for her, that young hopeful, naive woman who tried so very hard to make the dream last beyond it's time, but I'm grateful that she learned a lot and has become the fifty seven year old woman I am today. It's wonderful but surprising that at my age, I'm getting married for the second time. I've got a more realistic approach this time around. Sam and I have been together for five years and lived together for two of those. We can make this commitment knowing that there aren't any guarantees but that we each have relationships experience. We have learned what works and know ourselves and what we each need. Being compatible is a very big deal. Like a jigsaw, the pieces are all different shapes but fit together to make a full picture. Second time marriage is about commitment and caring. We want to continue sharing our lives. It's the marriage I want, not just the wedding. Of course that will be beautiful because I want to say those words of love and intention for our relationship to Sam, and hear him say them to me. I want us to be dressed up and enjoy feeling this special moment. I want the people I love to be nearby supporting and witnessing our union, our loving commitment to our future lives together. There are no guarantees, but who would do anything if they needed that to take a chance in life. No one would ever write a book or create anything if they needed a guarantee. This is my second chance at a loving marriage, and I'm so taking it. Dora Bramden writes heart-melting, passionate romance. Sewing a dress on Saturday afternoon, to wear on Saturday night, was something I though nothing of doing when I was seventeen. But other than taking up a hem or resewing a seam that has frayed from wear, it's been years since I've sewn my own clothes. I've bought fabric and patterns on sale but haven't actually jumped in at the deep end and tackled a large sewing project. When I was a student, I sewed from necessity. Dresses were expensive but fabric was cheap. Now it's the opposite, you can buy a dress cheaper than it costs to make it yourself. But I long to feel the thrill of wearing something I've created. Some YouTubers I watch have great tutorials on sewing and it's given me the bug to unpack the sewing machine and actually make up a simple dress. For economy purposes, I'm using a cheap craft fabric that I picked up on sale years ago. I like that it's cotton though, as I think it will be light and cool as the last hot days of Summer stretch into Autumn, here in Melbourne. But my northern hemisphere friends are eagerly awaiting the warmer days of Spring to arrive. I can imaging wearing this romantic dress to pick the first blooms of the season with a basket slung over my arm and a pretty shade hat to guard my complexion. The first step is to wash, dry and iron the fabric. Cotton is likely to shrink, so make sure this has happened before cutting out the fabric. Cut out the pattern using a loose fitting dress that only has four seams, the shoulders and side seams. Fold the dress in half with the back facing out. Place the fold on the fold of the fabric. Cut around it leaving a 1cm seam allowance. Add 4 cm to the bottom for hemming. I didn't because I wanted the new dress to be shorter. Next, fold the dress in half with the front facing out so the v neckline is visible. Place that on the fold of another piece of fabric and tuck the back under at the neckline, revealing the v. Cut around leaving a 1cm seam allowance all around. If you want the dress to be longer or shorter simply add or subtract that amount when cutting out. If a shorter dress is desired fold the bottom up to where you want it. A tip is to put it on and insert a pin where you want the hem to be. Because I had a stain on my fabric I decided to add pockets so had to make sure it would sit under a pocket placement before cutting it out. To make the pockets, measure a square by eye and cut it on the fold so that makes a rectangle. Turn it wrong sides out and stitch around leaving a gap to turn it out. Sew straight stitch about an inch from the fold. This will be the top of the pocket. The double layer of fabric will give it added structure and strengthen it. Last I sewed on a lace embellishment with zig zag stitch. Top stitched the pockets into place on the front panel. I sewed the pockets to the front before sewing up the seams because it was easiest that way. Also on the front panel I hand stitched a gathering thread under the bust and pulled it in. I sewed a thick panel of lace over it. However, when I tried it on after the dress was made up, it wasn't gathered enough so I put it on the sewing machine and bunched the lace up as I sewed straight stitch at the top and bottom of the lace panel. This gave it the look I was after. You could instead treat the front the same way as the back, sewing a length of elastic on the wrong side, if you don't want lace. Instructions are following. I sewed a piece of elastic to the back panel to pull it in like the original dress does which gives the dress shape. Work out where to place the start of the elastic by stretching it out and centering it over the back panel. Keep holding the left edge in place and let go of the other end. Pin the left edge to the fabric. This is where you'll begin stitching. Start sewing the elastic and then stretch it as you sew to create the gathers. Sewing the front and back panels together can be done in any order but I like to sew the same direction for each seam. Start under the armhole and stitch down to the hem. I don't flick it over and sew up, but start at the other arm hole and sew down so that the dress falls evenly. I used quilting clips to hold the seams together until they were sewn but pins work great too. As this is a pull over your head style of dress you don't have to worry about buttons or zips however I did add lace for interest and to bind the neckline. I sewed the lace to the wrong side and flipped it over to the right side and top stitched it down. You could sew it to the right side and fold it inward and stitch if you don't want lace to show or use bias binding. I hemmed the dress turning it over about 2cm and then another 2cm and stitching it down on the machine using straight stitch. The arm holes were hemmed the same way but turning it over half a cm twice and stitching down. After trying it on it felt too plain at the hem and too long, so I added interest by sewing two bands of folded over fabric, parallel with the hemline. I made them the about the same width as the hem and the top stitching on the pocket so that elements were repeated and made the design cohesive. Here's the finished dress. I added lace because felt the all over small print needed something to lift it. I also like to accessorize with a strand of pearls.
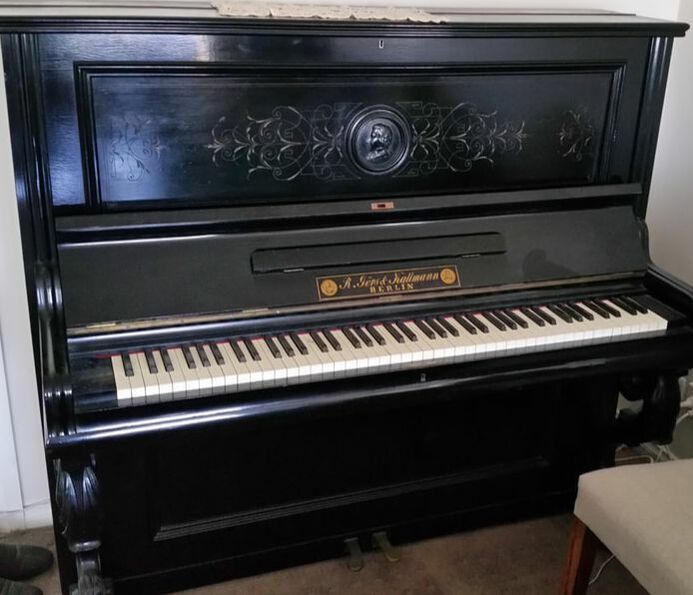
I've worn this dress quite a bit since I made it a couple of weeks ago. It's so comfortable and roomy. Being cotton, it's cool and breathes in the hot weather. Anyone could make a version of this dress, the lace could be left off. It would be beautiful with a matching bias binding around the neck and sleeves. Because you make it from a dress you already own, it will fit any size. Use a shift or caftan style dress already in your wardrobe that you can pull on over your head. If you'd like it more fitted, elastic can be added all the way around under the bust line or at the waistline, whichever suits you best. The hemline detail required measuring and careful pinning to keep the lines accurate but this feature and for that matter, the lace wouldn't be needed on a larger print. A short stint working in the office of a fashion house was part of the inspiration for the book I have recently finished revising. Ruby is a fashion designer and, like me, grew up making her own clothes. I hope to have her story for sale this year. If you haven't read the Katrina or Natalie's stories you can find them here. Dora Bramden Heart melting, passionate romance. My current work in progress is set in the music industry. It's a story that is partly inspired by my time working in administration for a rock music venue. I met some famous people, which was wonderful but most interesting was learning what when on behind the glamour. I've always loved being where music is playing, so it seemed a good fit when I was invited to work there. I'm not surprised that I was drawn to work in the music industry, having grown up with music playing much of the time. Besides my father playing classical records on Sunday mornings, my older sister played records like the Bee Gees and the Beatles every day. But live music was also a huge part of my early life, performed by friends and family on our heirloom piano in our modest lounge room. I can still smell the Mr Sheen as I polished my great grandmother’s piano. The carved scrolls enchanted me with their fairyland quality, as I revealed warm glossy hued timber swirls from beneath their coat of dust. For me it was the magical center of our house. Not only did it look majestic and beautiful, from it came sounds that transported me to another world. Aunty Bev, Dad's sister, played by ear. She would say, "Sing the tune for me," and then she could play it straight away. Family gatherings were common, a highlight would be when she'd sit at the piano and begin playing the songs we all loved. Her brothers would gather around with their wives and all my cousins and we'd sing together. I was aware of belonging to a warm and loving family and felt happy, oh so happy.
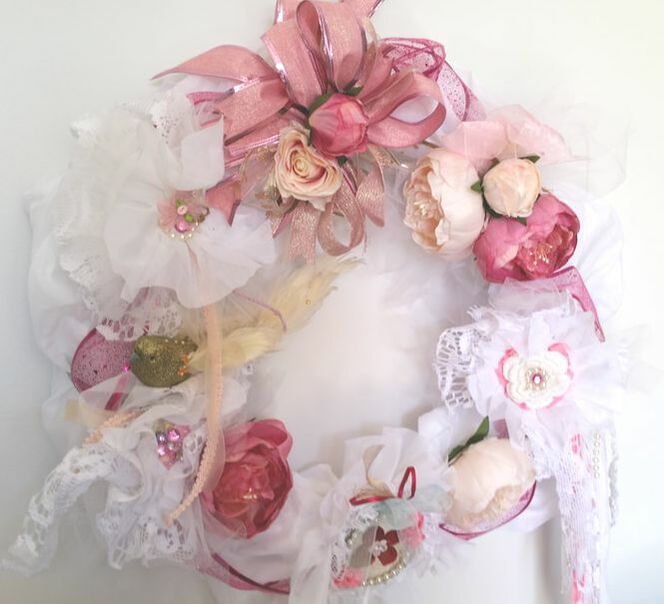
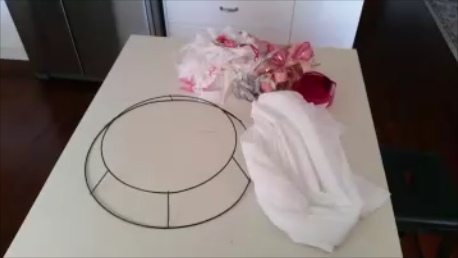
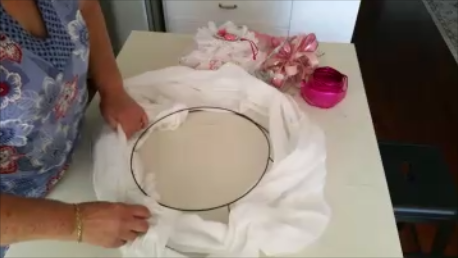
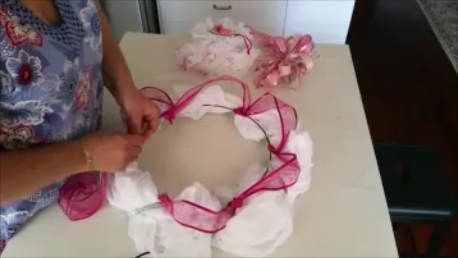
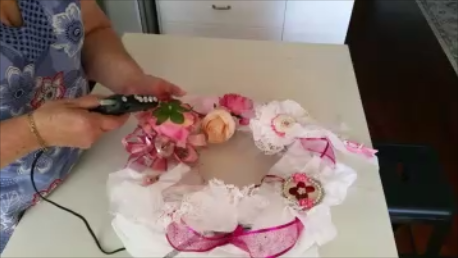
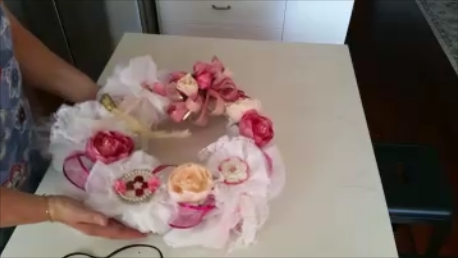
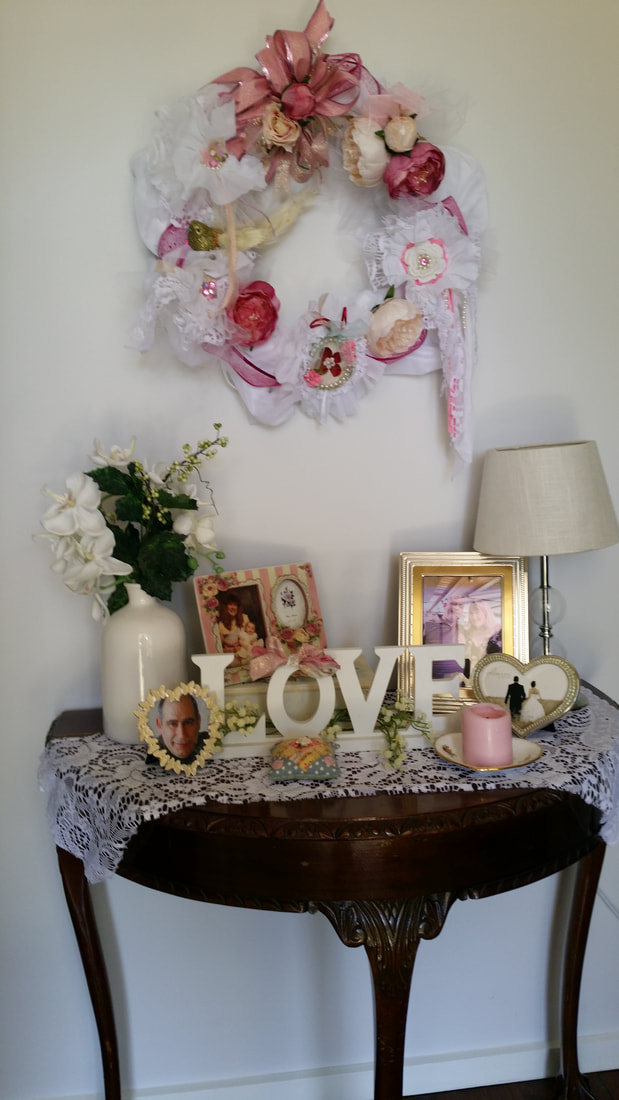
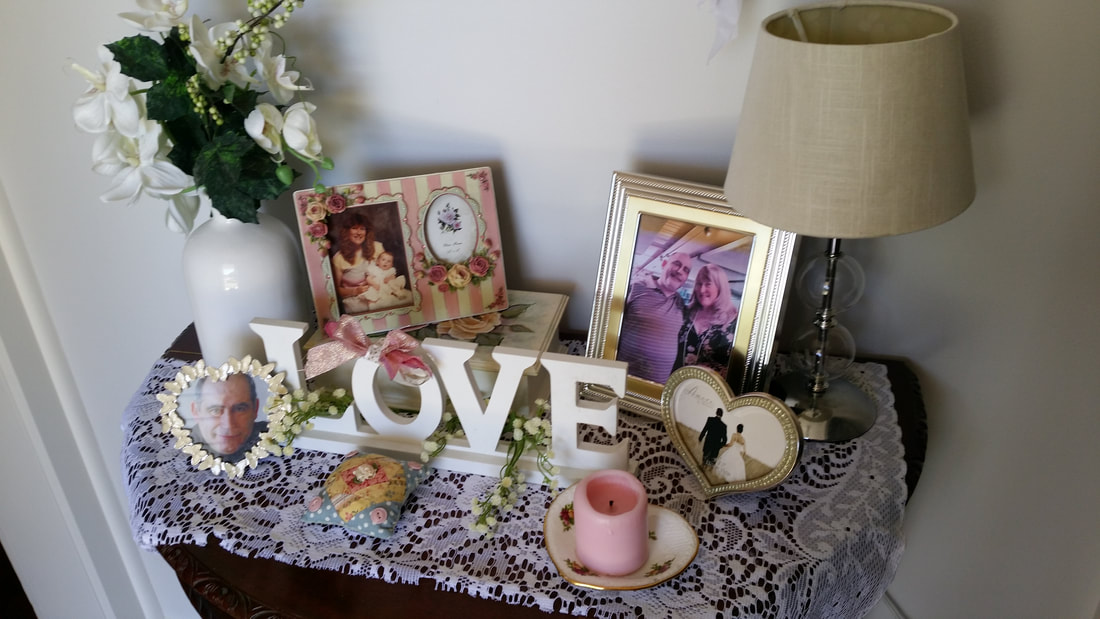
I also loved it when my sister played for me. Mostly she had to practice her lessons but sometimes she play for fun and I’d sing along standing next to her. I wanted to learn but couldn’t make my hands work independently of each other. I learned guitar instead and could play and sing as often as I wanted. As time went by, I developed thick calluses on the end of my fingers from playing so much, but I didn’t mind. I did very well at playing beginner chords and even achieved a first place certificate for best in the class. However as soon as I needed to play the more advanced bar chords it got too hard for me. My wrists weren’t strong and they didn’t toughen up. But I continued to play adapting songs and fudging the chords a bit. I enjoy the guitar sound so much, because like the piano, it is the strings vibrating that makes the sound. Dad’s best friend loved creating beauty around him, gardening and painting, but particularly music. He was a concert pianist during the second world war and played many famous classical pieces on that old piano in our lounge room. His music somehow became a part of my soul. I can recall, all these years later, how it felt, how it sounded as if it were yesterday. I’d stand at the end of the keyboard and watch his fingers move incredibly fast across the ebony and ivory. How was he able to strike so many correct notes in perfectly timed succession? The sound waves vibrated inside my lungs as I breathed the music in, closing my eyes. I’d think only of the sound and let it become a tangible living thing inside, transporting me to another dimension where only beauty exists. I hear those tunes now when my father plays his recordings, and it uplifts me as only something loved and familiar from childhood can do. It can’t be the same experience I had as small child, standing beside Uncle Keith, with the sound waves of uplifting beauty reverberating through my body and flooding my senses. But music still transports me to a world of magic and beauty. I'm so fortunate to have had that experience at a young age, and while we lacked some things, in regards to music our family had an abundance. It had a healing effect, soothing worries away and bringing joy. In the novel I'm currently writing, music is the hero. Helping to bring a woman home to where she remembers the joy music brought her in childhood and into the arms of a Country/Rock-star that needs her to love him. While I write I'm drawing on the memories of my child self, listening in wonder to the magic of music and the strong family connection it holds for me. I’m amazed how well this wreath turned out using recycled Christmas decorations, a curtain scrap and ribbons I had on hand. The roses mixed with tulle and lace rosettes lift this wreath out of the ordinary. It’s one of a kind which is the best thing about crafting your own home decor. I was inspired by a wreath made by Olivia from Olivia's Romantic Home to create this romantic themed wreath. Hers is so beautiful, but I think I got a little daunted at how fabulous it looked. Could I recreate the effect with the supplies I have on hand. Now it’s finished I love how it came out. I had a couple of dry runs before settling on the method I used. I encourage you to have a play with your supplies and see what you come up with. The wire base is from a Christmas wreath. I removed the garland of greenery and stored that away for next Christmas. Next I lay an old curtain scrap around it. Enough to go about twice around the frame . I found the center and put that at the top of the wreath and then gathered the fabric loosely around the rest. Once I had the placement how I wanted it I tied it on with a ribbon at the top and then wound the ribbon around the wreath down each side catching the curtain at the struts of the wreath and tied it off at the bottom. I looped a Pink glitter Ribbon around the wreath securing it at the struts by folding the wire edged ribbon over the frame at these points. I hot glued the curtain to the inner wire support and also where I’d attached the pink ribbon to secure it. Then came the fun part, adding the embellishments. At the very top of the wreath, I tried on a funky bow that had been used on top of a Christmas lantern. Follow this link to Arlynn's Country Craft Youtube video for how to make one. I hot glued two small roses to the center of the bow. Rosettes from the Christmas tree were placed around and hot glued where the pink ribbon was secured to the frame. YouTube tutorial for how the rosettes are made is on Olivia's Romantic Home. Roses were added, alternating the pink and cream, in between,with hot glue. Scraps of ribbon were looped or tied into bows and glued on to add dimension and whimsy. And here is how it looks above the hall table all decorated for Valentines Day. I have used a scrap of lace curtain as a runner and brought out my romantic trinkets that I've collected over the years. The picture of Sam in a heart frame sat next to my bed before we moved in together, so I could kiss him goodnight.
A very young Dora with my baby girl is in a sweet rose embellished frame. The picture of Sam and I was taken at our engagement dinner. The printer ran out of yellow ink and so we're very rosy hued but I love it, a happy accident. The heart frame has the picture that it came with. It's a lovely image and it was my hope for the future that Sam and I would one day get married, and now we planning our wedding! The centerpiece is the love sign I've had in my office for years. It lives there because I like to have romantic things around me when I'm writing romance. Hearts, flowers and a candle say romance added to that is the pictures that remind me of all things loving. Last year I decorated the hall as a surprise for Sam, this year he watched me do it and enjoyed the process of it coming together. I'm going to keep it up from now on because I enjoy so much coming home to our sanctuary and being greeted with this pretty festival of love. Further reading Published last Saturday on Romancing the Genres, A Detailed Account of Where I Got the Inspiration to Write my Novel by Dora Bramden Check out the Romancing the Genres blog next Thursday for my post on why I chose to celebrate Valentine's day. Dora Bramden writes heart-melting, passionate romance. |
Romance author and lifestyle bloggerMy whole life is inspired by romance. I write romance novels of course but also love creating DIY's and decorating in a romantic style. I'm rejuvenating an old garden, including rescuing a couple of old rose bushes and planting new ones. Archives
March 2021
Categories
All
|


 RSS Feed
