
|
When deciding which DIYs to take on, I needed to be strategic and also consider the time I'd have the day before and on the day to get it all done. I wanted to have personal involvement with creating our special day . Making some of the things myself was how I achieved it. Read on to find out what I DIYd and how I did it. 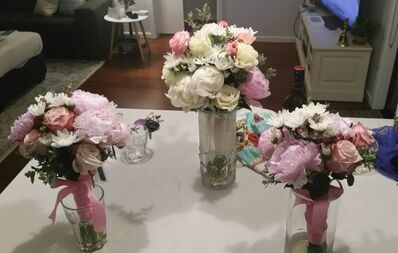 1. Making a bouquet. I knew I could make the bouquets myself, if I went with simple posies tied with satin ribbon. I found inspiration on Pinterest and watched YouTube videos on how to make them so that when it came time to act, I had a plan in place. What you'll need Florist wire on a roll or pre cut lengths of wire. Rolls of 1 inch wide ribbon in the colors you desire I used one roll per bouquet Lace of choice Florist's pins for attaching lace. Per Bouquet,Three bunches of flowers of choice. For all three, 1 bunch of greenery The flowers I used in the bouquets were: The bridal bouquet 1 branch of eucalyptus, separated into about 5 stems 5 white peonies and 1 pink, 10 white roses 1 multi flowered stem of white chrysanthemums Each bridesmaids bouquet contained I branch of eucalyptus separated into about 5 stems 5 pink peonies 10 blush pink rose stems 1 multi flowered stem of white chrysanthemums Method used for all bouquets I began with a center flower and kept adding in a circle around it. Holding the bouquet in my left hand and adding flowers with my right, letting the flowers sit at an angle as the bouquet grew. I Alternated the flowers and eucalyptus stems as I went. To make the classic dome shape, I placed the flowers lower near the edge. The stems will make a fan underneath below where you are gripping them. That's okay. Tie them off tightly with florist wire. 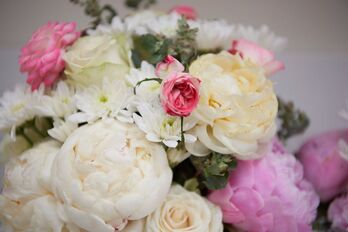 I included a few fairy roses, from my garden, to the bride's bouquet to add touches of blush pink. Wrap the stems tightly with ribbon starting at the top and leaving a length free. Wind down the stems (this brings them back together) stopping a couple of inches before you get to the bottom and then wind back up to the top. Using the length left free at the beginning, tie it off and make a bow . Using sharp kitchen scissors or secateurs, snip the stems even at the bottom and place in a vase with an inch of water covering the stems but not wetting the ribbon and or lace. 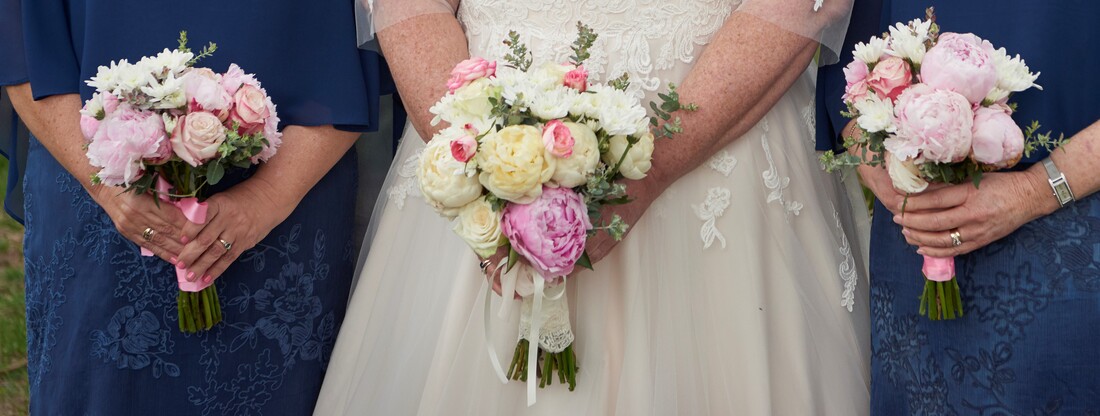 On my bride's bouquet I pinned on lace that matched the lace on my wedding cake and guest book. I made the bouquets the day before and stored them overnight in a cool room (the laundry in my house) with enough water to wet the stems but not come high enough to reach the ribbon. About an hour before I left for the ceremony I emptied the water from the vase and patted the end of the stems with paper towel. We didn't have any drips and the flowers lasted very well. They were put in water after the reception and kept well in vases for the next week. 2. Decorating the cake. Although making the cake would have been too big a challenge, I saved money (and got the cake I wanted) by decorating it myself. Cake decorating has been an interest on mine since I was a teenager so I felt confident enough to take this on. Again I got an idea of what I'd like from the DIYers best friend, Pinterest. The gold acrylic Mr and Mrs sign was purchased cheaply from Ebay. This one was only ten dollars plus postage. I hot glued a bamboo chopstick to the stake for extra height and then wrapped the join with ribbon to make sure it stayed put. I found the silk faux peonies I wanted at Kaisercraft. I trimmed the green petals away and the darkest pink outer petals then I popped them off their stems and hot glued them to stiff plastic drinking straws that I'd cut in half. This allowed me to push the straws into the cake and keep the flowers secure. I added the hydrangea florets from my stash to fill in the spaces between the peonies using toothpicks to anchor them into the cake. Some time ago, I bought a length of beautiful cream lace from a vintage fair to use as inspiration for my wedding. I wasn't sure how I'd use it, but I ended up having enough to use on the flowers, the guest book and to wrap around the two tiers of the butter cream cake. I had toothpicks on hand to secure it at the back with some florets but didn't need them. The lace stuck to the buttercream easily. I added a gold non toxic washi tape to the base of each tier so that it would tie in with the gold sign on top. 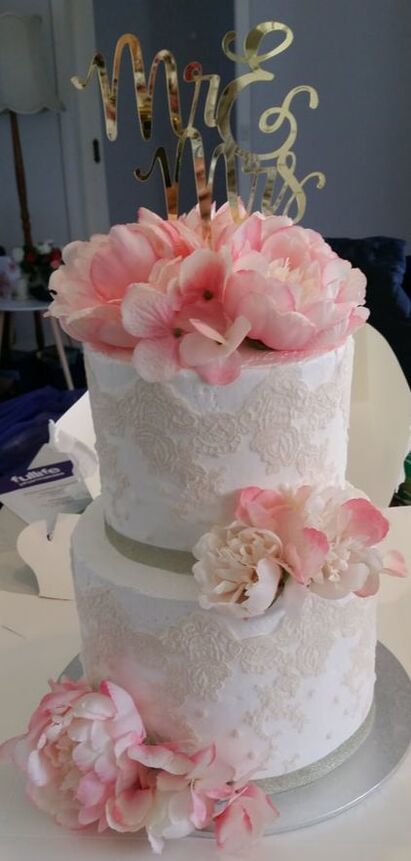 3. Blinging up vases. When we were at the reception tasting night there were samples of decorations for the tables. We were enchanted with a setting that included three small vases set around a central tall crystal candle holder. The table center pieces we chose were included in our package but the flowers would have been extra. But I had an idea for blinging milk bottles from Kmart to hold our flowers.  Picture courtesy of Ballara's Facebook page. @ballarareceptions I cut a single line of bling from the tape and hot glued it to the neck of each bottle. 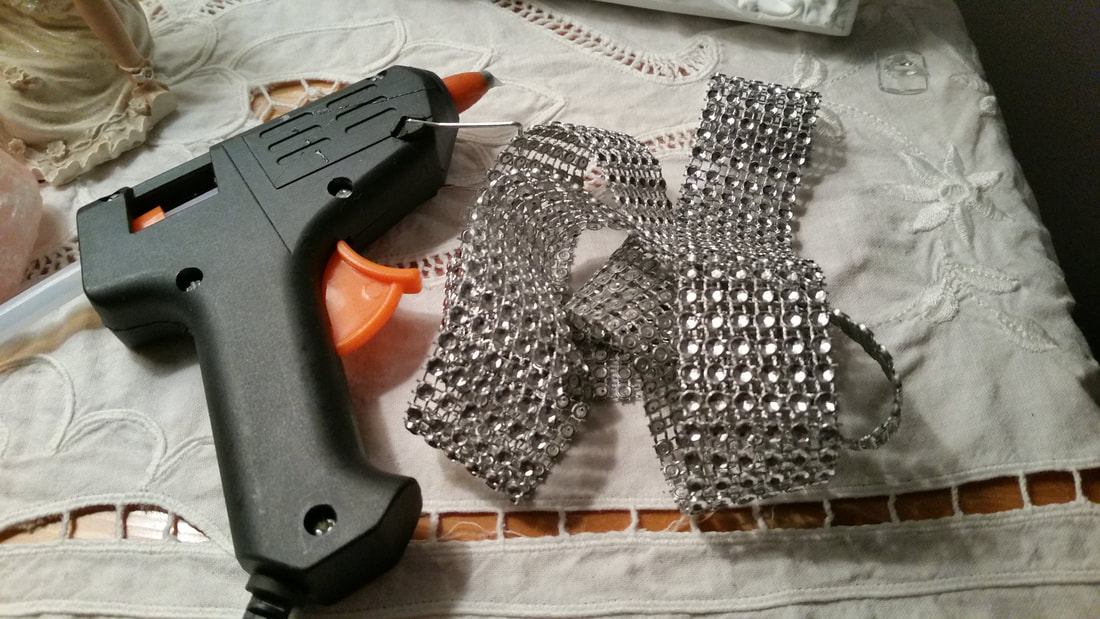 The tape can be cut into single strips using normal scissors. Then I applied 6 single crystal stickers in a flower shape to the front of each bottle. 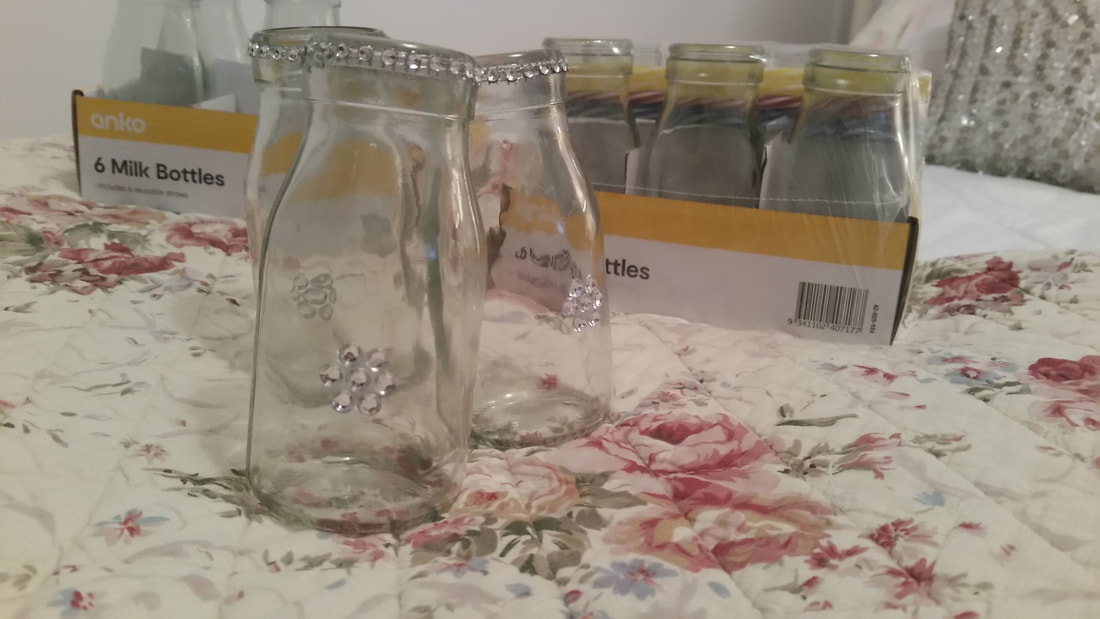 My girlfriend did the floral arrangements in the vases I created with Kmart milk bottles, bling ribbon and stickers and hot glue. The bottles cost $5Aus for a pack of six. 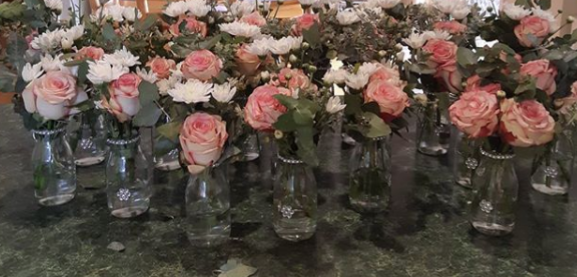 Unfortunately, we didn't get a photo of the tables set up but my girlfriend sent me this picture of the vases with flowers arranged ready to be taken to the wedding reception. We chose the flowers together, they included blush pink edged roses, white chrysanthemums and eucalyptus. It cost a lot less than if we'd paid the price quoted for a florist to do them. I was very fortunate to have a friend who volunteered to set them up and she purchased the flowers for Sam and I as a gift. Having such beautiful fresh flowers on the table really added elegance to room. To help out, I've hyperlinked the items I used in my DIY's, where I could find them. But they are Australian sites. For other countries, you should be able to source similar items from your local online retailers. (I also created a guest book which I posted in an earlier blog. Link to that is here if you'd like to see how I made that.) I used the same lace on this book that I also used on the cake and the bridal bouquet which helped link the ivory lace, navy and pink theme. 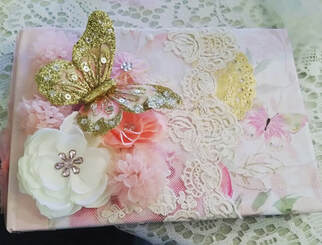 Comment and let me know if you're planning DIYs for your wedding or if already married, what you made for your wedding. I'm happy to answer any questions you might have as to how I made any of these DIYs. Thanks for stopping by to read the blog.
Comments are closed.
|
Romance author and lifestyle bloggerMy whole life is inspired by romance. I write romance novels of course but also love creating DIY's and decorating in a romantic style. I'm rejuvenating an old garden, including rescuing a couple of old rose bushes and planting new ones. Archives
March 2021
Categories
All
|
 RSS Feed
