
|
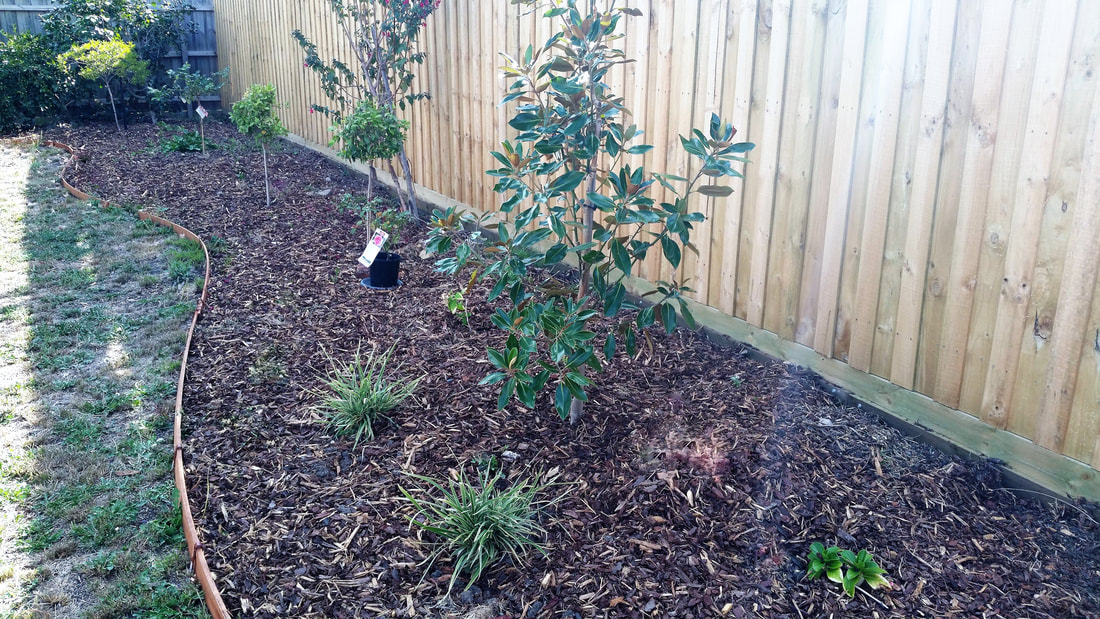
When Sam and I bought our house, the garden was in need of a lot of work. What must have been a lovely garden ten years ago was now overgrown and full of weeds. Under half dead pine trees a lovely rose struggled for life and a fuchsia chocked with vines was valiantly producing a few blooms. A massive Viburnum Tinus shrub had suckered and filled the back corner masking a couple of struggling camellias. An apricot tree was nearly dead so that needed clearing along with all of those bully plants. Once the plants were removed, we replaced the too short and rotten fences. 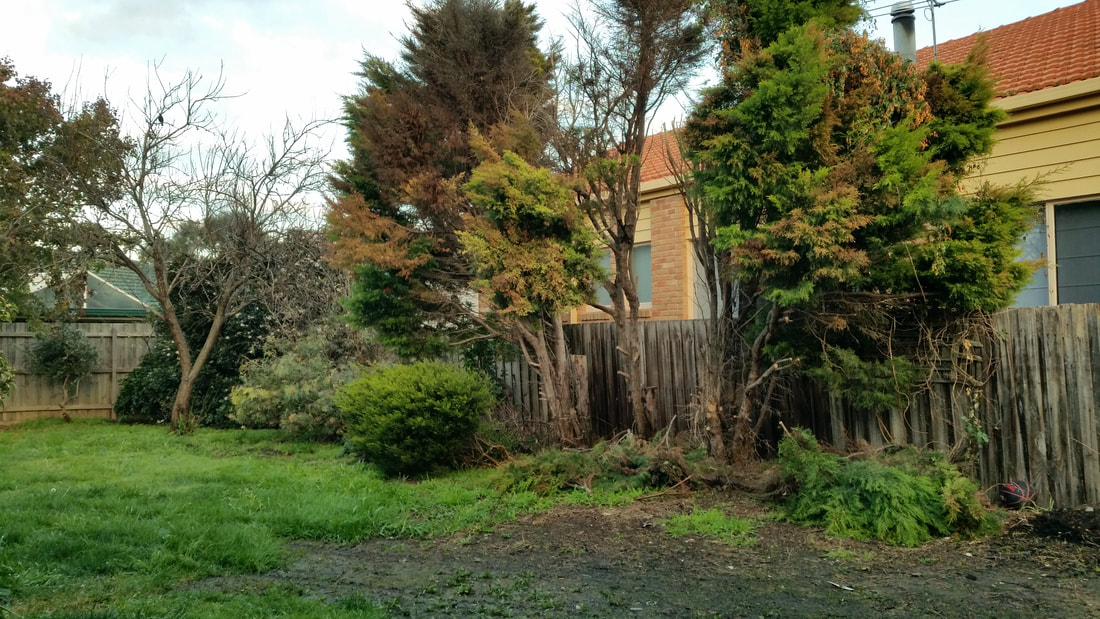 While waiting for these necessary big projects to be done I began looking on Pinterest and saving the gardens I liked, I also YouTube garden makeovers. It became apparent that the kind of garden I liked had free flowing edges with English garden plants. So I decided to go with that style. I drew up a plan that showed the property boundaries and the house and existing plantings that I wanted to keep. I then drew in my garden beds and a living area behind the house as you step outside. I had several goes at this step until I got it how I wanted. 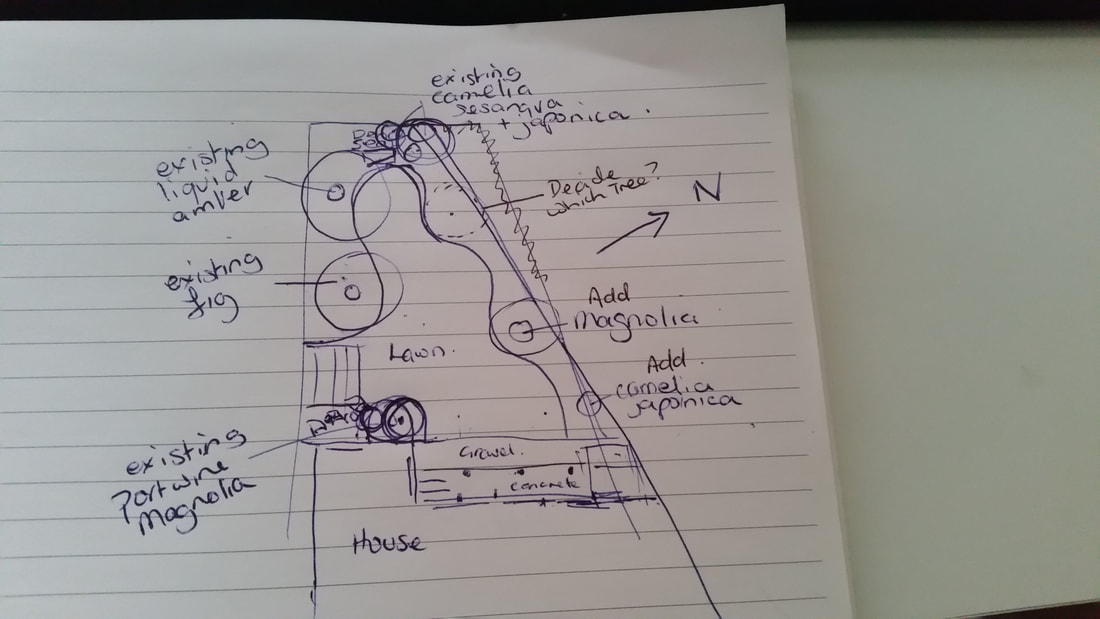 I placed some plants I already had in pots out and once happy with their position, planted them to help them get settled in sooner than later and started watering them regularly. I sprayed the grass and weeds that would be inside the future garden beds. 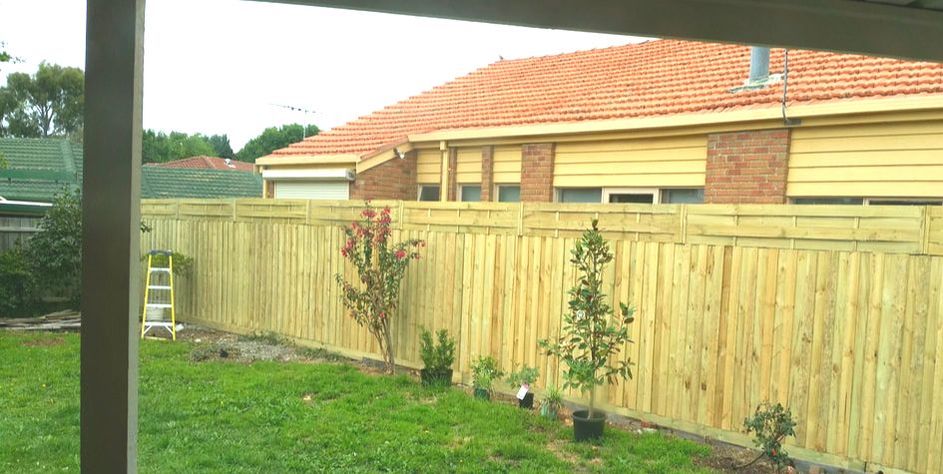 I then and started sourcing materials. Replacing the fence and the tree removal was quite expensive but had to be done which left little in the budget for completing the backyard. For this section of the work I had a thousand dollars. I spent a lot of time pricing pavers for outside the back door but came to the conclusion that it would be too expensive to buy and have them professionally laid. So I decided to work with the existing pergola and wide concrete path than ran along the back of the house but extend it out using gravel. I chose Sunset toppings which over time set to form a firm concrete like surface. I then chose firm straight timber edging to create a border for the toppings. My daughter’s partner works as a landscaper and he came on weekends to help with the makeover. He leveled the area for the toppings, installed the timber edging and spread the toppings to be flush with the concrete path. The concrete is painted an ocher color and the sunset toppings blend nicely. 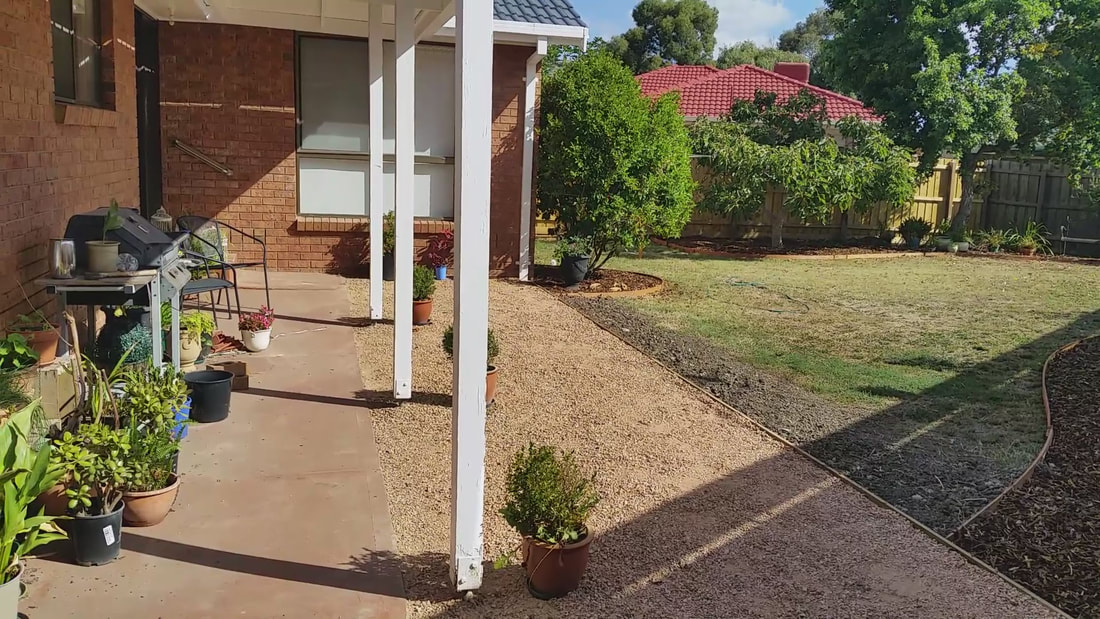
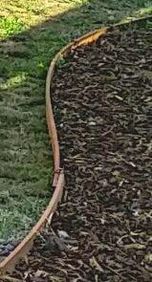
To create the curvy garden beds I purchased flexible timber edging and steel stakes that hook over it when hammered into place. This is more expensive than the ridged kind at approximately three times the cost per length but it allowed me to create the waving and curved garden beds I wanted. I proceeded to hammer in the metal stakes at one end of the timber edging then bent the wood into the desired curve and then hammered in another stake to keep it in place. I repeated this process around the back yard until all the garden borders were completed. I purchased pine-bark mulch in a large chip and back filled behind all the borders with help from my daughter’s partner. He wheel-barrowed it into place and I spread it around the plants. I put an iron bench seat, that I brought with me from my last house, at the far end of the garden in front of an ancient rosemary bush. This created a destination that not only drew my eye into the garden but also created an invitation to be in the garden.  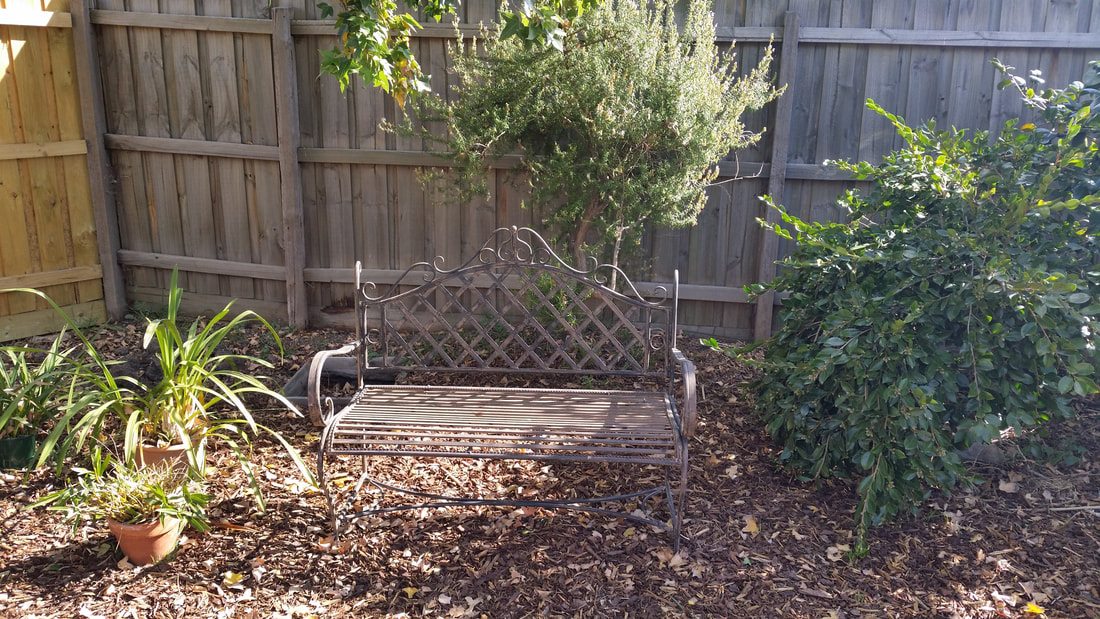 All up I came in just under budget. I still have more to do in the garden so it’s good to have a little left over for next spring when I’d like to add perennials to the flower border and some annuals where I’m waiting for some cutting I’ve planted to grow to full size. A garden is never really completed but I have the structure in place and now I get to play with plants.
Until yesterday we’ve had warm weather and I’ve been enjoying my morning cup of tea in the garden. The vista in my back yard draws me outside into the fresh air. The Rosella's are feasting on figs and I can hear the rustle of the liquid amber leaves in the wind. It took three weekends to complete but it was worth the effort and I look forward to many happy hours working in this garden. Steps.
Next summer I plan to bring a portable table into the garden and write sitting on the bench under the Liquid Amber tree. I can imagine the ice tinkling in my glass, as I sip my lemon and ice-water. 4/15/2018 10:41:18 pm
Wow, Dora, what a lovely transformation. Comments are closed.
|
Romance author and lifestyle bloggerMy whole life is inspired by romance. I write romance novels of course but also love creating DIY's and decorating in a romantic style. I'm rejuvenating an old garden, including rescuing a couple of old rose bushes and planting new ones. Archives
March 2021
Categories
All
|
 RSS Feed
